
How to Bake and Decorate a Traditional Christmas Cake
Lots of families enjoy a traditional Christmas cake during the festive season, making it a centrepiece of many holiday tables. This rich dessert is more than just a treat it is a beloved ritual that brings together generations and captures the true spirit of celebration. If you want to master an authentic British Christmas cake, understanding each step from fruit preparation to finishing touches will help you create a show stopping result everyone will remember.
Table of Contents
- Step 1: Gather Ingredients and Prepare Fruit
- Step 2: Mix and Bake the Traditional Christmas Cake
- Step 3: Feed and Mature the Fruit Cake
- Step 4: Prepare Cake for Icing and Covering
- Step 5: Decorate with Traditional Christmas Finishes
Quick Summary
| Essential Insight | Clarification |
|---|---|
| 1. Soak dried fruits overnight | Soaking mixed dried fruits in brandy for at least 8 hours enhances their flavour and texture in the cake. |
| 2. Cream butter and sugar well | Achieving a light, fluffy mixture of butter and dark brown sugar is crucial for the cake’s base. |
| 3. Feed the cake regularly | Drizzle spirits over the cooled cake every two weeks to maintain moisture and deepen flavour. |
| 4. Warm up apricot jam for adhesion | Using warmed apricot jam is essential for a smooth marzipan layer to adhere to the cake effectively. |
| 5. Create elegant decorations | Incorporate traditional elements like holly and snow effects using royal icing to enhance visual appeal. |
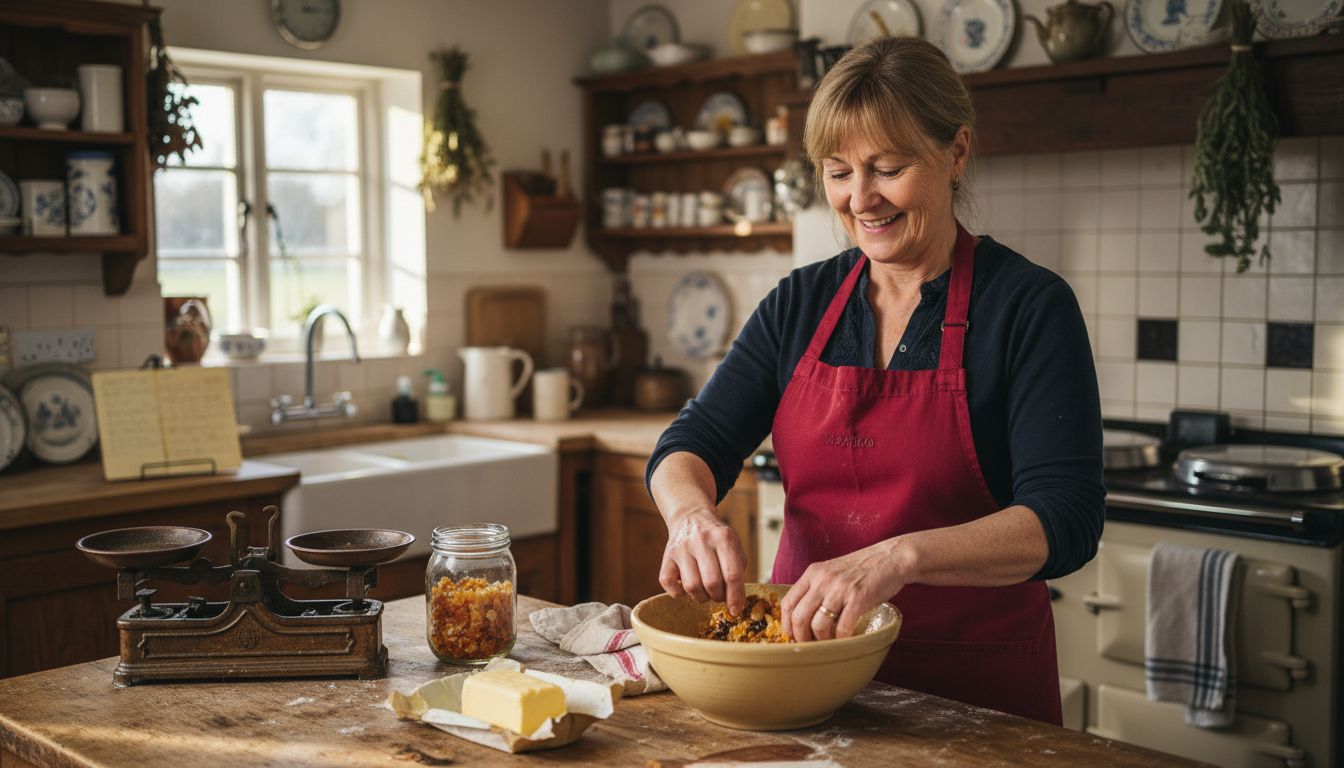
Step 1: Gather Ingredients and Prepare Fruit
Baking a traditional Christmas cake begins with carefully selecting and preparing your dried fruit mixture, which serves as the rich, flavourful foundation of this beloved festive dessert. The key is to start with high quality ingredients and treat them with care to maximise flavour and texture.
First, gather your ingredients: you will need 1 kg of mixed dried fruit (typically a combination of sultanas, raisins, currants, and candied peel), 150 ml of brandy (or alternative festive spirits for soaking), and other essential components like glacé cherries and chopped almonds. Begin by placing your mixed dried fruit into a large mixing bowl, and pour the brandy over the fruit, ensuring every piece gets thoroughly coated. Cover the bowl with a clean tea towel and allow the fruit to soak overnight or for at least 8 hours, which will plump the dried fruits and infuse them with rich, warming flavours.
Tip: For best results, use room temperature brandy and choose a mix of dried fruits that includes some larger pieces for varied texture. The longer you allow the fruit to soak, the more intense and complex the flavour will become in your final Christmas cake.
Step 2: Mix and Bake the Traditional Christmas Cake
With your fruit prepared and soaked, you are now ready to transform these ingredients into a rich and decadent Christmas cake. The mixing process requires careful attention to technique and precise baking methods to ensure a perfect result.
Begin by creaming together softened butter and dark brown sugar until the mixture becomes light and fluffy, creating a smooth base for your cake. Gradually incorporate eggs one at a time, beating thoroughly after each addition to prevent curdling. Sift together flour, mixed spices, and a pinch of salt, then gently fold this dry mixture into your wet ingredients. Next, carefully fold in the alcohol soaked fruits and any additional nuts, ensuring an even distribution throughout the mixture.
Prepare your cake tin by double lining it with greaseproof paper, extending the paper slightly above the tin rim to protect the cake edges during the long, slow baking process. Transfer your mixture into the prepared tin, creating a slight dip in the centre to help the cake rise evenly. Bake at a low temperature approximately 140 degrees Celsius for around two hours, checking periodically and covering with foil if the top begins to brown too quickly. A skewer inserted into the centre should come out clean when the cake is perfectly baked.
Step 3: Feed and Mature the Fruit Cake
Once your Christmas cake is baked, the art of maturing transforms it from a simple baked good into a rich, complex delicacy. Feeding the cake involves periodically adding small amounts of alcohol to enhance its flavour and ensure a wonderfully moist texture over several weeks or months.
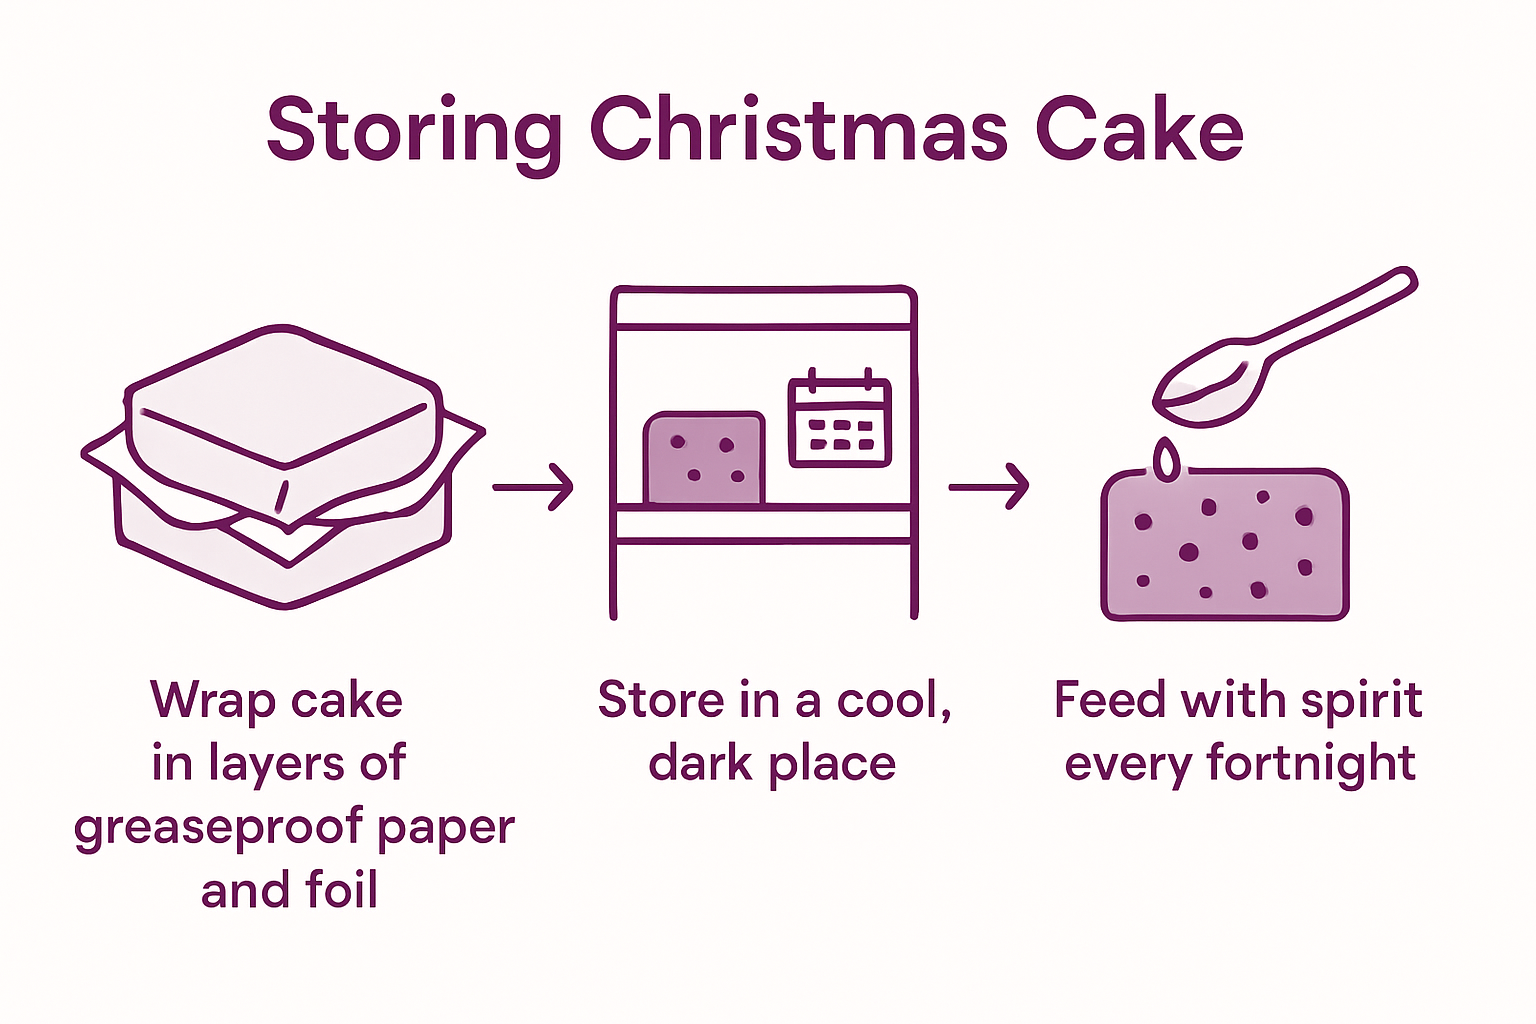
After your cake has completely cooled, wrap it carefully in multiple layers of greaseproof paper and foil to create an airtight seal. Using a fine skewer, create several small holes across the cake’s surface. Select your preferred spirit brandy, rum, or whisky work brilliantly and slowly drizzle approximately one to two tablespoons over the cake, allowing it to seep into the holes and permeate the cake.
Store your wrapped cake in a cool, dark place and repeat this feeding process every fortnight. Each time you feed the cake, rotate its storage position slightly to ensure even distribution of moisture. Pro tip: stop feeding the cake approximately one week before you plan to ice it, allowing the surface to dry and create the perfect base for your decorations. This patient process of feeding and maturing will develop a deep, complex flavour profile that makes traditional Christmas cake so extraordinarily special.
Step 4: Prepare Cake for Icing and Covering
Preparing your matured Christmas cake for its final decorative layers requires precision and care. The goal is to create a smooth, even surface that will showcase your beautiful icing and decorations.
Begin by gently warming apricot jam to create a perfect adhesive base for your marzipan layer. Using a pastry brush, carefully spread a thin coat of the warm jam across the entire surface of the cake, ensuring complete coverage without creating thick pools of jam. Next, roll out your marzipan on a surface dusted with icing sugar, aiming for a thickness of approximately 3 millimetres. Carefully lift the marzipan using your rolling pin and drape it smoothly over the cake, gently smoothing it down the sides to eliminate any air bubbles or wrinkles.
Trim the excess marzipan from the base of the cake using a sharp knife, creating a neat edge. Allow the marzipan to dry and form a slight crust over 24 hours before applying your final icing layer. Pro tip: work in a cool room to prevent the marzipan from becoming too soft and challenging to handle. This preparation stage is crucial for achieving a professional looking Christmas cake that will impress your guests and celebrate the wonderful tradition of festive baking.
Step 5: Decorate with Traditional Christmas Finishes
With your cake perfectly prepared, it is time to transform it into a festive masterpiece that captures the essence of Christmas tradition. The final decorative touches will turn your carefully crafted cake into a stunning centrepiece that celebrates the season.
Start by rolling out white royal icing to create a smooth, elegant covering over your prepared marzipan layer. Use a palette knife to achieve a perfectly even surface, carefully smoothing out any imperfections. To create traditional holly decorations that epitomise Christmas spirit, roll out green marzipan or fondant and cut delicate holly leaf shapes using a specialised cutter. Arrange these leaves around the cake’s top and sides, adding small red fondant berries to complete the classic holly design.
For an authentic finishing touch, consider adding a light dusting of edible glitter or creating a delicate snow effect using royal icing. Pipe gentle swirls or create small peaks to mimic a snowy landscape across your cake. Pro tip: work with cold hands and use cornflour to prevent your decorative elements from sticking. The key is to create a design that looks elegant yet feels wonderfully homemade something that will bring a smile to your guests faces and honour the rich tradition of Christmas cake decorating.
Elevate Your Traditional Christmas Cake Baking Experience
Mastering the art of baking and decorating a traditional Christmas cake is rewarding but can feel challenging when it comes to achieving that perfect texture and stunning finish. From soaking and feeding your fruit to applying flawless marzipan and royal icing, every detail matters. You want to capture the rich flavours and heartfelt charm that make a Christmas cake truly special.
Transform your festive baking with high-quality tools and decorations from The Vanilla Valley. Whether you need premium fondant for smooth covering, cake boards and boxes for safe storage, or vibrant decorations to bring your holly design to life, we have everything passionate bakers require. Shop now to enjoy expert products with next day delivery and join a community that has trusted us since 2009 for exceptional cake decorating supplies. Make this Christmas your most memorable yet by visiting The Vanilla Valley online store and explore inspiring baking resources on cake decoration techniques to perfect your craft.
Frequently Asked Questions
How do I prepare the dried fruit for my Christmas cake?
Start by gathering 1 kg of mixed dried fruit and soaking it in 150 ml of brandy overnight or for at least 8 hours. This will plump the fruit and enhance the cake’s flavour.
What temperature should I bake my Christmas cake at?
Bake your Christmas cake at a low temperature of approximately 140 degrees Celsius for around two hours. Check periodically, and cover the top with foil if it begins to brown too quickly.
How often should I feed my matured Christmas cake with alcohol?
Feed your Christmas cake every fortnight by drizzling 1 to 2 tablespoons of your chosen spirit over it. This regular feeding will help develop a richer flavour and maintain moisture until you are ready to ice it.
How do I prepare my Christmas cake for icing?
Gently warm apricot jam and apply a thin coat to the cooled, matured cake as an adhesive for the marzipan layer. Allow the marzipan to dry for 24 hours before adding the final icing layer for a smooth finish.
What types of decorations can I add to my Christmas cake?
You can use traditional holly decorations made from green marzipan or fondant, along with red fondant berries for a festive touch. Consider adding a light dusting of edible glitter or using royal icing to create a snowy effect on the cake.
Why is it important to allow the marzipan to dry before icing?
Allowing the marzipan to dry creates a slight crust that provides a solid base for your final icing layer. This ensures better adhesion and helps achieve a professional-looking finish for your Christmas cake.