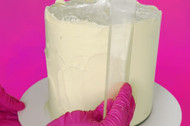
The Best Way to Achieve Smooth Sides
If you’ve ever wanted to achieve beautifully smooth ganache, sharp edges and perfectly straight sides on your cakes, ganaching plates could be just what you need!
Ganaching plates are a fantastic tool for cake decorators, helping you create a professional-looking finish with less guesswork. Whether you’re preparing a cake for a wedding, birthday or special celebration, they make it easier to achieve that flawless finish ready for covering with fondant or leaving beautifully ganached.
In this guide, we’ll walk you through how to use ganaching plates step by step, along with a few handy tips to help you get the best results.
What Are Ganaching Plates?
Ganaching plates are flat plates used on the top and bottom of a cake to help create perfectly level surfaces, straight sides and sharp edges when applying ganache.
By using plates that are slightly larger than your cake, you can build up the ganache around the sides and smooth it back to the edges of the plates. Once the plates are removed, you’re left with a beautifully straight cake with a clean, professional finish.
Step 1: Choose the Right Size Ganaching Plates
Choosing the correct size is essential for achieving a neat finish.
As a general rule, choose ganaching plates that are ¼ inch larger than your cake tin. This gives you enough room to build up the ganache around the sides and create a crisp edge.
For example, if your cake tin is 8 inches in diameter, choose 8¼-inch ganaching plates.
Step 2: Cover Your Plates with Cling Film
Before placing the plates against your cake, cover them with cling film.
This is an important step because you don't want your cake to stick directly to the plates. The cling film helps you remove the plates cleanly once the ganache has set, making the finishing process much easier.
Make sure the cling film sits as smoothly as possible to minimise creases in your ganache.
Step 3: Crumb Coat and Chill Your Cake
Your cake needs a stable base before you start applying the ganache.
Apply a crumb coat to your cake and place it in the fridge to chill for at least one hour. This helps firm up the coating and keeps crumbs from mixing into your final layer of ganache.
Top tip: Keep the baking paper on the bottom of your cake throughout the ganaching process. This helps protect the base and makes handling the cake easier when it's time to flip it onto your final board.
Step 4: Check the Consistency of Your Ganache
For the smoothest finish, your ganache should have a consistency similar to peanut butter.
If it's too soft, it may be difficult to build up the sides without it sliding or losing its shape. If it's too firm, it can be harder to spread evenly and smooth out.
Aim for a spreadable consistency that holds its shape while still being easy to work with.
Step 5: Cover and Position the Top Ganaching Plate
Cover your ganaching plate with a thick layer of ganache and carefully place it on top of your chilled cake.
Take your time to align the plate centrally so that the overhang is even all the way around. Use a cake smoother to check that the plate is level.
Getting this right now will make a big difference to the final result, helping you achieve a level top and straight sides.
Step 6: Apply Ganache to the Sides
With your top plate in position, start applying ganache around the sides of the cake.
Work your way around the entire cake, making sure the ganache fills the space between the cake and the edge of the plate. Apply enough ganache to cover the sides generously, as you can remove any excess during smoothing.
Step 7: Smooth the Ganache
Using your cake smoother, work around the sides of the cake to level the ganache against the plates.
Keep your smoother straight and move steadily around the cake, removing excess ganache as you go.
Once you've completed the first pass, check for any thin areas, gaps or uneven patches. Add more ganache wherever needed and smooth again until the sides are even and well covered.
Don't rush this stage. A little extra attention now will help you achieve a much cleaner finish.
Step 8: Remove the Top Ganaching Plate
Once you're happy with the sides, it's time to remove the top plate.
Carefully peel the plate away from the cling film, then remove the cling film itself. Avoid lifting the plate straight up, as this can disturb the top edge of your ganache.
Take your time to separate the layers gently and keep the top of your cake as neat as possible.
Step 9: Smooth the Top and Tidy the Edges
With the top plate removed, smooth the exposed ganache surface.
Pay particular attention to the top edge, tidying any excess ganache and refining the corners to create a clean, sharp finish.
This is your opportunity to perfect the edges before moving on to the bottom plate.
Step 10: Flip the Cake and Remove the Bottom Plate
Carefully flip the cake so you can access the bottom ganaching plate.
Remove the bottom plate and peel away the baking paper from the base of the cake.
Take care when handling the cake, ensuring it is well supported throughout the process. Your ganache should now have a smooth finish, straight sides and beautifully defined edges.
Step 11: Secure Your Cake to Its Final Board
Apply a little ganache to the centre of your final cake board. This will act as an adhesive to help secure the cake in place.
Carefully flip the cake onto the final board, making sure it is centred and positioned exactly where you want it.
Once the cake is securely in place, you can remove any remaining traces of ganache from the board and tidy up the base.
Step 12: Reveal Your Finished Cake!
And there you have it!
You should now have smooth sides, a level top and sharp edges, creating the perfect base for fondant, decorative details or a simple, elegant ganache finish.
With a little practice, ganaching plates can become an essential part of your cake decorating toolkit.
Our Top Tips for Using Ganaching Plates
For the best results every time, keep these tips in mind:
- Choose the right size: Remember to use plates ¼ inch larger than your cake tin.
- Always use cling film: This helps prevent the ganache from sticking to the plates and makes removal easier.
- Don't skip chilling: A firm crumb coat gives you a more stable cake to work with.
- Get your ganache consistency right: Peanut butter consistency is a great starting point for smooth application.
- Check your alignment: Make sure the top plate is level before applying ganache to the sides.
- Work in layers: Fill any thin areas before your final smoothing pass.
- Take your time when removing the plates: Gentle removal helps protect your sharp edges.
Ready to Achieve Those Sharp Edges?
Ganaching plates take the guesswork out of creating smooth, professional-looking cakes. Once you've mastered the technique, they're a brilliant way to achieve a consistent finish and prepare your cakes for the next stage of decorating.
Explore our range of ganaching plates and find the right size for your next cake decorating project.