
Homemade Wedding Cake: Easy Decorating for Beginners
Over 40 percent of South Wales couples now choose homemade cakes for their wedding, embracing the charm of a British tradition with a personal twist. As amateur bakers, finding affordable supplies and fuss-free decorating methods can make all the difference between stress and celebration. This guide breaks down every step, from shopping for must-have tools to mastering smooth icing and stylish edible flowers, so you can create a showstopping cake that feels truly special.
Table of Contents
- Step 1: Gather Essential Baking Supplies And Ingredients
- Step 2: Bake And Layer Your Homemade Wedding Cake Base
- Step 3: Cover Cakes Smoothly With Icing For A Flawless Finish
- Step 4: Choose And Arrange Easy Edible Flower Decorations
- Step 5: Check Stability And Perfect Your Cake For Presentation
Quick Summary
| Key Point | Explanation |
|---|---|
| 1. Gather essential supplies | Collect measuring tools, mixing bowls, and quality ingredients for smooth cake preparation. |
| 2. Bake layers with precision | Ensure even baking by greasing tins, mixing batter properly, and checking doneness accurately. |
| 3. Apply icing evenly | Use a crumb coat first and a hot spatula technique for a smooth icing finish. |
| 4. Decorate with edible flowers | Choose safe, organic edible flowers and arrange them to enhance your cake’s visual appeal. |
| 5. Ensure cake stability | Use dowel rods and cake boards for support and check alignment for a professional presentation. |
Step 1: Gather essential baking supplies and ingredients
Creating a homemade wedding cake requires careful preparation and the right equipment. Before diving into baking, you will need to collect specific supplies that ensure your cake turns out beautifully. The Association of Bakery Ingredient Manufacturers provides comprehensive guidance on selecting quality ingredients for professional results.
Your essential baking toolkit should include precise measuring equipment like digital kitchen scales, graduated measuring cups, and measuring spoons. You will need mixing bowls in various sizes, an electric mixer or stand mixer, cake tins in different shapes and sizes, cooling racks, offset spatulas, and piping bags with various nozzle tips. For ingredients, gather high-quality plain and self-raising flour, unsalted butter, free-range eggs, caster sugar, vanilla extract, baking powder, and fresh cream. If you have guests with dietary restrictions, consider gluten-free flour alternatives recommended by Coeliac UK.
Stock up on decorative supplies like food colouring, edible pearls, fresh flowers, and cake boards to create a professional finish. Most baking supply shops offer starter kits perfect for beginners. Remember that having the right equipment makes the entire cake creation process smoother and more enjoyable.
Top tip: Purchase extra ingredients to account for potential mistakes during your first wedding cake attempt.
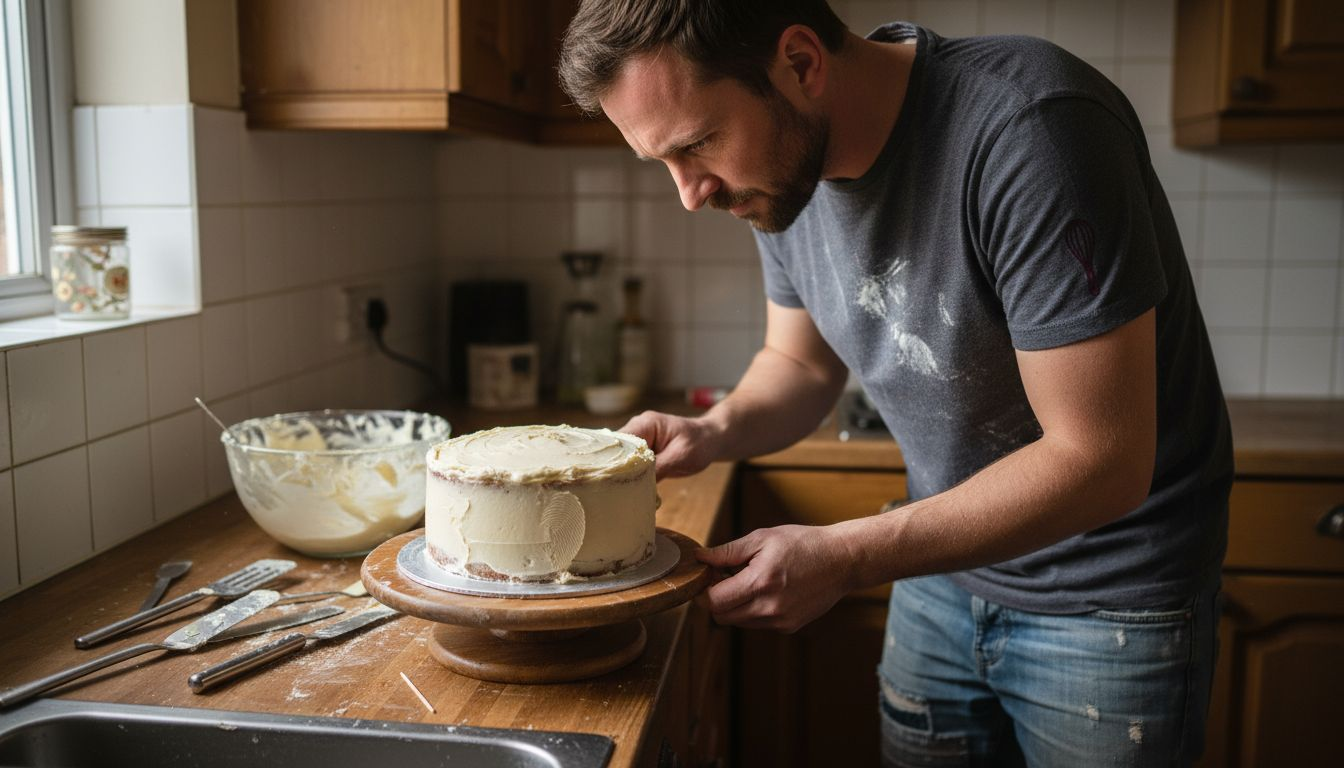
Step 2: Bake and layer your homemade wedding cake base
Baking the perfect wedding cake requires precision and attention to detail. You will be creating multiple cake layers that form the foundation of your stunning dessert. Coeliac UK offers comprehensive guidance on baking cake layers evenly to ensure a professional result.
Prepare your cake tins by greasing them thoroughly and lining the bottom with parchment paper. Mix your cake batter carefully ensuring all ingredients are combined smoothly without overmixing. Pour the batter evenly into your prepared tins, using a spatula to spread it to the edges. Bake at the recommended temperature typically around 180 degrees Celsius, rotating the tins halfway through to guarantee even cooking. Food Standards Agency advises checking cake doneness through precise baking temperatures and times to ensure safety and quality.
Once baked, allow your cake layers to cool completely on wire racks. This prevents condensation and maintains the cake’s structural integrity. When completely cool, level each layer using a serrated knife to create flat surfaces perfect for stacking. Place a small amount of buttercream or ganache between each layer to help them adhere smoothly and create a professional finish.
Top tip: Refrigerate your cake layers for 30 minutes before assembly to make them easier to handle and less likely to crumble.
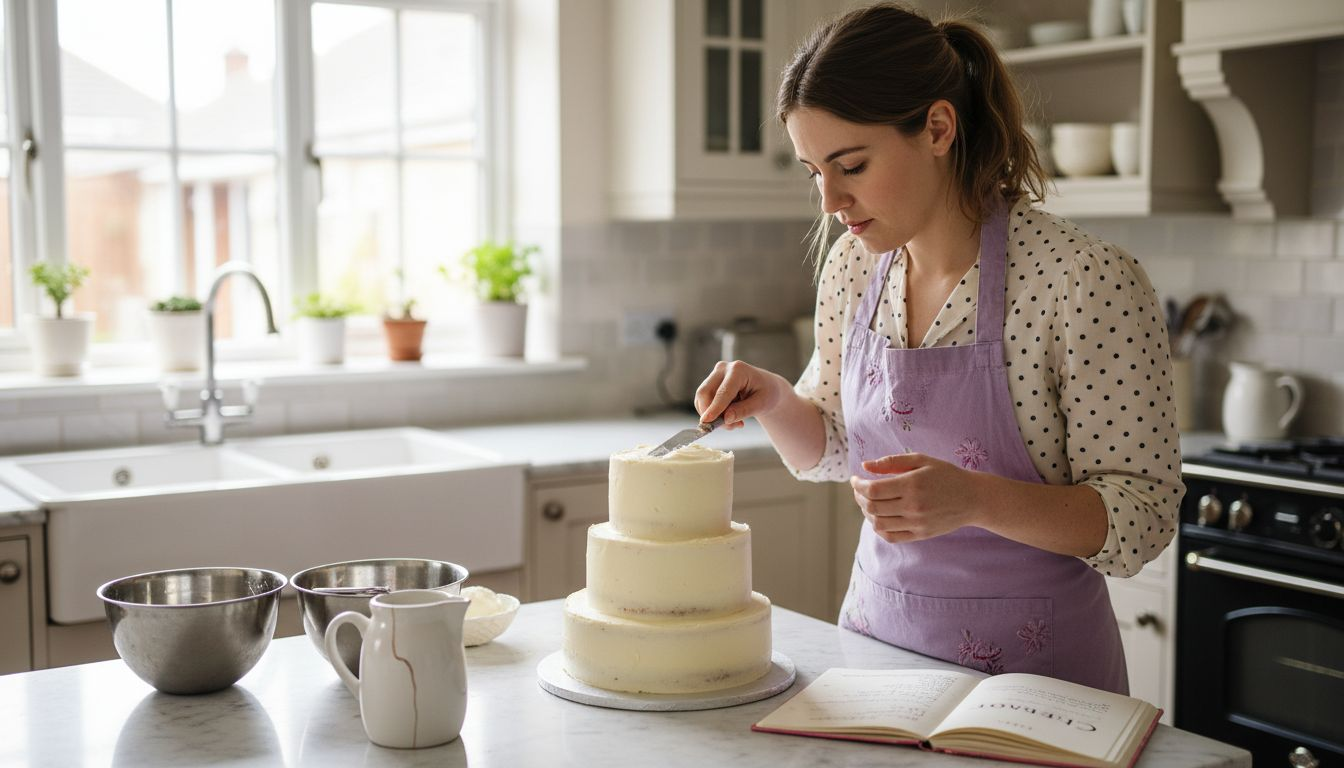
Step 3: Cover cakes smoothly with icing for a flawless finish
Covering your wedding cake with a smooth layer of icing is the key to creating a professional and elegant appearance. One Education offers expert guidance on preparing cakes for perfect icing to ensure a flawless final result.
Start by applying a thin crumb coat of buttercream or ganache to seal in any loose cake particles. Refrigerate the cake for 15 to 20 minutes to allow this initial layer to set firmly. When ready to apply the final icing, use an offset spatula or bench scraper to spread a smooth, even layer of buttercream or fondant across the entire cake surface. Work methodically around the cake, holding your tool at a 45 degree angle to create sharp edges and a clean finish. Food A Fact of Life recommends using precise techniques to level and smooth the icing surface for a professional look.
For buttercream, use a hot spatula technique by dipping your metal spatula in hot water and wiping it dry before smoothing the surface. This helps create an ultra smooth finish that looks sleek and polished. Take your time and work slowly to ensure each section is perfectly covered without air bubbles or uneven patches.
Top tip: Turn your cake turntable as you smooth the icing to maintain a consistent angle and achieve a perfectly even coating.
Step 4: Choose and arrange easy edible flower decorations
Adding edible flowers to your wedding cake transforms it into a stunning culinary masterpiece. The Royal Horticultural Society offers comprehensive guidance on selecting safe and beautiful edible flowers to ensure your cake looks and tastes incredible.
Start by selecting flowers known to be completely edible and safe for consumption. Roses, pansies, lavender, and chamomile are excellent choices that add both visual appeal and delicate flavours. Always ensure you source your flowers from organic sources free from pesticides or chemical treatments. The Royal Botanic Garden Edinburgh provides practical advice on creatively arranging edible flower decorations that can elevate your wedding cake design. Before placing flowers on your cake, carefully remove stems and wash petals gently to remove any dirt. Arrange flowers strategically around the cake tiers creating natural looking clusters or delicate scattered designs.
Consider using flowers that complement your wedding colour palette and cake flavour. Soft pink rose petals work beautifully with vanilla sponge while deep purple lavender matches wonderfully with chocolate layers. Place larger blooms as statement pieces and use smaller flowers to fill gaps and create visual harmony.
Use this summary to help select edible flowers for wedding cake decoration:
| Flower | Flavour Profile | Colour Options | Visual Impact |
|---|---|---|---|
| Rose | Floral, delicate | Pink, red, white | Elegant, romantic |
| Pansy | Mild, slightly sweet | Violet, yellow, blue | Colourful, whimsical |
| Lavender | Herbal, aromatic | Purple, mauve | Rustic, fragrant |
| Chamomile | Apple-like, gentle | White, yellow centre | Fresh, classic |
Top tip: Lightly brush edible flowers with a thin layer of clear sugar syrup to help them adhere to the cake and maintain their fresh appearance throughout your celebration.
Step 5: Check stability and perfect your cake for presentation
Ensuring your wedding cake remains stable and visually stunning is the final crucial step in creating a memorable centrepiece. The Food Standards Agency provides essential guidance on maintaining food safety and presentation standards to guarantee your cake looks spectacular and remains structurally sound.
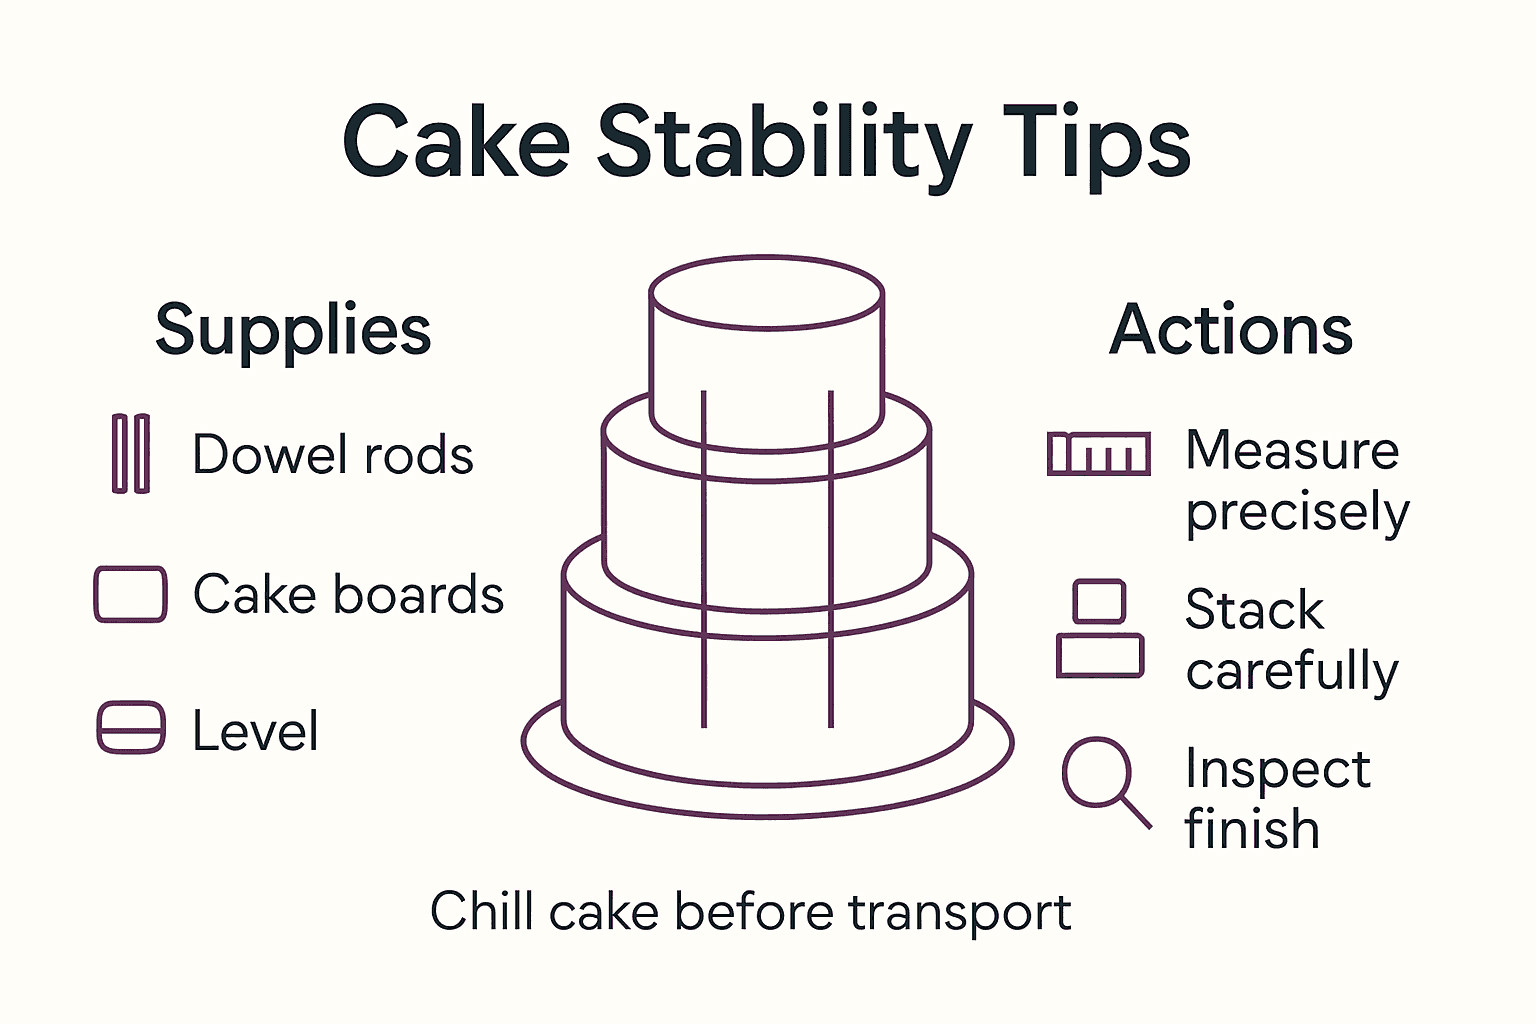
To guarantee stability, use food safe dowel rods between cake tiers to provide critical support. Measure each dowel precisely to the exact height of the cake layer it will support, ensuring a level and secure foundation. The National Careers Service recommends professional techniques for balancing and supporting multi tiered cakes that prevent potential structural failures. Place a cake board between each tier to distribute weight evenly and create a smooth transition between layers. Check that each tier sits perfectly level by using a spirit level or rotating the cake slowly to identify any slight angles.
Before final presentation, do a thorough visual inspection. Look for any uneven surfaces, slight imperfections in icing, or areas that might need touch ups. Gently smooth out any minor bumps with a warm palette knife and ensure all decorative elements are securely positioned. Keep the cake in a cool environment away from direct sunlight to maintain its structural integrity and pristine appearance.
Here’s a quick reference to common cake stability tools and their roles:
| Tool | Purpose | When to Use |
|---|---|---|
| Dowel rods | Provide structural support between tiers | Multi-layered cakes |
| Cake boards | Distribute weight evenly across layers | Between each cake tier |
| Spirit level | Ensure each tier is perfectly horizontal | After stacking each layer |
| Palette knife | Smooth icing and adjust minor imperfections | Final presentation touch-ups |
Top tip: Refrigerate your cake for 30 minutes before transportation to help stabilise the layers and set the decorations firmly in place.
Master Your Homemade Wedding Cake with The Vanilla Valley
Creating a flawless wedding cake at home can feel overwhelming, especially when trying to achieve smooth icing, stable tiers, and stunning edible flower decorations. Whether you are worried about finding the right cake boards, perfect icing colours, or sturdy supports to keep your layers secure, having trusted supplies and expert tools at your fingertips is essential. The careful techniques described in the article highlight the importance of quality equipment and decorations for a professional finish.

Discover everything you need for your wedding cake journey at The Vanilla Valley. From premium cake boards to vibrant food colours and reliable cake supports, we have been serving passionate bakers since 2009 with trusted products and exceptional service. Shop now and enjoy next day delivery options so you can start perfecting your cake with confidence today. Ready to transform your cake decorating skills? Explore our essential baking accessories and turn every layer into a masterpiece.
Frequently Asked Questions
What essential supplies do I need for making a homemade wedding cake?
You will need measuring equipment, mixing bowls, a mixer, cake tins, cooling racks, and decorating tools. Gather precise measuring cups and spoons, high-quality flour, sugar, eggs, and butter to get started.
How can I ensure my cake layers are even when baking a wedding cake?
To achieve even cake layers, thoroughly grease and line your cake tins before adding the batter. Bake at a consistent temperature and rotate the tins halfway through to promote even cooking.
What techniques can I use for applying icing smoothly on my wedding cake?
Start with a thin crumb coat to seal any loose particles, then chill the cake before applying the final layer of icing. Use an offset spatula or bench scraper at a 45-degree angle to create sharp edges and a smooth finish.
How do I arrange edible flowers on my wedding cake?
Choose safe, edible flowers and wash them gently before use. Arrange them in clusters or scattered designs around the tiers to match your wedding theme and create visual harmony.
What steps should I take to ensure my wedding cake is stable for presentation?
Incorporate food-safe dowel rods between cake tiers to provide necessary support, and use cake boards to distribute weight evenly. Always check for levelness and make final adjustments with a warm palette knife to smooth any imperfections.
How should I prepare my wedding cake for transportation?
Refrigerate your finished cake for at least 30 minutes to help stabilise the layers and decorations. This will ensure it remains intact during transport and arrives looking pristine.