
How to get a perfect crumb coat every time: flawless cakes
TL;DR:
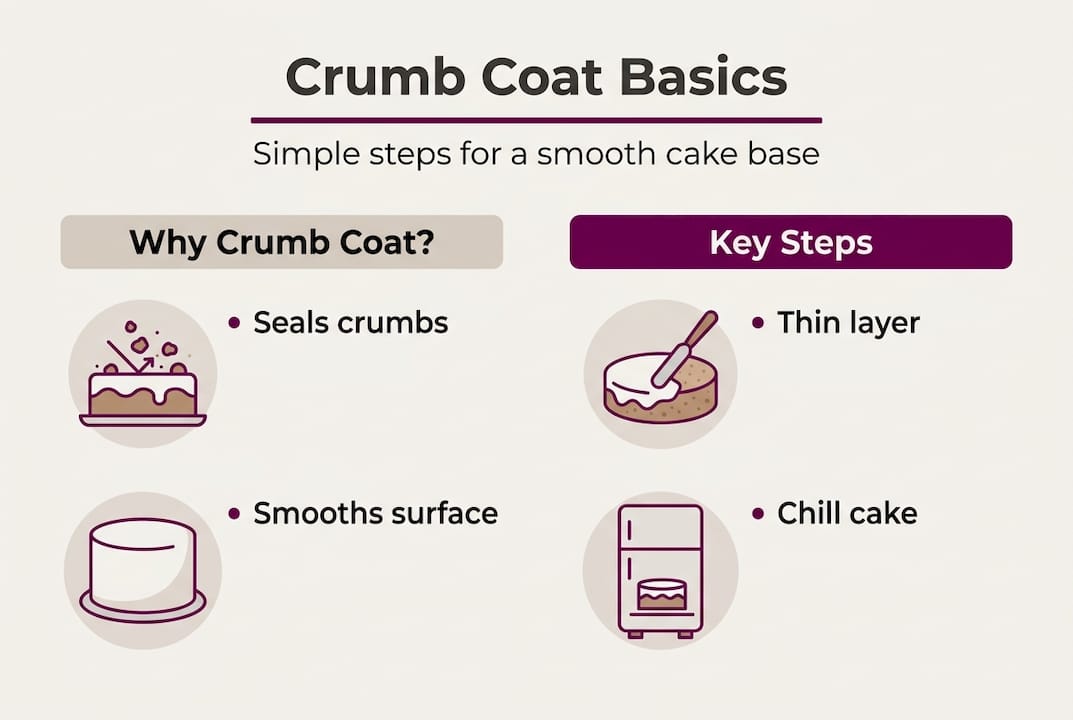
- A crumb coat seals in crumbs for a smooth, professional cake finish.
- Proper tools and chilled, well-prepared cakes are essential for effective crumb coating.
- Repetition and practice improve technique and build confidence in cake decorating skills.
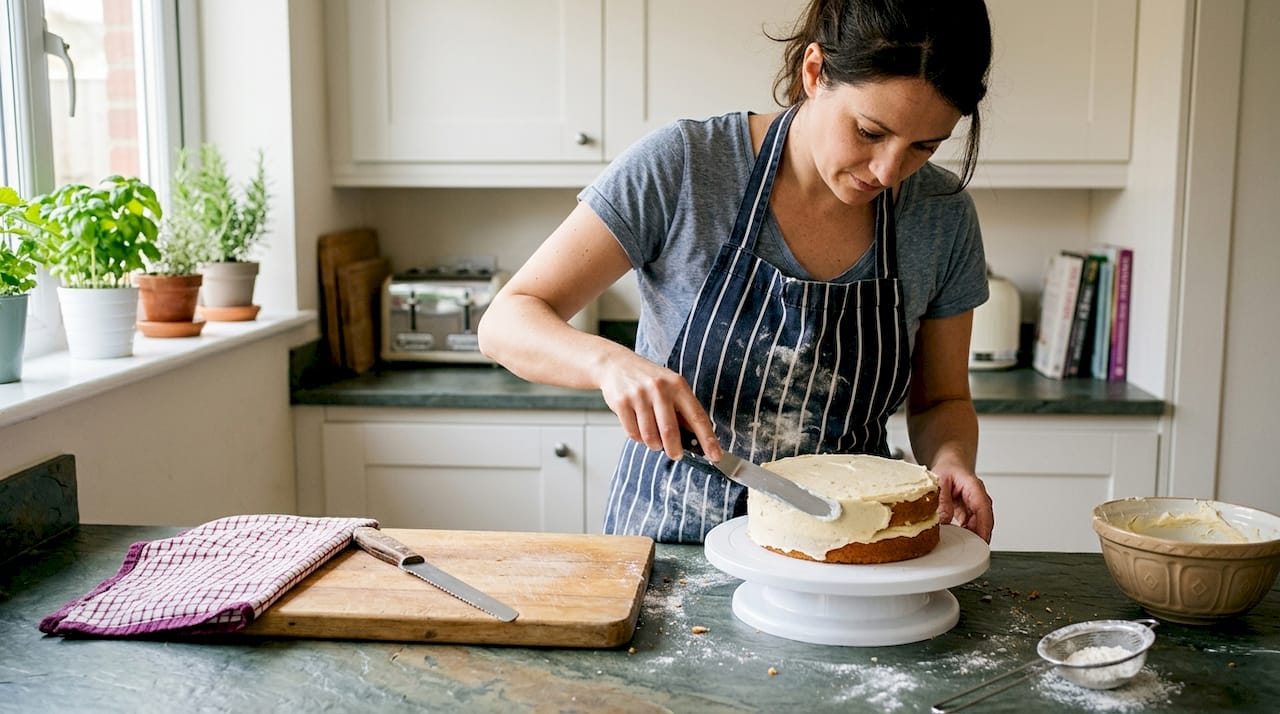
Even the most enthusiastic home baker knows that sinking feeling: you’ve baked a beautiful cake, whipped up a gorgeous buttercream, and then the crumbs start showing through your final coat of frosting. It’s one of the most common frustrations in cake decorating, and it happens to almost everyone at first. The good news? There’s a simple, satisfying solution: the crumb coat. Master this one technique and you’ll notice an immediate difference in your finished cakes. This guide walks you through everything, from understanding what a crumb coat actually is, to the tools you need, the step-by-step method, and how to fix things when they go wrong.
Table of Contents
- What is a crumb coat and why does it matter?
- Essential tools, ingredients, and prep steps
- Crumb coating step-by-step: mastering the technique
- Troubleshooting, advanced tips, and common mistakes
- The overlooked secret to a flawless finish
- Enhance your cake decorating journey with The Vanilla Valley
- Frequently asked questions
Key Takeaways
| Point | Details |
|---|---|
| Thin, chilled crumb coat | Apply a very thin layer of frosting and always chill it for best crumb control. |
| Proper tools matter | Using an offset spatula, turntable, and scraper makes crumb coating easier and neater. |
| Practice builds skill | Consistent practice with simple methods is the surest path to flawless results. |
| Tackle common issues | For tricky cakes or visible crumbs, use double coats and seal edges carefully. |
What is a crumb coat and why does it matter?
If you’ve ever wondered why your final layer of buttercream looks speckled with dark crumbs, you’re not alone. It’s one of the most common stumbling blocks for anyone just getting started with beginner cake decorating tips. The solution is a crumb coat, and once you understand what it does, you’ll never skip it again.
A crumb coat is a thin layer of frosting applied to seal in crumbs before the final coat goes on. Think of it like priming a wall before painting. Without primer, the paint drags and the surface looks uneven. Without a crumb coat, your final frosting picks up every loose crumb and drags them across the surface. The result is a finish that looks messy no matter how carefully you work.
The crumb coat acts as a sticky barrier. It grabs all those loose crumbs and holds them in place. Once it chills and firms up, your final coat of buttercream or ganache glides on smoothly over a clean, stable surface.
Here’s a quick comparison to show the difference:
| Without crumb coat | With crumb coat |
|---|---|
| Crumbs visible in final frosting | Clean, smooth final layer |
| Frosting drags and tears | Frosting spreads easily |
| Uneven surface texture | Even, professional finish |
| Colours look muddy | Colours appear vivid and clean |
Crumb coating is especially useful in these situations:
- Layer cakes with multiple tiers and exposed cut edges
- Dark or chocolate cakes where crumbs are very visible against light frosting
- Soft or delicate sponges that crumble easily
- Cakes being covered in fondant, where any bump shows through
- Any cake destined for a professional cake guide level finish
Before you even apply frosting, always brush loose crumbs off your cake layers with a pastry brush. This removes the most obvious loose bits before the crumb coat even goes on, giving you a much cleaner starting point.
Skipping the crumb coat is one of those shortcuts that costs you more time in the end. You’ll spend ages trying to rescue a messy final coat when a quick crumb coat would have prevented the problem entirely.
Essential tools, ingredients, and prep steps
Getting your crumb coat right starts well before the buttercream hits the cake. Having the right tools laid out and your cake properly prepared makes the whole process calmer, quicker, and much more enjoyable.
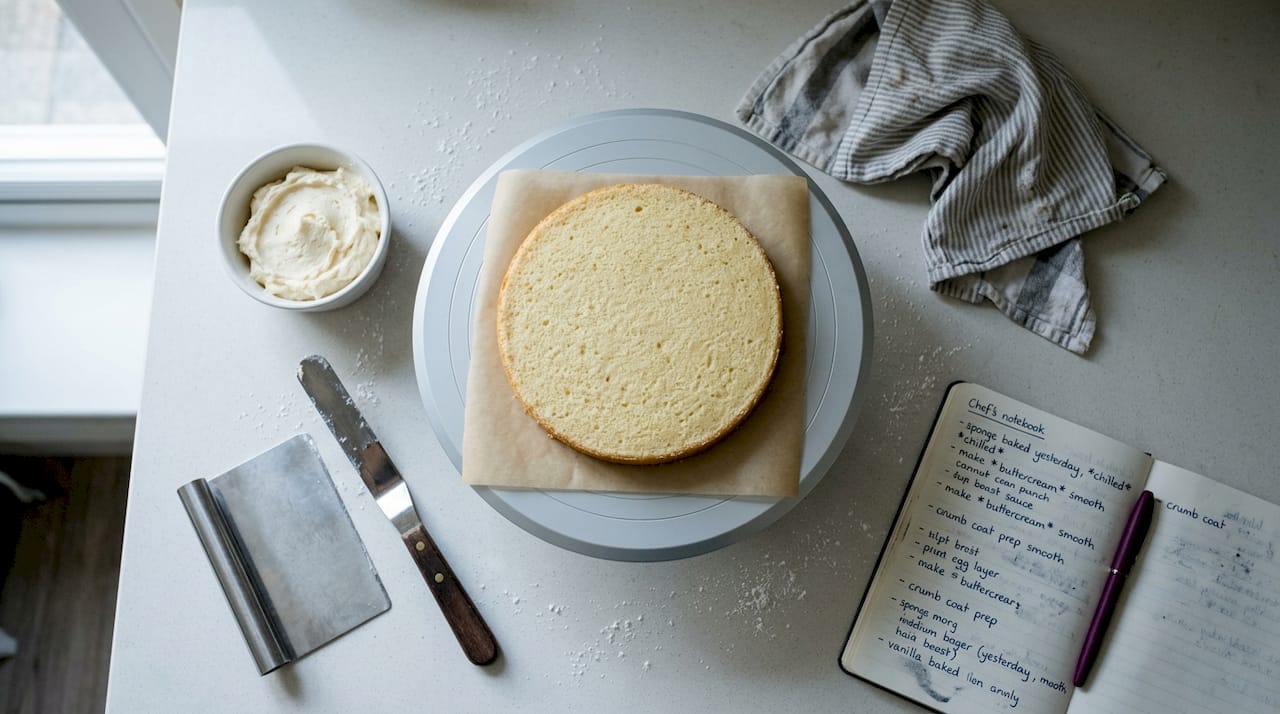
Here’s what you’ll need:
| Tool | Why you need it |
|---|---|
| Offset spatula | Spreads frosting evenly and reaches edges cleanly |
| Cake turntable | Lets you rotate the cake for smooth, consistent coverage |
| Bench scraper | Creates flat sides and sharp edges |
| Pastry brush | Removes loose crumbs before coating |
| Cake board | Keeps the cake stable while you work |
| Palette knife | Useful for smaller adjustments |
For ingredients, your buttercream consistency matters enormously. Soft, spreadable buttercream at room temperature is ideal. If it’s too stiff, it’ll drag crumbs rather than glide over them. If it’s too soft, it won’t hold the crumbs in place. If your buttercream has been sitting in the fridge, pop a small portion in the microwave for a few seconds to bring it back to a workable consistency.
Prepping your cake layers is just as important as the tools. Always chill cake layers completely before stacking and crumb coating. A cold cake is firmer, less crumbly, and far easier to work with. If you’re short on time, the freezer works brilliantly for a quick 15-minute chill.
Once chilled, level each layer with a serrated knife so your cake sits flat and stable. Brush away any loose crumbs with your pastry brush. Stack your layers with an even filling between each one, making sure everything is lined up neatly.
Pro Tip: Set up your workspace before you start. Clear a clean, cool area, have your turntable ready, and make sure your buttercream is at the right temperature. A calm, organised setup makes a huge difference to the final result. If you want to build your confidence before working on a real cake, practising with cake dummies is a brilliant way to get the feel for spreading and smoothing without any pressure.
Also consider your buttercream techniques before you begin. A well-made buttercream with the right fat-to-sugar ratio will behave beautifully as a crumb coat. A grainy or over-beaten one will fight you every step of the way. Getting your smooth frosting tips right at the buttercream stage saves a lot of frustration later.
Crumb coating step-by-step: mastering the technique
Right, everything’s prepped and your cake is chilled. Now comes the satisfying part. Follow these steps and you’ll have a clean, firm crumb coat that sets you up for a stunning finish.
- Place your cake on a turntable. Position it on a cake board so it’s centred and stable. The turntable lets you rotate as you work, giving you consistent coverage without awkward reaching.
- Apply a generous spoonful of buttercream to the top. Use your offset spatula to spread it outward to the edges. Don’t worry about perfection at this stage.
- Work the buttercream down the sides. Add small amounts to the sides and use your spatula to spread it around. Rotate the turntable as you go.
- Apply a thin layer of frosting, roughly 3 to 4mm thick. You should be able to see the cake through it. That’s completely normal and exactly what you want.
- Use your bench scraper to smooth the sides. Hold it against the cake at a slight angle, press gently, and rotate the turntable slowly. One smooth, steady movement works better than lots of short strokes.
- Smooth the top with your offset spatula. Work from the outside edge inward, using light, sweeping motions.
- Check for any gaps or bare patches and fill them in. The goal is full coverage, not perfection.
- Chill the cake. Pop it in the fridge for 15 to 30 minutes until the crumb coat feels firm to the touch. In a hurry? The freezer works in 5 to 10 minutes.
“The crumb coat doesn’t need to be beautiful. It just needs to be there.” That’s the mindset shift that makes everything easier. Stop trying to make the crumb coat look perfect and focus on full, even coverage instead.
Pro Tip: Warm your bench scraper slightly under hot water and dry it before smoothing. A warm scraper glides through buttercream far more easily than a cold one, giving you cleaner edges with less effort. This is a technique used by professionals and it makes a noticeable difference. Once chilled, your cake is ready for the final coat, whether that’s more buttercream, ganache, or even a mirror glaze finish. You can also use the firm crumb coat as a base for embossed decorating techniques that require a stable surface. Follow the NYT crumb coating guide for additional visual reference on technique.
Troubleshooting, advanced tips, and common mistakes
Even with the best prep, things don’t always go to plan. Here’s how to spot problems and sort them out quickly.
Signs your crumb coat needs attention:
- Crumbs are visibly moving around in the frosting as you spread
- The buttercream is tearing or dragging rather than gliding
- There are large gaps or bare patches after smoothing
- The coat looks too thick and lumpy in places
If crumbs are moving, your buttercream is likely too warm. Pop the whole cake in the fridge for 10 minutes and let everything firm up before continuing. If the frosting is dragging, it may be too cold or stiff. Let it sit at room temperature for a few minutes or warm it slightly.
For fragile cakes, chill or freeze the layers before stacking. If you’re using a soft filling like jam or lemon curd, pipe a dam of stiffer buttercream around the edge of each layer before adding the filling. This stops it from bulging out when you apply pressure during crumb coating.
Dark chocolate cakes may need two crumb coats to fully hide the colour beneath a light frosting. Apply the first coat, chill until firm, then apply a second thin coat and chill again. Always seal the bottom edge carefully where the cake meets the board, as this area is easy to miss and crumbs collect there.
Pro Tip: Don’t skip sealing the bottom edge. Use your offset spatula to tuck a small amount of buttercream under the base of the cake, then smooth it up and onto the sides. It creates a neat seal and prevents gaps in your final coat.
Common myths worth busting:
- “Room temperature cakes are easier to crumb coat.” Not true. Cold cakes are firmer and crumble far less.
- “One crumb coat is always enough.” For dark or very crumbly cakes, two coats give a much cleaner result.
- “Chilling overnight ruins the texture.” It doesn’t. A covered crumb-coated cake keeps beautifully in the fridge overnight and is often easier to finish the next day.
For more help with troubleshooting crumb coats and common frosting mistakes, it’s worth bookmarking a few reliable references. And if you’re moving on to fondant, check out our guide on preventing fondant cracks for the next stage of your decorating journey.
The overlooked secret to a flawless finish
Here’s something we genuinely believe after years of helping bakers of all levels: the crumb coat isn’t really about getting it perfect. It’s about building muscle memory.
The first time you use a turntable and bench scraper together, it feels awkward. The second time, a little less so. By the tenth time, your hands just know what to do. That’s the real secret. Using a turntable and heated scraper consistently, even when it feels unnecessary, trains your technique faster than any tutorial can.
We always recommend cake dummy practice to anyone who wants to improve quickly. You can crumb coat a dummy cake again and again without wasting ingredients or feeling the pressure of a real bake. It’s genuinely one of the fastest ways to go from wobbly finishes to smooth, confident results.
Professional decorators don’t have magic tools. They have repetition. They’ve done the same movements hundreds of times. You can get there too, and it happens sooner than you’d think.
Enhance your cake decorating journey with The Vanilla Valley
Now that you’ve got a solid crumb coating method under your belt, the exciting part begins. Getting the right tools really does make a difference, and we’ve got everything you need at The Vanilla Valley, from offset spatulas and turntables to cake boards and the best buttercream ingredients around.

We’ve been supporting bakers across the UK since 2009, and we love seeing what our community creates. Whether you’re just starting out or refining your technique, our beginner tips blog is packed with friendly, practical advice to keep you inspired. Pop in to our North Cardiff store or shop online, and let’s make something amazing together.
Frequently asked questions
What should the consistency of crumb coat buttercream be?
Crumb coat buttercream should be soft, smooth, and easily spreadable at room temperature. If it feels too stiff, microwave a small portion briefly to bring it back to a workable consistency.
How long should you chill a crumb coat before the final layer?
Chill the crumb coat for 15 to 30 minutes in the fridge or 5 to 10 minutes in the freezer, until the surface feels firm and dry to the touch.
Is a crumb coat necessary for all cakes?
A crumb coat is highly recommended for layer cakes or cakes with lots of loose crumbs. It’s particularly important for crumbly or dark cakes, though dense single-layer cakes may sometimes manage without one.
What do I do if crumbs still show through after chilling?
Apply a second thin crumb coat over the first and chill again before adding your final layer. Dark cakes may need two coats to fully conceal the colour beneath light frosting.
Can I crumb coat a cake the day before decorating?
Absolutely. A chilled crumb coat keeps beautifully overnight in the fridge when covered, and many bakers find a rested crumb coat is even easier to finish the following day.
Recommended
- Make your cakes look more professional: step-by-step guide - The Vanilla Valley
- Stop fondant from cracking: Essential steps for perfect cakes - The Vanilla Valley
- Beginner Cake Decorating Tips for Stunning Results - The Vanilla Valley
- How to Avoid Making a Fail Cake: Essential Steps - The Vanilla Valley
- Guía decoración de cupcakes: ideas creativas paso a paso