
Make your cakes look professional instantly: simple tips

TL;DR:
- Using the right tools and supplies improves cake appearance and professionalism.
- Mastering smooth frosting, sharp edges, and simple decorations enhances cake presentation.
- Focus on basic techniques and quality supplies for confident, elegant cake decorating.
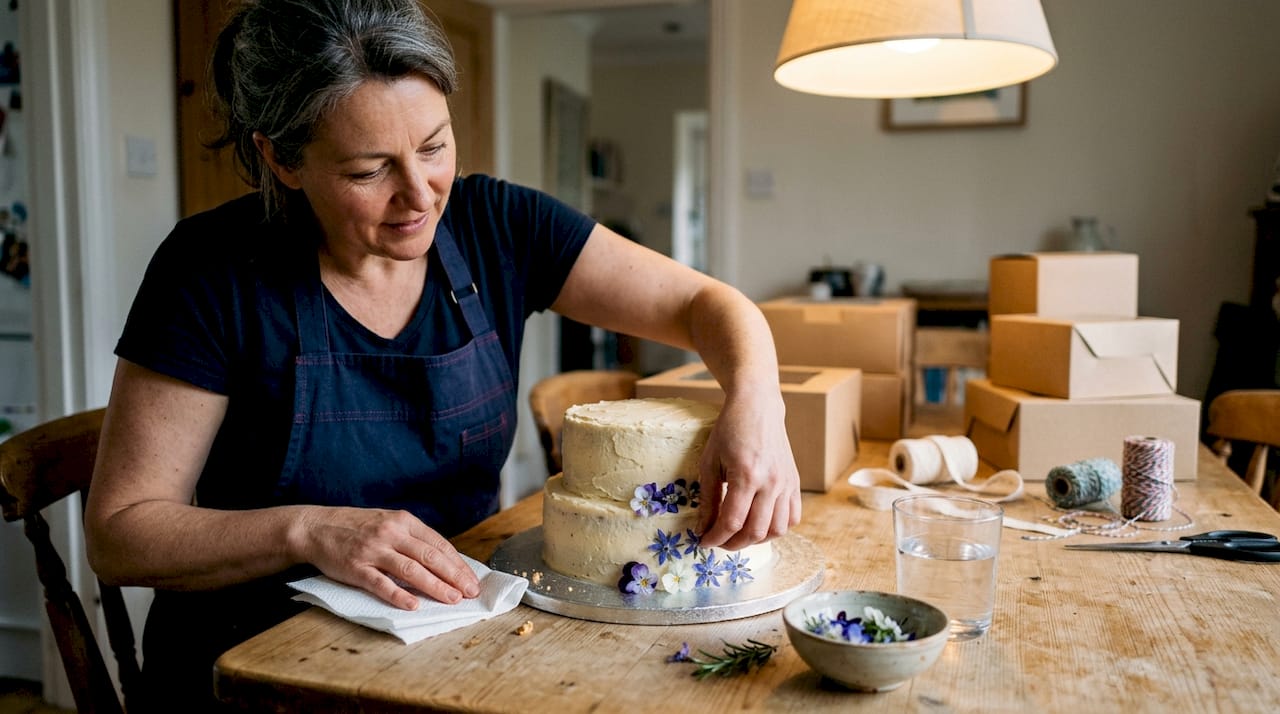
You’ve spent hours baking a cake that tastes absolutely incredible. Then you step back, take a proper look, and feel that familiar pang of disappointment. It doesn’t quite look the way you imagined. Sound familiar? You’re not alone. So many home bakers pour their hearts into flavour and texture, only to feel let down by the final appearance. The good news? A handful of smart techniques and the right supplies can transform your results almost immediately. This guide walks you through exactly what to do, step by step, so your cakes look just as amazing as they taste.
Table of Contents
- Essential tools and supplies for a professional finish
- Mastering smooth frosting and sharp edges
- Decorating shortcuts: no-piping and simple toppings
- Presentation perfection: boards, boxes, and final touches
- Why confidence and simplicity make all the difference
- Elevate every cake with quality decorating supplies
- Frequently asked questions
Key Takeaways
| Point | Details |
|---|---|
| Master the basics | Smooth frosting and clean, sharp edges make the biggest instant impact. |
| Use the right tools | Offset spatulas, a turntable, and covered cake boards are essential for a professional look. |
| Decorate simply | No-piping decorations like fresh fruit or flowers deliver elegant results with minimal skill. |
| Finishing touches matter | Neat cake boards and careful presentation transform your finished cake. |
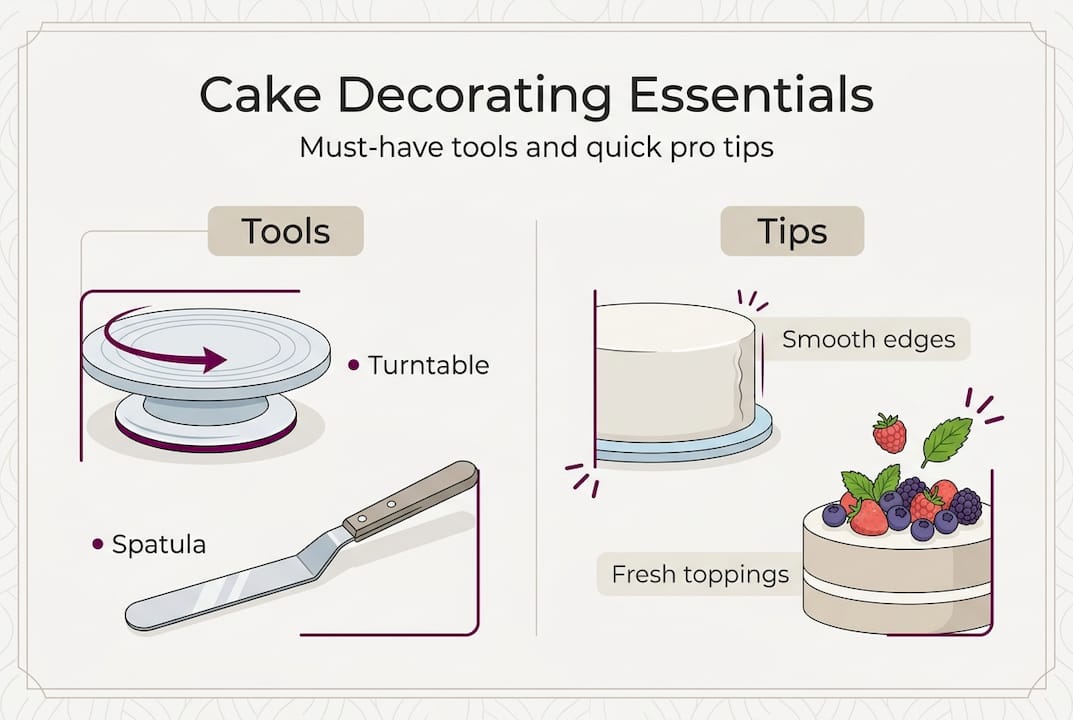
Essential tools and supplies for a professional finish
To get started, you’ll need some key tools. Having the right kit in your kitchen makes an enormous difference, and the good news is that you don’t need to spend a fortune to see real results. As the best cake decorating tools research confirms, the essentials are an offset spatula, a turntable, piping bags and tips, and a cake leveler. These are the items that the professionals reach for every single time.
Here’s a quick rundown of what belongs in your kit:
- Offset spatula – reaches across the cake without your hand dragging through the frosting
- Cake turntable – lets you rotate the cake smoothly while you work, giving you even coverage
- Bench scraper – creates those sharp, clean sides that instantly look polished
- Piping bags and tips – for borders, rosettes, or neat writing
- Cake leveler – slices layers flat so your finished cake doesn’t lean or bulge
Once you have those covered, there are some brilliant optional extras worth exploring. Cake boards, foil coverings, decorating stencils, and colour dusts can all add that finishing sparkle without requiring advanced skills.
| Supply | Category | Purpose |
|---|---|---|
| Offset spatula | Essential | Smooth and spread frosting evenly |
| Turntable | Essential | Rotate for smooth, consistent sides |
| Bench scraper | Essential | Achieve sharp, clean edges |
| Piping bags and tips | Essential | Decorative borders and lettering |
| Cake leveler | Essential | Flat, even layers |
| Cake boards | Optional | Professional base and easy transport |
| Colour dusts | Optional | Add shimmer, depth, and colour |
| Stencils | Optional | Create patterns without freehand skills |
| Foil covers | Optional | Neat, decorated board finish |
If you want a broader overview of what to look for when building your collection, our best baking tools guide breaks everything down by skill level. Knowing what matters most means you spend wisely and see results faster.
Pro Tip: Always wash and dry your tools thoroughly between uses. Residual grease or crumbs on a bench scraper will drag through your frosting and undo all your hard work.
Mastering smooth frosting and sharp edges
Once you have your essential tools, it’s time to master your base finish. This is where most home bakers either shine or struggle, and the difference usually comes down to a few simple habits rather than natural talent.
Follow these steps every time for a clean, smooth result:
- Apply a crumb coat – spread a thin layer of frosting over the entire cake to seal in any loose crumbs. Don’t worry about making it perfect.
- Chill the cake – pop it in the fridge for at least 20 to 30 minutes until that crumb coat feels firm to the touch.
- Add the main frosting layer – apply a generous amount and work it across the top and sides using your offset spatula.
- Use your turntable – spin the cake slowly as you hold the bench scraper steady against the side. The rotation does the smoothing work for you.
- Warm the scraper – dip it in hot water and dry it quickly before your final pass for an extra glossy, polished finish, a technique backed up by tidy cake presentation advice from experienced decorators.
- Chill again – firm up the frosting before adding any further layers or decorations.
Always chill your cake after the crumb coat. Rushing this step is the single most common reason frosting looks rough and uneven.
One thing that catches people out is using too little or too much frosting. For a standard 3-layer cake, the right frosting quantities are roughly three quarters of a cup per filling layer, one and a half cups on top, and the remainder spread across the sides. Getting this balance right means you’re never scraping desperately for coverage or drowning the cake.
For anyone just getting started, our decorating tips for beginners covers the fundamentals in a really accessible way. And if you want to go further, the full step-by-step cake guide takes you through the whole process from baking to final presentation.
Pro Tip: Use a slightly warm spatula when smoothing the top of the cake. Run it under hot water, dry it off, and glide it across the surface in one confident sweep for a super clean finish.
Decorating shortcuts: no-piping and simple toppings
With your base looking smooth, it’s time to add show-stopping decoration. Here’s a truth that might surprise you: some of the most impressive cakes at bakeries use zero piping. The secret is in choosing toppings and details that do the visual work for you.
These are some of the easiest, most effective options:
- Fresh fruit – strawberries, figs, and raspberries look vibrant and abundant when grouped together
- Edible flowers – instantly elevate a simple cake to something that looks genuinely beautiful
- Chocolate drip – dramatic and striking, and surprisingly straightforward to do
- Textured sprinkles – a handful of high-quality sprinkles can transform a plain cake in seconds
- Metallic dust – brushed across fondant or frosting, it catches the light and looks extraordinarily polished
All of these approaches fall squarely into decorating without piping, which is a brilliant category of techniques for home bakers who want impressive results without years of practice.
| Decoration | Skill level | Visual impact |
|---|---|---|
| Fresh fruit cluster | Beginner | High |
| Edible flowers | Beginner | Very high |
| Chocolate drip | Beginner to intermediate | High |
| Metallic colour dust | Beginner | Very high |
| Textured sprinkles | Beginner | Medium to high |
One genuinely useful expert insight: off-centre fruit clusters look far more professional than a neat, symmetrical arrangement. It sounds counterintuitive, but asymmetry reads as intentional and artistic. Give it a try and you’ll see the difference immediately.
If you’re interested in working with colour dusts for a metallic or pearl finish, we have a full guide on getting the most from them. For a fondant-covered cake, our fondant finishing tips are well worth a read before you start.
For the smoothest possible buttercream to work with underneath your decorations, using quality ingredients matters too. A well-made American buttercream provides the ideal base: stable, smooth, and easy to decorate.
Pro Tip: For a chocolate drip, make sure your cake is properly chilled before you pour the ganache. A warm cake will cause the ganache to run too fast and pool at the base rather than creating those gorgeous, controlled drips.
Presentation perfection: boards, boxes, and final touches
After decorating, finishing touches make all the difference. This is genuinely the area that separates amateur cakes from professional ones, and it’s one of the most overlooked parts of the whole process.
The cake board is often the biggest giveaway. A bare drum board, or one with scruffy edges, immediately undermines even a beautifully decorated cake. Covering your cake board with foil or patterned paper costs almost nothing but adds a proper, considered finish. Match it to your colour scheme and the whole presentation feels intentional.
Before your cake leaves the kitchen, run through these final checks:
- Clean edges – wipe away any smudges on the board or box with a dry cloth
- Tidy base – check where the cake meets the board for any excess frosting
- No fingerprints – fresh gloves when you handle the finished cake prevent marks
- Secure decorations – give any fruit, flowers, or toppers a gentle press to make sure nothing will slide
- Right-sized box – a box that’s too large lets the cake shift and dent in transit
Choosing the right box matters more than most people realise. A cake that moves around during transport can arrive with crushed sides or smeared decoration. Our guide to choosing cake boards explains how to pair boards and boxes properly, and our article on cake board mistakes covers the slip-ups that are surprisingly easy to avoid once you know about them.
A polished board and a well-fitted box turn a good cake into a great one. It’s that simple. These details cost very little extra time but make an enormous impression on anyone who receives your cake.
Why confidence and simplicity make all the difference
Here’s something we genuinely believe after years of being in and around the baking community: the biggest obstacle for most home bakers isn’t skill. It’s the urge to overcomplicate things.
New bakers often assume that more elaborate decoration equals more impressive results. Actually, the opposite is usually true. A smooth, well-chilled cake with a single beautiful topping will almost always look more professional than a busy cake covered in competing elements. The pros know this. Their edge isn’t fussy technique; it’s consistency and attention to the basics.
Every baker who has found their groove will tell you they got there by repeating simple things until they became second nature. If you build confidence in cake decorating one technique at a time, you’ll develop a personal style that feels natural and looks brilliant. Lean into what you enjoy. Your cakes will reflect that joy, and that is something no complicated technique can manufacture.
Simplicity, done with care, always wins.
Elevate every cake with quality decorating supplies
Ready to put these tips into practice? The quality of your supplies genuinely shapes your results. Better tools make smoother frosting, and quality decorations catch the eye in a way that budget alternatives simply can’t match.

At The Vanilla Valley, we’ve been helping home bakers and professionals create stunning cakes since 2009. From cake boards and boxes to sprinkles, colour dusts, and fondant, our professional decorating supplies have everything you need in one place. If you want to keep building on what you’ve learnt today, our step-by-step professional guide is a fantastic next step. Let’s make your next cake your best one yet.
Frequently asked questions
What is the easiest way to make a cake look professional?
Smooth your frosting using a turntable and bench scraper for even, polished sides, then add simple toppings like fresh fruit or edible flowers for an instant upgrade that requires no piping at all.
How much frosting do I need for a layered cake?
For a standard 3-layer cake, use roughly three quarters of a cup of frosting per filling layer, one and a half cups on top, and the rest spread across the sides.
Do I need special tools to decorate cakes well?
A basic set of essential decorating tools including an offset spatula, turntable, and bench scraper will instantly improve your results, with piping bags and a cake leveler adding even more control as you grow.
How do I keep my cake board looking neat?
Cover your cake board with foil or decorative paper before placing the cake on it. This simple step, highlighted in professional cake presentation advice, gives the whole display a finished, considered look.
Recommended
- Make your cakes look more professional: step-by-step guide - The Vanilla Valley
- Beginner Cake Decorating Tips for Stunning Results - The Vanilla Valley
- How to photograph cakes for Instagram: a baker’s guide - The Vanilla Valley
- How to Use Colour Dusts for Professional Cake Details - The Vanilla Valley