
How to photograph cakes for Instagram: a baker’s guide
You’ve spent hours baking and decorating a cake that looks absolutely stunning in real life. Then you take a photo, post it to Instagram, and the result is flat, dull, and nothing like what’s sitting on your worktop. It’s one of the most frustrating experiences for bakers, and it happens to almost everyone at first. The good news is that great cake photography isn’t about expensive equipment or professional studios. With a few simple techniques, the right setup, and a bit of practice, you can take photos that genuinely show off your work and attract the attention your cakes deserve.
Table of Contents
- What you need to get started
- Setting the scene: lighting and backgrounds
- Composing your shot: angles and arrangement
- Editing for impact: apps and adjustment basics
- Posting and engagement: formats, process shots and brand consistency
- Troubleshooting and common mistakes
- Level up your cake photos with expert supplies
- Frequently asked questions
Key Takeaways
| Point | Details |
|---|---|
| Natural light is best | Use natural window light with a diffuser for soft, true-to-life cake photos. |
| Choose clean backgrounds | A clutter-free, neutral background keeps cakes as the main focus in photos. |
| Mix up angles | Try 45-degree, straight-on, and overhead angles to capture your cake’s best features. |
| Edit with restraint | Light edits enhance cake details, but avoid heavy filters for authentic results. |
| Stay consistent | Maintain a signature style and format to build your brand on Instagram. |
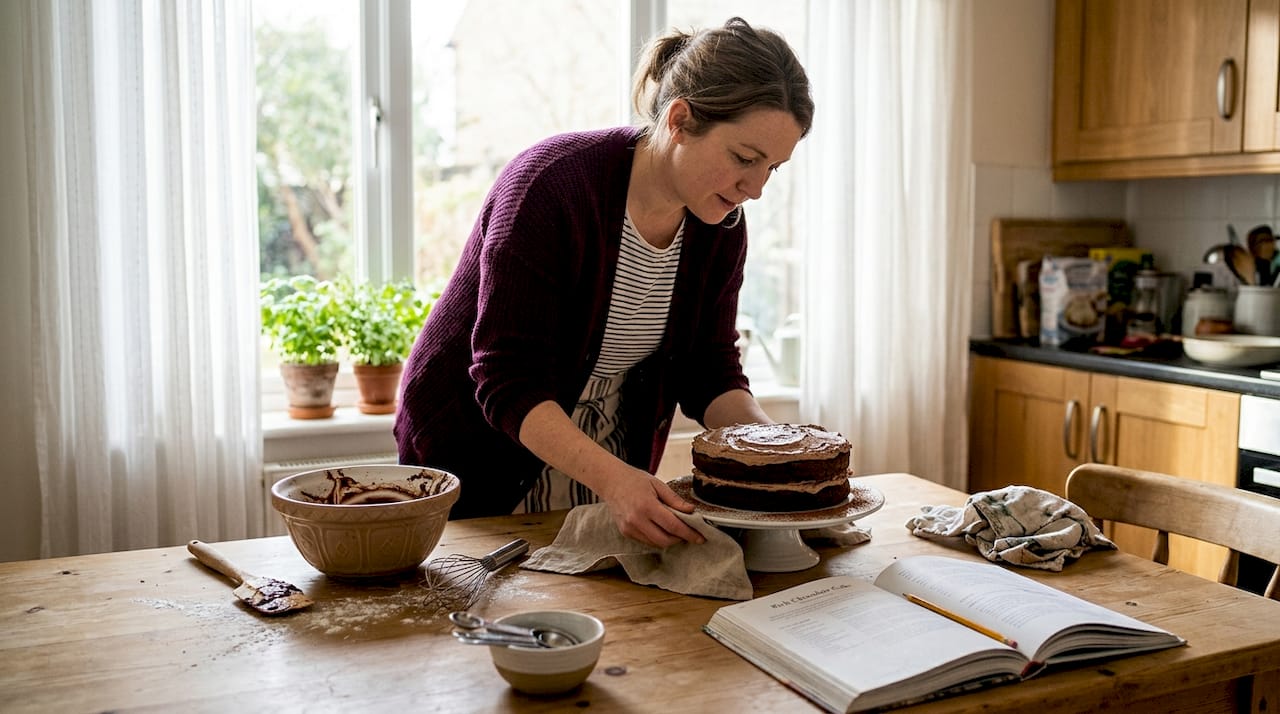
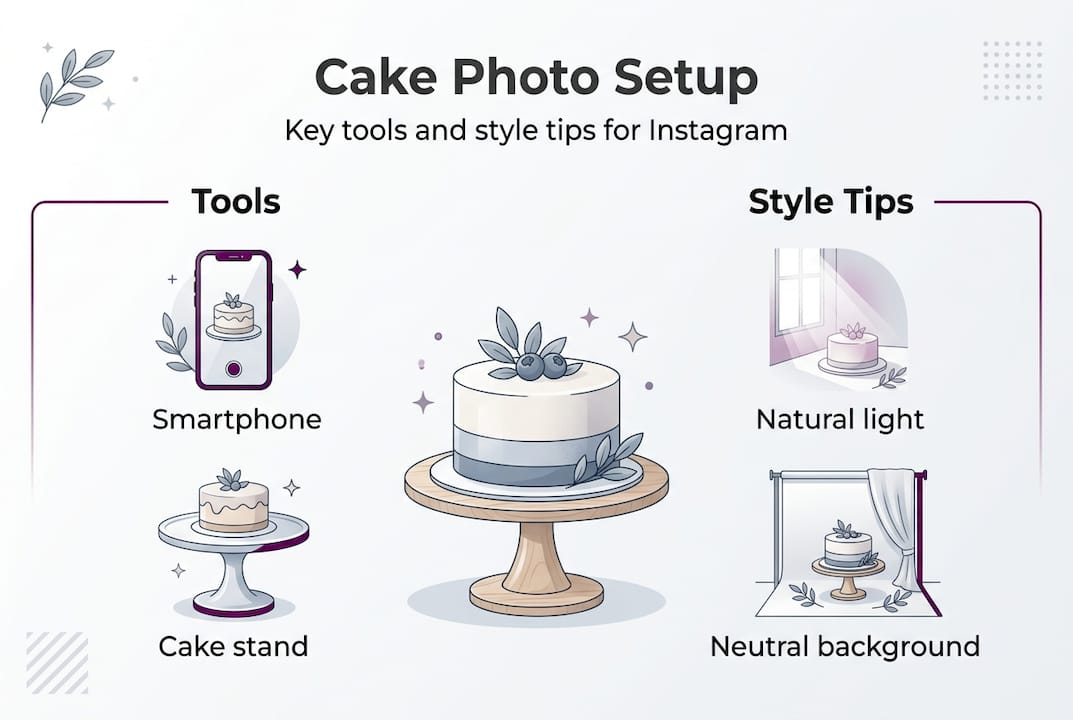
What you need to get started
Before you take a single photo, it helps to gather a few basic items. You don’t need a professional camera or a photography studio. Most of what you need is either free or costs very little.
Here’s what makes a real difference:
- Smartphone or camera — modern smartphones produce excellent results with the right light
- A window with natural light — your single most important tool
- Sheer curtains or a white sheet — to diffuse harsh sunlight
- White foam board or cardboard — acts as a reflector to fill shadows
- A neutral backdrop — white card, a wooden board, or plain fabric
- Optional props — a cake slice, fresh flowers, or a linen napkin
When it comes to food photography lighting basics, natural light near a window, diffused with sheer curtains, avoids harsh shadows and preserves true cake colours and textures. A white foam board placed opposite the light source fills shadows and creates even, flattering light across the whole cake.
Thinking about your cake’s presentation before the shoot also matters. The way you choose a cake board can affect how the base of your cake looks in photos, so it’s worth considering colour and finish as part of your overall visual plan.
| Item | Purpose | Approximate cost |
|---|---|---|
| Smartphone | Capturing the image | Free (already owned) |
| White foam board | Reflecting light, filling shadows | £1 to £3 |
| Sheer curtain or sheet | Diffusing direct sunlight | Free or low cost |
| Neutral backdrop (card/wood) | Clean, uncluttered background | £0 to £15 |
| Simple props | Adding context and depth | £0 to £10 |
Setting the scene: lighting and backgrounds
Once you’ve gathered your tools, your next step is to create the right environment to highlight your cakes. Lighting and backgrounds are the two factors that separate a forgettable photo from one that stops the scroll.
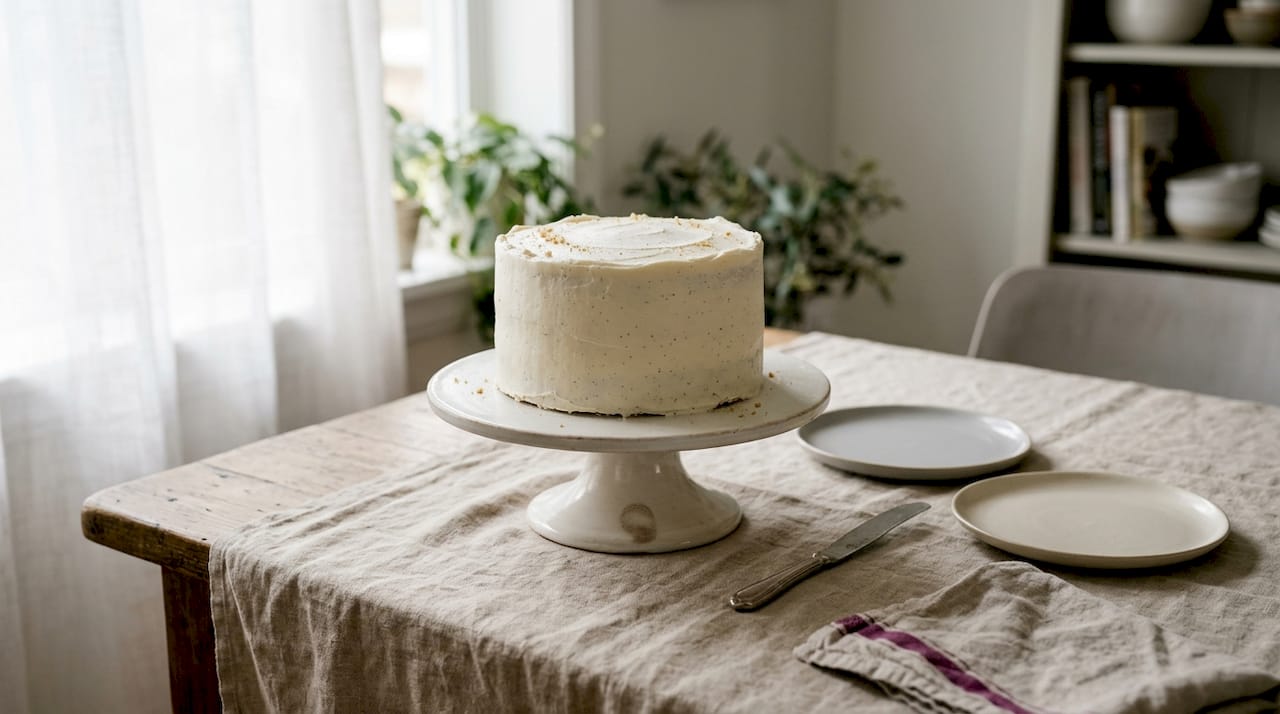
Natural window light is your best friend. Position your cake a metre or so from the window, with the light coming from the side rather than directly above or behind. Avoid shooting in direct sunlight, which creates harsh, unflattering shadows. If the sun is strong, hang a sheer curtain or tape a sheet of white paper over the window to soften the light. The sidelighting technique with a diffuser and reflector opposite softens shadows and highlights textures like buttercream or ganache beautifully.
For backgrounds, simplicity wins every time. Clean, neutral backgrounds like white, beige, wood, or seamless paper keep the focus firmly on your cake.
| Background type | Pros | Cons |
|---|---|---|
| White seamless paper | Clean, versatile, professional | Can look clinical if overused |
| Wooden board | Warm, rustic, popular on Instagram | Can distract if too busy |
| Plain fabric (linen, cotton) | Soft texture, adds warmth | Can crease and look untidy |
| Marble or tile | Elegant, high-end feel | Heavy, expensive, hard to store |
| Plain painted wall | Free, minimal | Limited variety |
Pro Tip: Before buying backdrops, look around your home. A chopping board, a tray, or even a painted piece of MDF from a DIY shop can work brilliantly as a photography surface.
Thinking about cake design principles before you bake can also help you plan a shoot that works visually, since cakes with strong colour contrasts and clean lines tend to photograph better. The way you approach selecting cake boards is part of that same visual thinking.
Composing your shot: angles and arrangement
With your lighting and background in place, now let’s focus on how you arrange and photograph your cake for visually stunning results. The angle you choose can completely change how a cake reads in a photo.
Here are the three most effective angles and when to use each:
- 45-degree angle — the most versatile. It shows both the top and the sides of the cake, making it ideal for layered cakes with height and detailed decorations.
- Straight-on (eye level) — perfect for tall cakes where you want to emphasise height. Position the camera at the midpoint of the cake for a dramatic, editorial look.
- Overhead (flat lay) — works brilliantly for sliced cakes, cupcakes, and biscuits arranged on a board. Shoot directly above for a clean, graphic composition.
Once you’ve chosen your angle, think about composition. Placing your cake off-centre using the rule of thirds (imagine your frame divided into a 3x3 grid and place the cake at an intersection) creates a more dynamic and professional-looking image than centring it every time.
Pro Tip: Switch your phone to portrait mode for close-up detail shots of piping, sprinkles, or painted elements. The background blur draws the eye straight to the texture. You can also explore photography angle tricks on Instagram Reels for creative inspiration.
For arrangement, less is more. A single cake slice placed beside the whole cake, a few edible toppers, or a dusting of icing sugar can add interest without cluttering the frame. If your cake features painted details or modelling paste work, make sure those elements face the camera. Showcase your buttercream textures by shooting at an angle that catches the light across the surface.
Editing for impact: apps and adjustment basics
After capturing your cake, a few editing tweaks can help your image stand out while staying true to your work. The goal is to enhance what’s already there, not to transform it into something unrecognisable.
The two apps most recommended by food photographers are Lightroom Mobile (free version available) and Snapseed (free). Both give you precise control without requiring any technical knowledge.
Key adjustments to make, in order:
- Brightness — lift slightly if the image looks dark, but avoid blowing out highlights
- Contrast — a small increase adds depth and makes colours pop
- White balance — correct any yellow or orange colour casts from artificial light
- Shadows — lift shadows slightly to reveal detail in darker areas
- Clarity or sharpness — a gentle increase brings out texture in buttercream or fondant
Edit lightly using Lightroom Mobile or Snapseed, adjusting brightness, contrast, white balance, and shadows while avoiding heavy filters.
Subtle editing keeps cakes looking real and delicious. Avoid filters that alter colours, especially if clients are ordering based on your photos.
This is particularly important if you’re showcasing specific cake colour palettes or intricate colour dust detailing, where accuracy matters for both aesthetics and client expectations.
Posting and engagement: formats, process shots and brand consistency
Once your photo is edited, it’s time to post in a way that maximises reach and fits your personal or business brand. How you format and present your images on Instagram is just as important as the photo itself.
Here are the key image types to capture for every cake:
- Hero shot — the main, polished image of the finished cake
- Detail shot — a close-up of a specific element like piping, a topper, or a painted finish
- Process shot — a behind-the-scenes image showing a stage of decoration
- Before and after — the undecorated cake next to the finished result
For the feed, use a 1:1 square or 4:5 portrait ratio, as the latter takes up more screen space and performs better for engagement. Shoot vertical content at 9:16 for Reels and Stories, and include process or detail clips to boost interaction.
Consistency in style, whether that’s a warm colour palette, a particular backdrop, or always shooting from the same angle, builds brand recognition over time. Viewers begin to recognise your feed at a glance, which builds trust and loyalty. Explore how professional colour palettes can inform both your cake designs and your photography aesthetic.
For captions, describe the flavour, the technique, or the occasion. Use a mix of niche hashtags (like #buttercreamcake or #weddingcakeuk) and broader ones (#cakesofinstagram) to reach both targeted and general audiences. If you’re just starting out, beginner cake decorating advice and keeping an eye on latest baking trends can help you stay relevant and inspired.
Troubleshooting and common mistakes
Even with all the right practices, small issues can creep in. Here’s how to spot and resolve the most common problems for flawless cake photos.
- Harsh shadows — move the cake further from the window or add a diffuser. Place your foam board reflector on the opposite side to fill the shadow area.
- Yellow or orange colour cast — this usually comes from artificial lighting mixing with natural light. Turn off overhead lights and rely solely on window light, then correct white balance in your editing app.
- Blurry details — tap the screen on your phone to focus on the cake before shooting. Use a small tripod or prop your phone against a stable surface to avoid camera shake.
- Busy or distracting background — strip it back. Remove everything that isn’t intentional. One or two props maximum.
- Flat, lifeless image — check your light direction. If the light is coming from directly in front or above, it flattens the cake. Move to sidelighting for instant improvement.
Natural light consistently produces professional results without the need for expensive gear, which is why it’s the foundation of almost every food photography guide.
Pro Tip: Always review your images at full screen before posting. Small issues like a smudge on the cake board, a stray crumb, or an out-of-focus edge are easy to miss on a small preview but very obvious once posted.
Level up your cake photos with expert supplies
Great photography starts with a great cake, and the details really do show up on camera. Unique decorations, vibrant food colours, and professional-finish fondant all make a visible difference when you’re shooting for Instagram.

At The Vanilla Valley, we stock everything you need to make your cakes as photogenic as they are delicious. From bold food colours and eye-catching sprinkles to elegant cake boards and professional decorating tools, our range is built for bakers who care about the finished result. We’ve been supporting bakers across the UK since 2009, and we’d love to see what you create. Share your Instagram photos and tag us for a chance to be featured on our page.
Frequently asked questions
What is the best lighting for photographing cakes indoors?
Soft, natural window light diffused with sheer curtains produces the most accurate colours and textures for cake photography indoors.
How can I make my cake photos look less cluttered?
Keep your background neutral and clear, use minimal props, and focus the shot on your cake itself rather than the surrounding scene.
Are phone cameras good enough for cake photography on Instagram?
Yes. Current phone cameras with proper lighting and editing easily produce professional-looking cake photos suitable for Instagram.
Should I use filters or heavy edits on my cake pictures?
Avoid heavy filters. Use light editing adjustments for brightness, contrast, and white balance to keep results realistic and appealing.
Recommended
- How to Avoid Making a Fail Cake: Essential Steps - The Vanilla Valley
- How to Choose a Cake Design That Actually Works Easily - The Vanilla Valley
- How to Transport Cake Safely: Step-by-Step Guide for Bakers - The Vanilla Valley
- Complete Guide to Cake Boards for Bakers: Types & Tips - The Vanilla Valley