
Organise Baking Tools: Cut Search Time by 30% in 2026
Many amateur bakers in South Wales waste precious time searching through cluttered drawers and overstuffed cupboards for the right piping nozzle or measuring spoon. This guide teaches a systematic approach to organise your baking tools efficiently, using proven strategies that reduce search time by 30% and transform chaotic kitchen corners into streamlined baking stations. You’ll learn decluttering techniques, smart categorisation, effective storage solutions, vertical space optimisation, and dedicated station creation tailored to typical South Wales kitchens.
Table of Contents
- Prerequisites: What You Need Before Organising Your Baking Tools
- Decluttering Baking Supplies: The First Critical Step
- Categorising Baking Tools By Usage And Type
- Using Labelled Storage Solutions For Visibility And Efficiency
- Maximising Vertical Space In Your Baking Area
- Creating A Dedicated Baking Station For Improved Workflow
- Common Mistakes And How To Avoid Them
- Maintaining Organisation And Measuring Success
- Discover Top Baking Tools & Decorating Tips At The Vanilla Valley
- Frequently Asked Questions
Key Takeaways
| Point | Details |
|---|---|
| Decluttering creates space | Removing expired ingredients and broken tools frees up 25% more usable storage space. |
| Categorisation speeds retrieval | Grouping similar items improves workflow and tool retrieval speed by up to 40%. |
| Clear containers save time | Transparent, labelled storage reduces ingredient search time by 30% and mix-ups by 50%. |
| Vertical storage expands capacity | Wall-mounted pegboards and racks increase accessible space by approximately 25%. |
| Dedicated stations boost efficiency | Purpose-built baking zones reduce preparation time by 20% and enhance ergonomic comfort. |
Prerequisites: What You Need Before Organising Your Baking Tools
Before diving into reorganisation, proper preparation ensures you complete the job efficiently without multiple interruptions. Take inventory of all baking tools, utensils, and ingredients currently scattered across your kitchen. Pull everything out from cupboards, drawers, and pantries so you see the full scope of what needs organising.
Clear a large workspace like your dining table or kitchen counter for sorting items into groups. Gather essential supplies including clear storage containers in various sizes, a label maker or permanent markers, cleaning cloths, and bin bags for disposal. Set realistic time expectations: organising baking tools takes 4-6 hours for measurable benefit, so block off adequate time without rushing.
Understand your personal baking workflow and kitchen constraints before implementing any system. Consider which tools you reach for most frequently during typical baking sessions. Assess available storage areas including cupboard depth, drawer dimensions, and wall space for potential vertical solutions. Take measurements of storage zones to ensure containers and racks fit properly before purchasing organisers.
- Complete inventory of all baking supplies and tools
- Cleared workspace for sorting and decision making
- Clear storage containers in multiple sizes
- Labels and permanent markers for identification
- 4-6 hour time block without interruptions
- Understanding of your baking habits and kitchen layout
Decluttering Baking Supplies: The First Critical Step
Decluttering forms the foundation of effective baking tool organisation by eliminating items that waste space and create visual chaos. Start by checking expiration dates on all ingredients, especially baking powder, yeast, spices, and extracts. Expired leavening agents cause a 25-35% rise in failed bake rates, making this step crucial for baking success.
Examine every tool for damage, rust, or missing parts that render them unusable. Bent whisks, cracked measuring cups, and dulled cake levellers belong in the discard pile. Identify duplicates and keep only the highest quality version of each tool. Three vegetable peelers and five wooden spoons create clutter without adding value.
Create three distinct piles during this process: keep, donate, and discard. Items in good condition you never use should go to charity shops or friends starting their baking journey. Broken or unsafe tools go straight to rubbish. Be honest about what you actually use versus what you think you might use someday. Effective decluttering strategies focus on realistic usage patterns, not aspirational baking goals.
- Check all ingredient expiration dates and discard anything past its prime
- Inspect tools for damage, rust, missing parts, or poor functionality
- Remove duplicate items, keeping only the best quality version
- Sort remaining items into keep, donate, and discard categories
- Dispose of broken tools and expired ingredients immediately
- Package donated items for delivery to charity shops
Categorising Baking Tools by Usage and Type
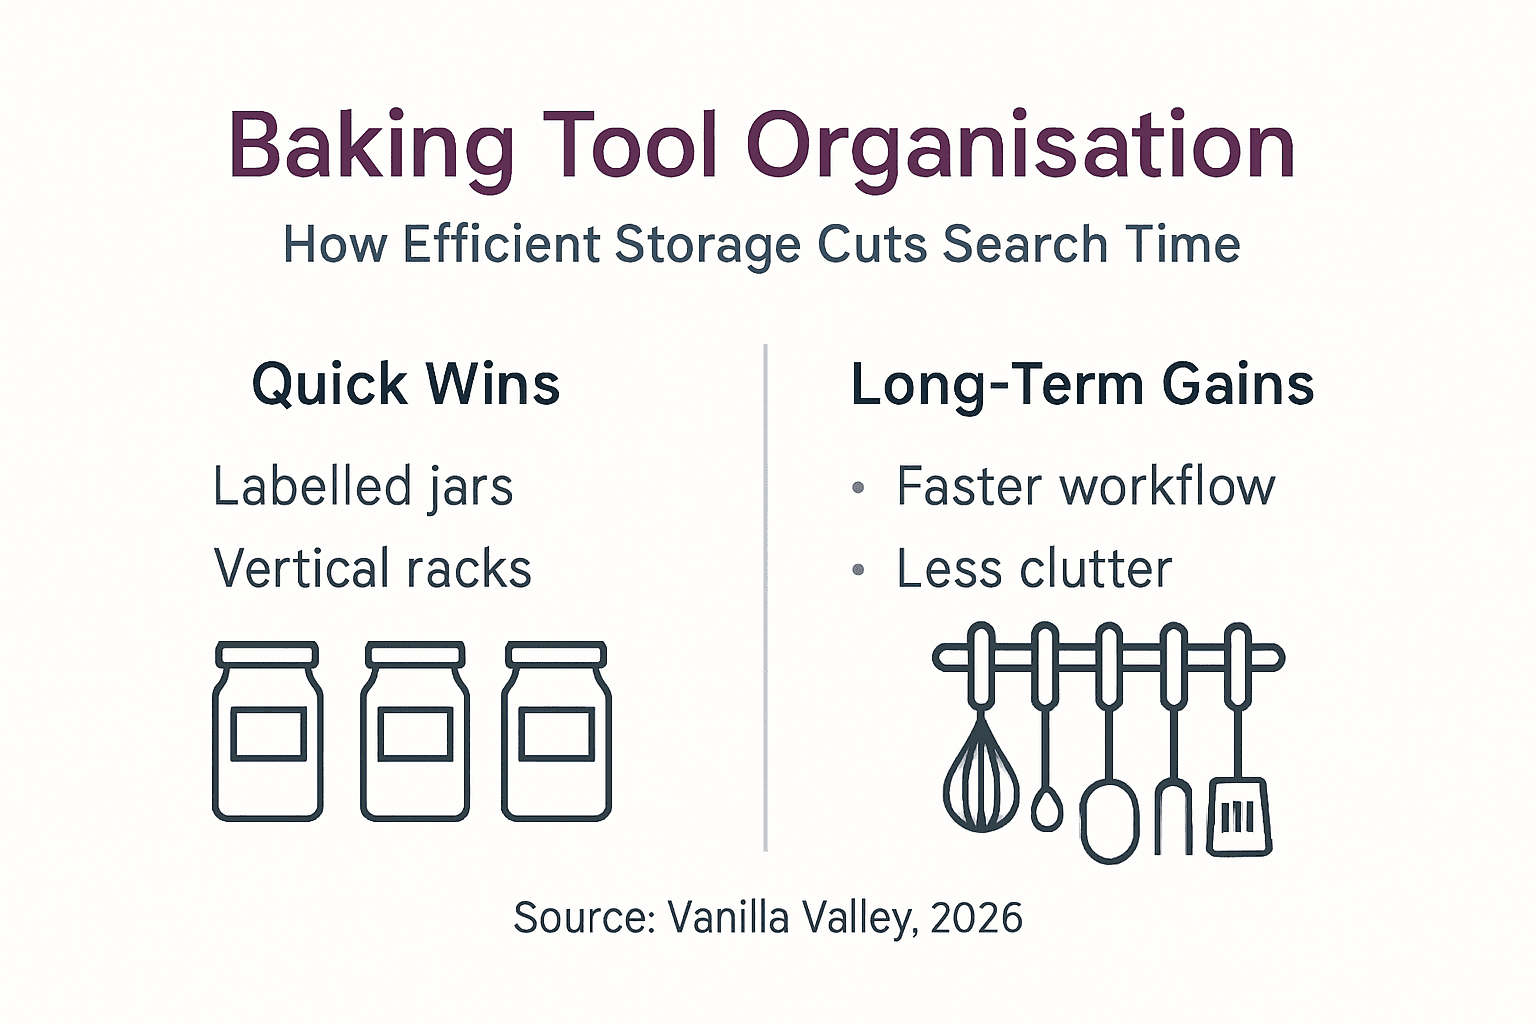
Once you’ve decluttered, logical categorisation dramatically improves how quickly you locate tools during baking sessions. Grouping similar items improves workflow and retrieval speed by up to 40%, transforming chaotic searching into efficient grabbing. Create distinct categories based on tool function rather than storage location.
Establish primary categories including measuring tools (cups, spoons, scales), mixing equipment (whisks, spatulas, mixers), decorating supplies (piping bags, nozzles, fondant tools), baking tins and moulds, and small appliances. Within each category, further divide by frequency of use. Daily essentials deserve prime real estate in your most accessible storage zones.
Your personal baking style should drive category priorities. If you decorate cakes weekly, position your professional baking tools at eye level in easy reach. Occasional-use items like speciality moulds can live higher up or deeper in cupboards. Consider creating a separate category for ingredients versus tools to prevent flour dust coating your whisks.
Adapt these categories to match your kitchen’s physical layout and your dominant baking activities. Someone who bakes bread daily needs different organisation than someone focused on cake decorating. Review your categories after a few weeks of use and adjust based on which items you struggle to find or frequently need simultaneously.
- Measuring tools: cups, spoons, scales, thermometers
- Mixing equipment: whisks, spatulas, bowls, electric mixers
- Decorating supplies: piping bags, nozzles, fondant tools, edible decorations
- Baking vessels: tins, trays, moulds, cake boards
- Small appliances: hand mixers, food processors, stand mixers
- Ingredients: categorised by type (leaveners, sugars, flavourings, decorations)
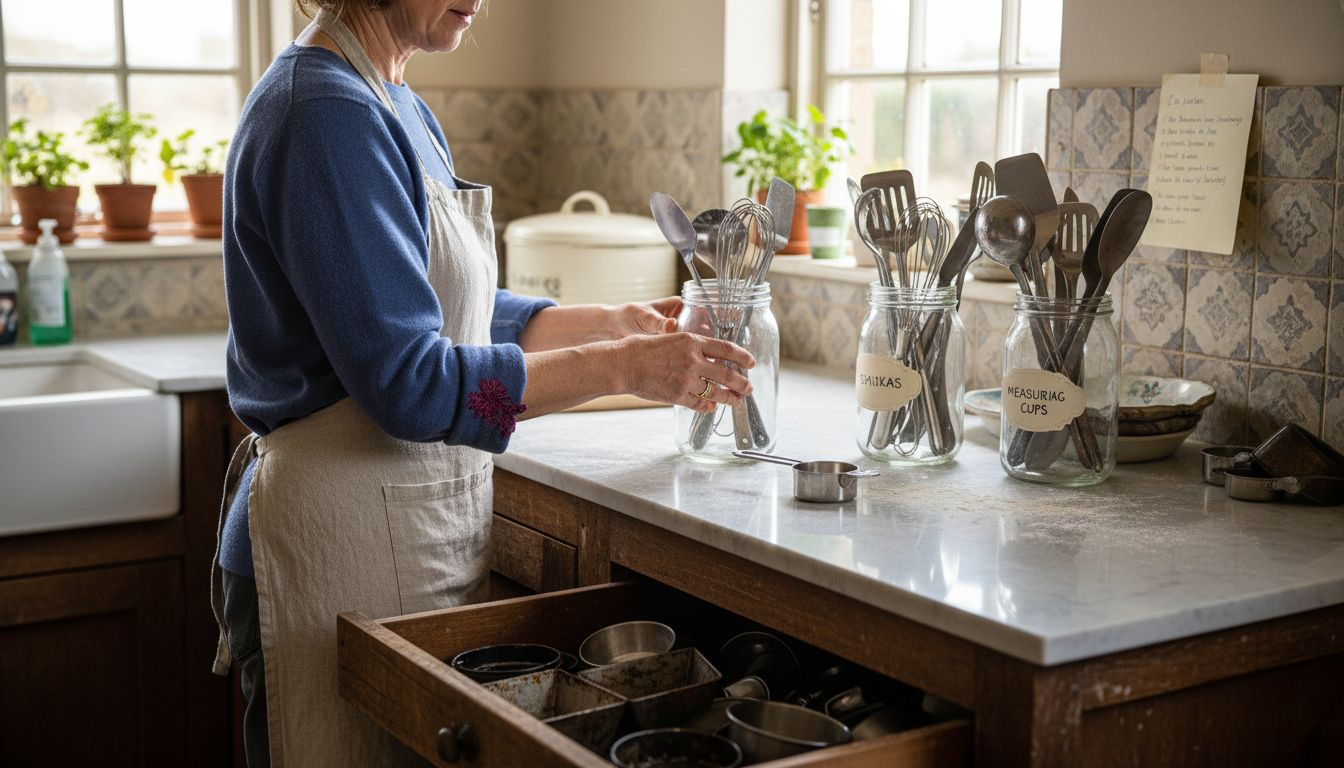
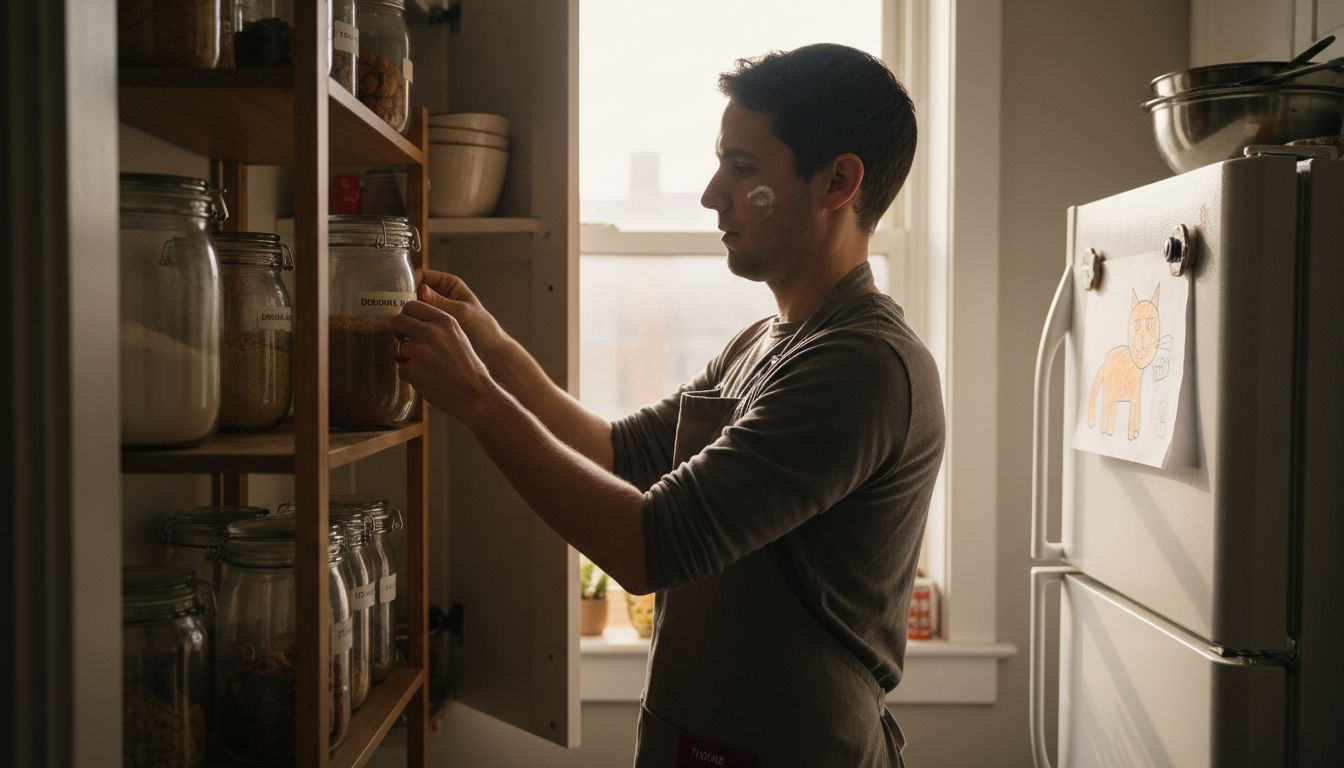
Using Labelled Storage Solutions for Visibility and Efficiency
Proper storage containers with clear labelling eliminate the frustration of mystery containers and incorrect ingredient substitutions. Transparent containers reduce ingredient search time by 30% compared to opaque storage, while clear labelling reduces ingredient errors by 50%. These statistics translate directly to fewer ruined batches and smoother baking sessions.
Select airtight containers for ingredients prone to moisture absorption or staleness. Airtight containers extend ingredient freshness by up to 6 months, protecting your investment in quality supplies. Square or rectangular containers maximise shelf space better than round ones, fitting together without gaps.
Label every container with both contents and purchase or expiry date using a label maker or permanent marker on masking tape. Position labels on the front and top of containers so you can identify contents from any angle. Include measurement conversions on flour and sugar containers to speed up recipe preparation.
Organise filled containers according to the categories you established earlier, grouping all baking powders, sugars, and flavourings together. Store heavier containers on lower shelves to prevent accidents, and place frequently used items at eye level. Stack similar-sized containers to maximise vertical space within cupboards.
Pro Tip: Update labels immediately when refilling containers with fresh ingredients, and clean sticky residue from container exteriors monthly to maintain visibility and kitchen hygiene.
- Choose clear containers allowing instant content identification
- Select airtight options for moisture-sensitive ingredients
- Label with content name, purchase date, and expiry information
- Position labels on front and top for visibility from multiple angles
- Use consistent label format across all containers
- Group containers by ingredient category established earlier
Maximising Vertical Space in Your Baking Area
Smaller South Wales kitchens demand creative storage solutions that capitalise on underused wall space. Vertical storage increases accessible space by approximately 25% without requiring kitchen renovations or expensive cabinetry. Wall-mounted solutions keep frequently used tools visible and within arm’s reach.
Pegboards offer versatile hanging storage for whisks, measuring cups, piping bags, and rolling pins. Install pegboard panels inside cupboard doors or on empty wall sections near your baking station. Adjustable hooks let you reconfigure tool placement as your collection evolves. Magnetic knife strips mounted horizontally hold metal measuring spoons, cookie cutters, and other small metal tools.
Wall-mounted shelving units store less frequently used items like speciality cake tins and seasonal decorating supplies. Position these shelves higher on walls, keeping everyday essentials at waist to shoulder height. Ensure all wall-mounted storage attaches securely to studs or uses appropriate wall anchors to prevent accidents when loaded with heavy tools.
Consider eco-friendly storage solutions like bamboo racks and recycled plastic organisers that align with sustainable baking practices. Compare different vertical storage methods to determine which suits your space and budget.
| Storage Type | Best For | Pros | Cons |
|---|---|---|---|
| Pegboard | Frequently used hanging tools | Highly customisable, visible storage, easy access | Requires wall mounting, tools must be hangable |
| Wall shelves | Tins, moulds, containers | Maximises vertical space, displays items | Can look cluttered if overloaded, needs secure mounting |
| Magnetic strips | Small metal tools, cutters | Space efficient, keeps tools visible | Limited to magnetic items, short length |
| Over-door organisers | Lightweight supplies, wraps | No installation needed, portable | Limited weight capacity, can block door fully |
Pro Tip: Before drilling holes for permanent fixtures, test your layout with removable adhesive hooks to ensure tool placement matches your natural workflow and reach patterns.
Creating a Dedicated Baking Station for Improved Workflow
A purposeful baking station centralises tools and ingredients, creating an efficient workspace that reduces preparation time by 20% compared to gathering supplies from multiple locations. Position your station near the oven for convenient transfer of prepared items to baking. Ensure adequate countertop space for mixing bowls, ingredient prep, and cooling racks.
Organise your station to mirror your typical baking workflow from left to right (or right to left if you’re left-handed). Place ingredient storage on one side, prep and mixing space in the centre, and finished items staging area nearest the oven. This logical flow eliminates backtracking and crossing your own path during busy baking sessions.
Keep your most frequently used tools within immediate reach of your primary work surface. Store everyday measuring cups, wooden spoons, whisks, and spatulas in a countertop caddy or wall-mounted holder right above your workspace. Reserve drawer and cupboard space for less frequent items that would otherwise create countertop clutter.
Maintain your baking station’s organisation by returning tools to designated spots immediately after cleaning. Wipe down work surfaces after each baking session to prevent flour buildup and sticky residue. Restock ingredients before they run out so you never start a recipe only to discover you’re missing a crucial component.
- Position station within easy reach of your oven
- Allocate sufficient countertop space for multiple tasks
- Arrange tools to match your natural workflow direction
- Store frequent-use items at arm’s length from workspace
- Keep work surfaces clear except during active baking
- Establish a cleaning routine to maintain station organisation
Common Mistakes and How to Avoid Them
Even well-intentioned organisation efforts fail when common pitfalls undermine your system. Overstuffed drawers cause 60% of delays as you dig through jumbled tools, while unclear labelling causes 50% of ingredient mix-ups leading to recipe disasters. Understanding these mistakes helps you build sustainable organisation.
Avoid cramming every tool into drawers until they barely close. Overfilled storage defeats the purpose of organisation by making items inaccessible and causing tools to tangle or break. If drawers overflow, reevaluate what truly deserves storage versus donation. Use drawer dividers to create designated zones preventing tools from sliding into chaotic piles.
Inconsistent or missing labels create confusion, especially when multiple family members use the kitchen. Label everything clearly, including obvious items, because what’s clear to you might not be to others. Replace worn or illegible labels promptly before they cause expensive ingredient swaps.
Placing frequently used tools in hard-to-reach locations sabotages efficiency. If you constantly need a step stool to grab mixing bowls, your system needs adjustment. Expert organisation tips emphasise accessibility matching usage frequency.
Neglecting regular ingredient freshness checks leads to disappointing results. Expired baking powder causes a 25-35% rise in failed bake rates, wasting time and ingredients on flat cakes and dense biscuits. Schedule monthly checks of leavening agents and quarterly reviews of all stored ingredients.
- Overfilling drawers until tools tangle and become inaccessible
- Using inconsistent or missing labels causing confusion
- Storing frequent-use tools in difficult-to-reach locations
- Mixing different powders in one unlabelled container
- Skipping regular checks for expired ingredients
- Ignoring your actual baking patterns when designing storage
Maintaining Organisation and Measuring Success
Sustaining your newly organised system requires regular maintenance and honest assessment of what works. Maintenance routines cut re-organisation needs by 50%, saving hours of future effort by preventing gradual decay into chaos. Schedule brief organisation resets every one to three months depending on baking frequency.
Measure success through practical indicators rather than aesthetic perfection. Track how quickly you locate tools during baking sessions compared to your pre-organisation baseline. Notice whether you feel less stressed and more creative when starting new recipes. Monitor whether you’re baking more frequently now that setup feels effortless rather than overwhelming.
Gather informal feedback from family members who share the kitchen. Ask whether they can find baking supplies without asking for help, indicating your labelling system works for multiple users. Observe pain points that emerge during actual use rather than theoretical planning.
Periodically refresh your supply of frequently used ingredients before they run out entirely. Discard expired items during monthly checks rather than letting them accumulate. Wipe down storage containers and shelving to remove flour dust and sticky residue that gradually makes labels illegible.
- Schedule organisation reviews every 1-3 months based on baking frequency
- Time how long tool location takes compared to your pre-organisation baseline
- Notice changes in baking frequency and stress levels as indicators of success
- Ask family members whether they can locate supplies independently
- Check ingredient expiration dates monthly and discard outdated items
- Clean storage containers and update labels quarterly
- Adjust tool placement based on evolving baking patterns and seasonal needs
Discover Top Baking Tools & Decorating Tips at The Vanilla Valley
Now that you’ve organised your baking space, explore quality tools and supplies that enhance your newly efficient workflow. The Vanilla Valley offers specialised baking tools for home bakers including professional-grade measuring equipment, piping nozzles, and decorating supplies perfect for South Wales bakers.

Visit the North Cardiff showroom to see products firsthand and receive personalised advice on building your baking toolkit. Browse comprehensive guides on cake decorating techniques and tools to expand your skills alongside your organised workspace. The Vanilla Valley stocks everything from everyday essentials to speciality items, with next-day delivery across South Wales and free shipping on qualifying orders. Check the online store for seasonal promotions and loyalty club benefits that reward your baking passion.
Pro Tip: Visit The Vanilla Valley blog regularly for fresh inspiration, expert organisation advice, and seasonal decorating ideas that keep your baking creative and enjoyable year-round.
Frequently Asked Questions
How do I know when it’s time to declutter my baking tools?
Reorganise when baking sessions consistently delay because you can’t quickly locate essential tools or ingredients. If drawers feel jammed, shelves overflow, or you discover multiple expired ingredients during routine baking, these signal decluttering urgency. Schedule a reset when frustration outweighs the enjoyment of baking.
What’s the best way to label baking containers for easy identification?
Use clear printed labels from a label maker or write neatly with permanent marker on masking tape for budget-friendly options. Include both content name and expiry date on labels positioned on the container front and top for visibility from multiple angles. Update labels immediately when refilling to maintain accuracy and prevent costly ingredient mix-ups.
How can I maximise storage in a small South Wales kitchen?
Install pegboards and wall-mounted racks to capture unused vertical space without sacrificing countertop or floor area. Use stackable clear containers that nest efficiently and allow you to see contents instantly. Create a dedicated baking station that centralises tools and ingredients, eliminating the need to spread supplies across multiple rooms. Explore eco-friendly kitchen storage ideas that combine sustainability with space efficiency.
How often should I review my baking organisation to maintain efficiency?
Schedule organisation reviews every one to three months depending on how frequently you bake and how quickly clutter accumulates. Monthly ingredient freshness checks prevent expired items from causing recipe failures. Reset tool placement whenever your workflow feels sluggish or you repeatedly struggle to locate specific items, indicating your system needs adjustment to match evolving baking patterns.
Recommended
- 7 Expert Tips for Organising Your Baking Supplies at Home - The Vanilla Valley
- Professional Baking Tools – Elevating Bakery Standards - The Vanilla Valley
- 7 Best Baking Tools for Home Bakers to Master Cake Decorating - The Vanilla Valley
- Bulk-Buy Baking Supplies: Savings for Serious Bakers - The Vanilla Valley