
Use Cake Dummies for Practice and Display: Step-by-Step Guide
Choosing the right tools makes every decorating session more enjoyable and productive. For South Wales decorators, cake dummies crafted from high-quality expanded polystyrene deliver the strength and versatility needed for practice and eye-catching shop displays. Whether preparing for a Cardiff event or refining piping techniques at home, these reusable shapes reduce waste and open up creative possibilities. Discover how selecting and preparing the perfect cake dummy helps you achieve professional results that last on both practice projects and store showcases.
Table of Contents
- Step 1: Select Suitable Cake Dummies And Materials
- Step 2: Prepare Cake Dummy Surface For Decorating
- Step 3: Apply Decorations And Practise Techniques
- Step 4: Perfect Finished Look For Display Settings
- Step 5: Verify Stability And Presentation Quality
Quick Summary
| Key Point | Explanation |
|---|---|
| 1. Choose Quality Cake Dummies | Invest in high-quality expanded polystyrene dummies for durability and versatility in your decorating practice. |
| 2. Secure Dummy for Stability | Use buttercream to anchor your dummy to the board, ensuring it won’t shift while you decorate. |
| 3. Experiment with Techniques | Use the dummy to practice various decorating techniques without the pressure of wasting real cake. |
| 4. Perfect Display Appearance | Refine your decorations and ensure the dummy is visually appealing before display or presentation. |
| 5. Check Stability Before Display | Always verify the stability of your cake dummy to prevent any mishaps during transport or display. |
Step 1: Select Suitable Cake Dummies and Materials
Choosing the right cake dummies and supporting materials is absolutely foundational to your practice and display success. This step determines not only how realistic your practice cakes will look, but also how durable and cost-effective your investment becomes over time. Getting this right means you’ll have reliable tools that work with you, not against you, as you develop your decorating skills.
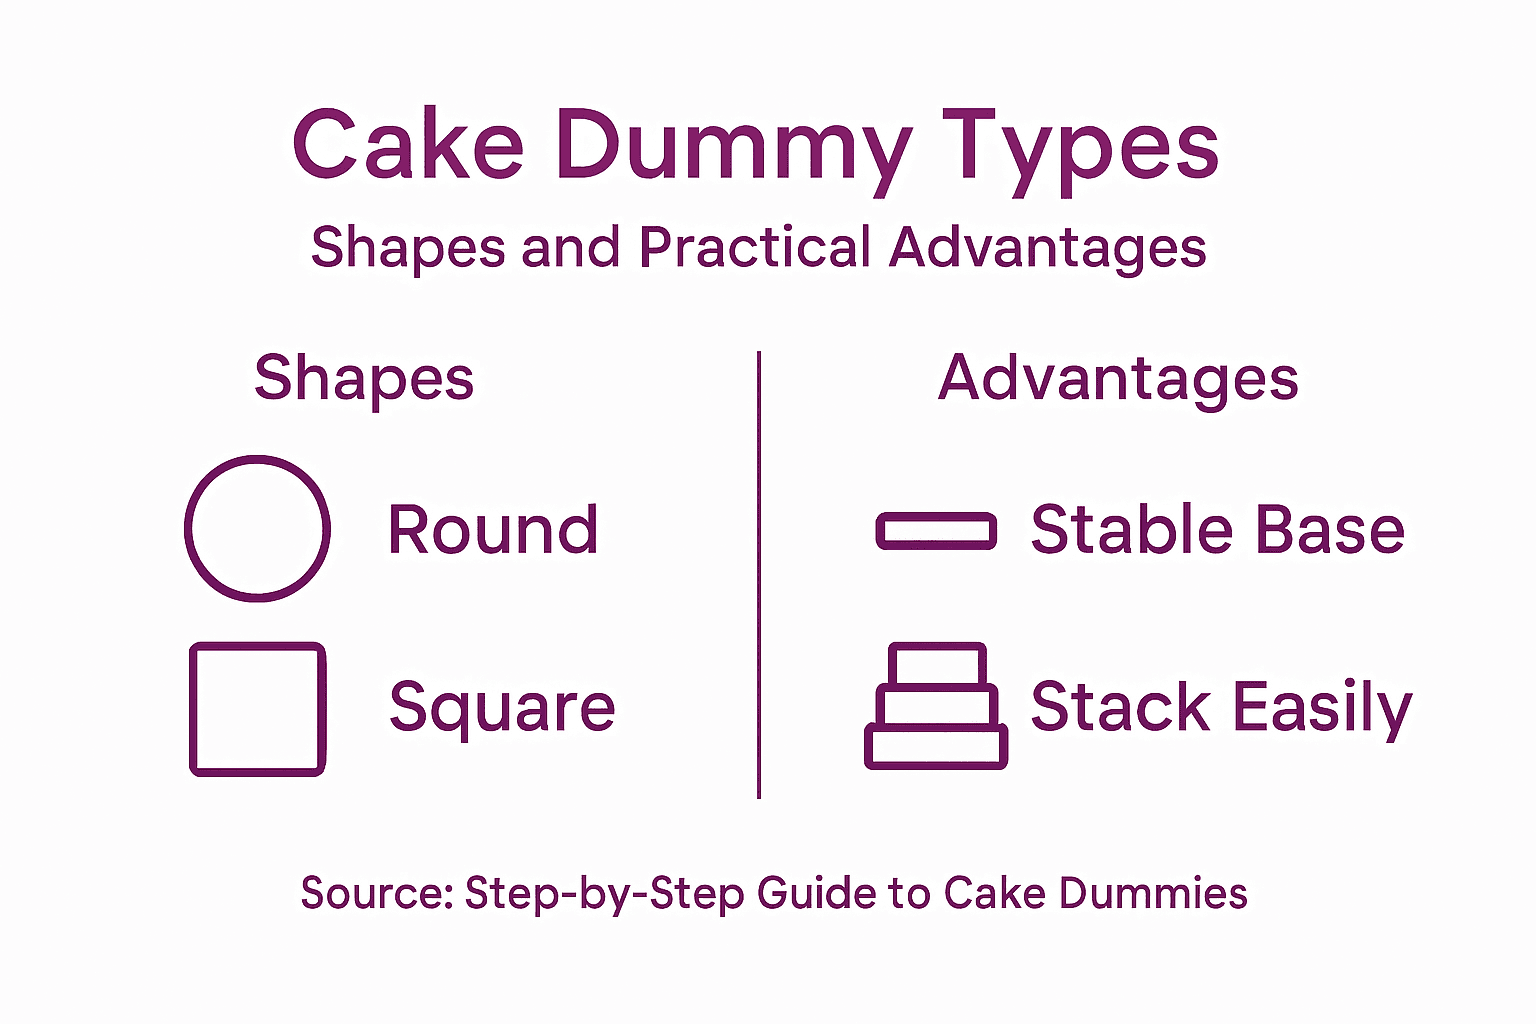
Start by understanding what you’re working with. High-quality expanded polystyrene dummies offer the strength and density you need for stacking multiple tiers and practising heavy decorating techniques without worry. South Wales decorators often appreciate that these dummies come in various shapes beyond the standard round: square, heart, hexagonal, and even custom cuts if you’re planning something truly unique for a client showcase. Think about what shapes you’ll most frequently encounter in your decorating work. If you’re regularly asked to create three-tier wedding cakes, invest in a selection of round dummies in sizes 6, 8, and 10 inches. If you’re doing more contemporary designs, square dummies give you that modern edge. The beauty of dummies is that they’re reusable and incredibly durable, which means your initial purchase becomes a long-term investment rather than a throwaway expense. You’ll also want to consider the appropriate cake board selection for displaying your dummy cakes securely, as the board and dummy work together as a system.
Beyond the dummies themselves, gather your supporting materials. You’ll need quality cake boards that sit beneath your dummies, providing stability and a professional presentation surface. Investing in sturdy boards in various sizes means your display cakes look polished and shop-ready. Consider also having dowels or bubble tea straws on hand for internal support, particularly when stacking multiple tiers. Many professional decorators in Cardiff and surrounding areas keep a dedicated box of dummies and boards, allowing quick setup for practice sessions or client consultations. This preparation approach saves you time and eliminates excuses for skipping practice.
Here is a comparison of common cake dummy shapes and their best usage scenarios:
| Dummy Shape | Typical Application | Practical Advantage |
|---|---|---|
| Round | Traditional tiered wedding | Versatile, classic look |
| Square | Modern celebration cakes | Edgy, contemporary style |
| Heart | Anniversary or romantic cakes | Emphasises theme, eye-catching |
| Hexagonal | Unique or custom designs | Distinctive display, client intrigue |
Pro tip: Start with a modest selection of three dummies in sizes you’ll use most (typically 6, 8, and 10 inches) and gradually expand your collection as specific client requests emerge, rather than buying every size upfront.
Step 2: Prepare Cake Dummy Surface for Decorating
Preparing your cake dummy’s surface properly makes the difference between a wobbly, frustrating decorating experience and a smooth, professional result. This step involves securing your dummy to its board and creating an ideal surface for your frosting or fondant, ensuring everything stays in place whilst you work your creative magic.
Begin by anchoring your dummy firmly to the cake board. Apply a small dollop of buttercream directly onto the board where your dummy will sit, then press the dummy down firmly and hold it steady for a moment. This buttercream acts as an adhesive, and when chilled, it locks your dummy in position so it won’t shift whilst you’re spreading frosting or piping details. Place a non-slip mat beneath your board for extra stability, particularly if you’re working on a smooth kitchen counter. Since dummies are lightweight compared to actual cakes, this grounding step prevents frustrating movement. Here’s where dummy work genuinely saves you time: because there are no actual cake crumbs to deal with, you can skip the traditional crumb coat entirely. Simply clean the dummy’s surface with a dry cloth or soft brush to remove any dust from storage, and you’re ready to apply your frosting directly. If you want an extra-smooth finish before adding fondant or detailed decorations, a thin crumb coat layer of buttercream creates a perfect base. You might also consider gently sanding any sharp edges or rough spots on the dummy’s surface, which prevents your covering materials from snagging or tearing.
Once your dummy is secured and the surface is prepared, you’re ready to begin frosting. Some decorators apply a thin outline of buttercream around the dummy’s base to help fondant adhere more securely, particularly if you’re covering the entire surface with rolled fondant. Think of this as creating visual and tactile guidelines for your decorating work. This preparation ensures an even, professional finish that clients will be impressed by when viewing your display cakes in your shop or studio.
Pro tip: Chill your buttercream for 10 to 15 minutes after securing the dummy to the board, allowing it to set completely and prevent any wobbling whilst you begin decorating.
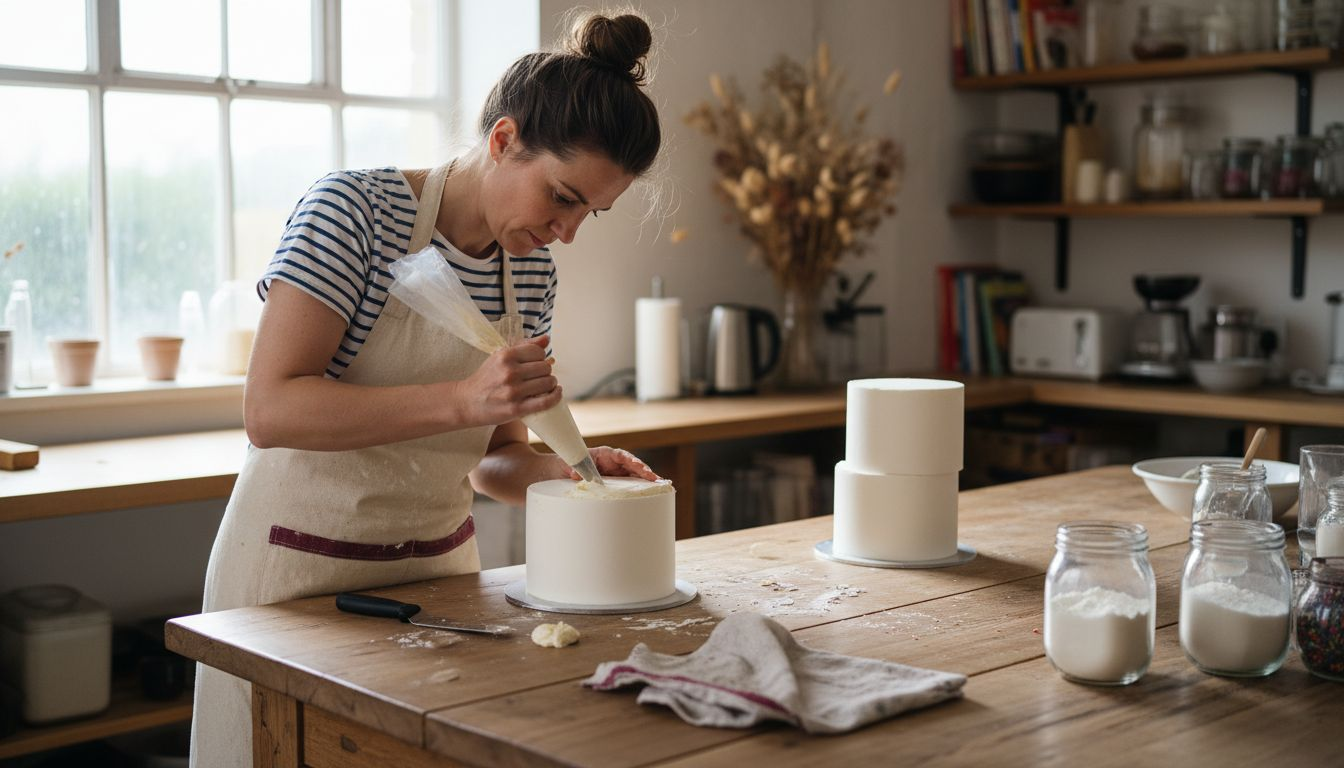
Step 3: Apply Decorations and Practise Techniques
This is where your cake dummy truly shines. Now you get to experiment freely, trying new ideas and refining your skills without the pressure of working on a real cake that a client will eat. Whether you’re a beginner nervous about your first fondant application or an experienced decorator wanting to master a novel technique, your dummy becomes your creative playground.
Start by applying your chosen base layer, whether that’s buttercream, ganache, or fondant. The beauty of practising on a dummy is that you can experiment with placing accessories and intricate designs without worrying about wasting expensive ingredients or creating an unusable cake. If you want to try a new piping technique, go ahead and practise that rose garden you’ve been nervous about. If you’ve always wondered how to execute a particular fondant texture or embossing pattern, now’s your chance. Apply layers generously, make mistakes, scrape it off, and try again. The dummy won’t judge you, and neither will anyone else. Your dummy can support the weight of multiple icing layers and heavy decorative elements like sugar flowers, fresh flowers, or elaborate hand-crafted pieces, so you can build your design with confidence. This is genuine practice territory where skill improvement happens naturally because you’re repeating techniques without real-world consequences. Many South Wales decorators use their display dummies to test client ideas before committing to the actual cake. A bride wants to see how a particular colour scheme will look? Decorate your dummy. A customer is considering a bold new design concept? Your dummy lets you show them exactly what to expect.
As you work through your techniques, take photos of your finished dummy cakes. These images become invaluable portfolio pieces for your shop display, your website, or your social media. Beginner cake decorating tips can guide you through foundational approaches, whilst more advanced decorators might explore creative buttercream techniques to expand their repertoire. The dummy doesn’t expire, doesn’t dry out, and doesn’t go stale, so you can leave your creation up for days or even weeks as a shop display piece that attracts customers and showcases your abilities.
Pro tip: Keep a dedicated notebook or digital folder documenting which techniques you practised on each dummy, noting what worked brilliantly and what you’d adjust next time, transforming each practice session into measurable skill progression.
Step 4: Perfect Finished Look for Display Settings
Your dummy cake is now fully decorated, and this final step is about elevating it from a practice piece to a genuine showstopper. Whether you’re displaying it in your shop window, at a wedding fair, or on your studio shelves, perfecting those finishing touches transforms your dummy into a customer-attracting masterpiece that showcases your decorating prowess.

Begin by stepping back and examining your cake with fresh eyes. Look for any imperfections in your fondant application, uneven frosting lines, or areas where your piping could be sharper. Now’s the time to make those adjustments. Smooth out any wrinkles in your fondant using a heat gun on low setting or a fondant smoother, working gently to avoid creating more problems. If your buttercream needs touching up, use a warm spatula or palette knife to blend any rough edges. Consider whether your current decoration tells the story you want to convey. Does it need additional decorative accents? Perhaps delicate sugar flowers, hand-painted details, or metallic touches that elevate the design? High-quality polystyrene bases support detailed decoration for a truly professional presentation that catches the eye. This is your opportunity to add those finishing flourishes that make clients gasp when they walk past your display. A simple cake becomes extraordinary with the right adornments. Think about your target audience. Are you creating a wedding cake display? Add some sophistication with fine detailing and elegant colour palettes. Planning to attract customers for celebration cakes? Go bold with vibrant colours and playful design elements.
Once you’re satisfied with every detail, consider your display location carefully. Your dummy maintains its appearance long-term without deterioration, unlike a real cake that would go stale or develop mould, making it ideal for permanent shop displays. Position your finished dummy where lighting enhances its details. Natural daylight shows off fondant finishes beautifully, whilst soft spotlighting creates drama and draws attention. Make sure your dummy is stable and secure, positioned at eye level so customers can fully appreciate your work. Photograph your finished creation from multiple angles for your portfolio and social media. These images become your marketing assets, showcasing your skills to potential clients who are browsing online or visiting your shop. Your dummy cake works tirelessly for you, day after day, without requiring refrigeration or replacement.
Pro tip: Refresh your display dummy’s appearance seasonally by adding new decorative accents that match current trends or upcoming celebrations, keeping your shop window looking fresh and contemporary without the expense of creating entirely new display cakes.
Step 5: Verify Stability and Presentation Quality
Before your dummy cake goes on display or travels to an event, you need to verify that everything is secure and visually flawless. This verification step prevents embarrassing mishaps during transport or display and ensures your cake maintains its stunning appearance for as long as it’s showcasing your work.
Start by checking the foundational stability of your entire setup. Gently press down on your cake dummy from different angles to ensure it sits firmly on the cake board without any wobbling or shifting. If you feel any movement, your buttercream adhesive may not have set properly. Return your dummy to the fridge for another 15 to 20 minutes and test again. If you’ve stacked multiple tiers, use buttercream as glue and chill to set layers stably, ensuring each tier bonds securely before adding the next level. Test the integrity of each stacked layer by gently pressing on the top tier. You shouldn’t detect any movement between layers. For multi-tiered displays destined for transport, consider using dowels or bubble tea straws inside the lower tiers to provide internal support that prevents shifting. Now inspect your presentation quality with meticulous attention. Walk around your completed dummy cake and examine it from every angle, as customers and clients will do. Look for uneven frosting application, fondant imperfections, or decorative elements that have shifted slightly. Check that piped details are sharp and clean, and that any added embellishments are securely attached. Smooth any final rough spots using a warm spatula or fondant smoother. Ensure your cake board is spotless and attractive, free from crumbs, smudges, or debris that would undermine your professional presentation.
Once you’re confident in stability and appearance, position your dummy on a secure, level surface away from direct heat sources, moisture, or high-traffic areas where it could be accidentally bumped. Use a non-slip mat under the board if you’re displaying on polished surfaces, keeping everything grounded and stationary. If you’re transporting your dummy to an event, wedding fair, or client consultation, secure the cake board in a sturdy box with padding to prevent movement during the journey. Your dummy’s lightweight nature makes transport manageable, but stability verification ensures it arrives looking exactly as impressive as when it left your studio.
The following table summarises essential stability checks for dummy cake displays:
| Stability Check | Why It Matters | What to Do If Problem Found |
|---|---|---|
| Base wobbling | Prevents toppling risk | Re-secure with adhesive, re-chill |
| Tier movement | Maintains neat stacking | Add support dowels or chill layers |
| Decorative element shifting | Ensures lasting finish | Adjust placement, reinforce with glue |
| Cake board cleanliness | Enhances presentation | Wipe board, remove debris |
Pro tip: Document your dummy cake’s setup by photographing it from multiple angles immediately after stability verification, creating a visual reference should you need to replicate the display or recreate similar designs for future clients.
Master Cake Decorating with the Right Tools and Supplies
The challenge of practising cake decorating using dummies means you need durable, versatile materials that support your learning and showcase your skill with confidence. The article highlights the importance of choosing proper dummies, cake boards, and supports that help prevent wobbling and allow you to experiment with techniques safely. Achieving flawless finishes and stunning displays is your goal – yet sourcing reliable supplies that meet these needs can feel overwhelming.
At The Vanilla Valley, we understand these concerns deeply. Since 2009 we have proudly supplied decorators across South Wales, including North Cardiff, with top-quality cake boards, cake decorating essentials, and reusable materials that make practice sessions and displays simpler and more professional. Whether you require sturdy cake boards to secure your dummies or vibrant edible decorations to bring your designs to life, our broad range of products is designed to elevate your cake artistry.

Ready to transform your practice into perfection and impress clients with every decorated dummy cake Settling for less is no longer an option Explore our specially selected cake decorating supplies now at The Vanilla Valley and discover how easy it is to gain confidence and create flawless showpieces. Start your journey with trusted tools that work as hard as you do by visiting our main site today. For expert advice and inspiration, also check out our valuable Cakespiration articles and ensure each step of your creative process is supported and seamless.
Frequently Asked Questions
How do I select the right cake dummies for practising?
Choosing the right cake dummies involves considering the shapes and sizes you’ll most often use. Start with a selection of three dummies in sizes 6, 8, and 10 inches, suitable for typical cakes, and expand your collection as needed based on client requests.
What materials do I need for preparing my cake dummies?
In addition to cake dummies, gather quality cake boards, dowels or bubble tea straws for internal support, and buttercream or fondant for decorating. Ensure you have everything on hand for an efficient setup before you begin practicing.
How can I ensure my cake dummy is stable for display?
Verify the stability of your cake dummy by gently pressing down on it from various angles to check for wobbling. If you find any movement, chill your dummy in the fridge for 15 to 20 minutes to set the buttercream adhesive properly before proceeding.
What techniques can I practise on cake dummies?
You can practise a variety of techniques on cake dummies, including fondant application, piping designs, and adding decorative accents. Use the dummy as a creative space to experiment freely without the pressure of working on an edible cake, enabling you to try new ideas and refine your skills.
How do I prepare the surface of the cake dummy before decorating?
Start by anchoring the dummy to the cake board using a small dollop of buttercream, then smooth the surface with a dry cloth or soft brush. Optionally, apply a thin crumb coat layer of buttercream before adding fondant or detailed decorations for a flawless finish.
How can I enhance the visual appeal of my finished dummy cake?
To enhance the visual appeal, focus on fine details such as smoothing out imperfections, adding decorative elements, and ensuring a clean cake board. Experiment with seasonal accents to keep your display current and attractive, as a well-presented dummy can significantly draw customer interest.