
Master crumb coating for flawless cake finishes: A step-by-step guide
TL;DR:
- Crumb coating creates a smooth, crumb-free surface and helps lock in moisture.
- Choose buttercream for ease and flexibility, ganache for a professional, firm finish.
- Proper application and chilling of the crumb coat are essential for a flawless final cake.
There’s a common belief among home bakers that crumb coating is something only professionals bother with. Skip it, the thinking goes, and you’ll save time without anyone noticing. But here’s the thing: that thin, almost invisible layer of frosting is what separates a cake that looks homemade from one that looks genuinely stunning. It traps loose crumbs, creates a smooth canvas for your final decoration, and even helps lock in moisture. Whether you’re baking your first layered sponge or your fiftieth celebration cake, understanding the crumb coat properly will change the way you work.
Table of Contents
- Why crumb coating matters: The science and art
- Choosing your crumb coat: Buttercream vs ganache
- Step-by-step: Preparing and applying the crumb coat
- Troubleshooting and mastering advanced crumb coating
- The uncomfortable truth most bakers miss about crumb coating
- Polish your cake decorating: Get supplies and expert help
- Frequently asked questions
Key Takeaways
| Point | Details |
|---|---|
| Crumb coating is essential | Always apply a crumb coat for a neat finish and improved flavour in layered cakes. |
| Choose the right frosting | Buttercream suits beginners, while ganache delivers professional results for tiered cakes. |
| Chilling sets the coat | Chill the crumb-coated cake for up to an hour for a smooth, stable finish. |
| Advanced techniques matter | Use multiple coats and seal edges on crumb-heavy cakes for best results. |
Why crumb coating matters: The science and art
So what exactly is a crumb coat? Think of it as the undercoat before you paint a wall. It’s a thin layer of frosting applied all over the outside of your assembled cake, designed to catch and seal in any loose crumbs before your final, beautiful layer goes on. Without it, those crumbs migrate into your top coat and create a messy, speckled finish that no amount of smoothing will fix.
“A crumb coat is the secret weapon that separates a polished cake from a pretty one. It’s not optional, it’s essential.”
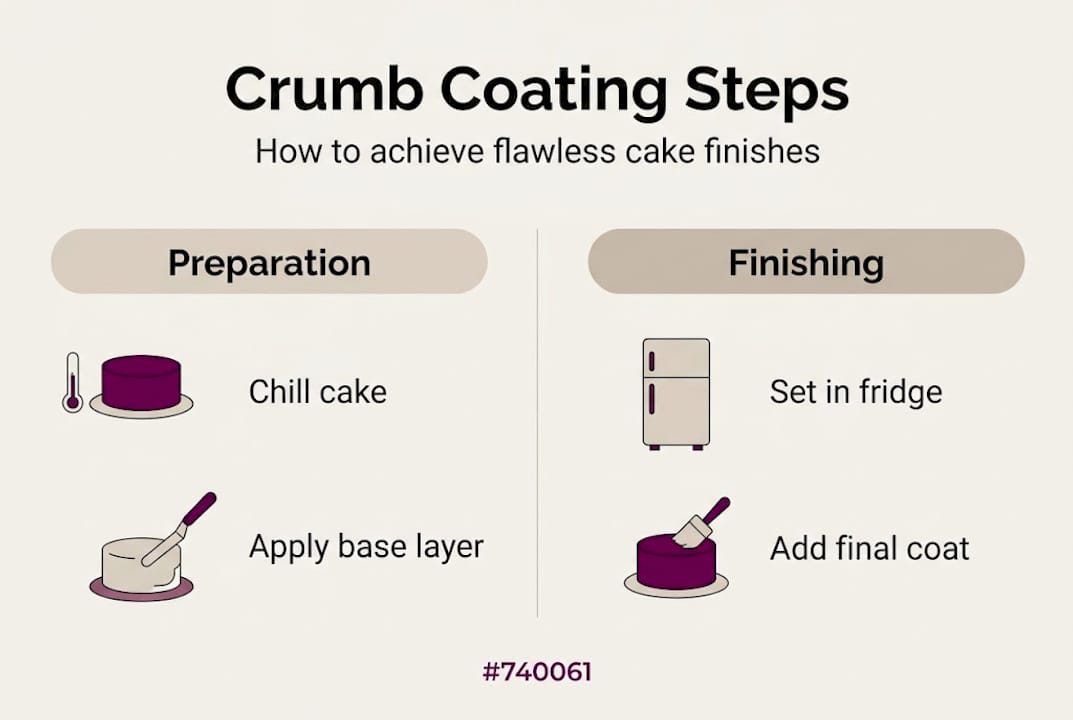
Crumb coating is applied after cooling and levelling cake layers to create a smooth base. That sequencing matters enormously. A warm cake will melt your frosting on contact, and an unlevelled cake will make achieving a straight finish nearly impossible.
Here’s why bakers at every level benefit from this step:
- Traps crumbs so your final coat stays clean and smooth
- Creates a stable base for fondant, buttercream, or ganache finishes
- Locks in moisture, helping your cake stay fresh longer
- Reveals structural issues early, like uneven layers or gaps, so you can fix them before the final coat
- Saves time overall because your final coat goes on far more easily
Amateurs often skip this step because it feels like extra work. Professionals never skip it because they know the payoff is enormous. If you’re just starting out, our beginner cake tips are a brilliant place to build your foundation. And if you’re already baking regularly, our guide to professional cake finishing will help you push your results even further.
The crumb coat also protects flavour. Exposed sponge dries out quickly. That thin layer of frosting acts as a seal, keeping the interior soft and delicious right up until the moment it’s served.
Choosing your crumb coat: Buttercream vs ganache
Once you’re committed to crumb coating, the next question is: what do you use? The two most popular options are buttercream and ganache, and each has real strengths depending on your situation.
Buttercream is easier for beginners; ganache offers professional results but is temperature-sensitive. That’s a fair summary, but let’s break it down properly.
| Feature | Buttercream | Ganache |
|---|---|---|
| Ease of use | Very easy | Moderate to advanced |
| Setting time | Faster in fridge | Needs careful temperature control |
| Finish quality | Smooth, soft | Ultra-smooth, firm |
| Best for | Home bakers, casual cakes | Display cakes, fondant work |
| Flavour | Sweet, creamy | Rich, chocolatey |
| Temperature sensitivity | Low | High |
Buttercream is forgiving. It spreads easily, sticks well to sponge, and sets quickly in the fridge. It’s ideal when you’re working at home or under time pressure. The downside is that it can be slightly softer in warm conditions, which matters if your cake will be displayed at room temperature for hours.
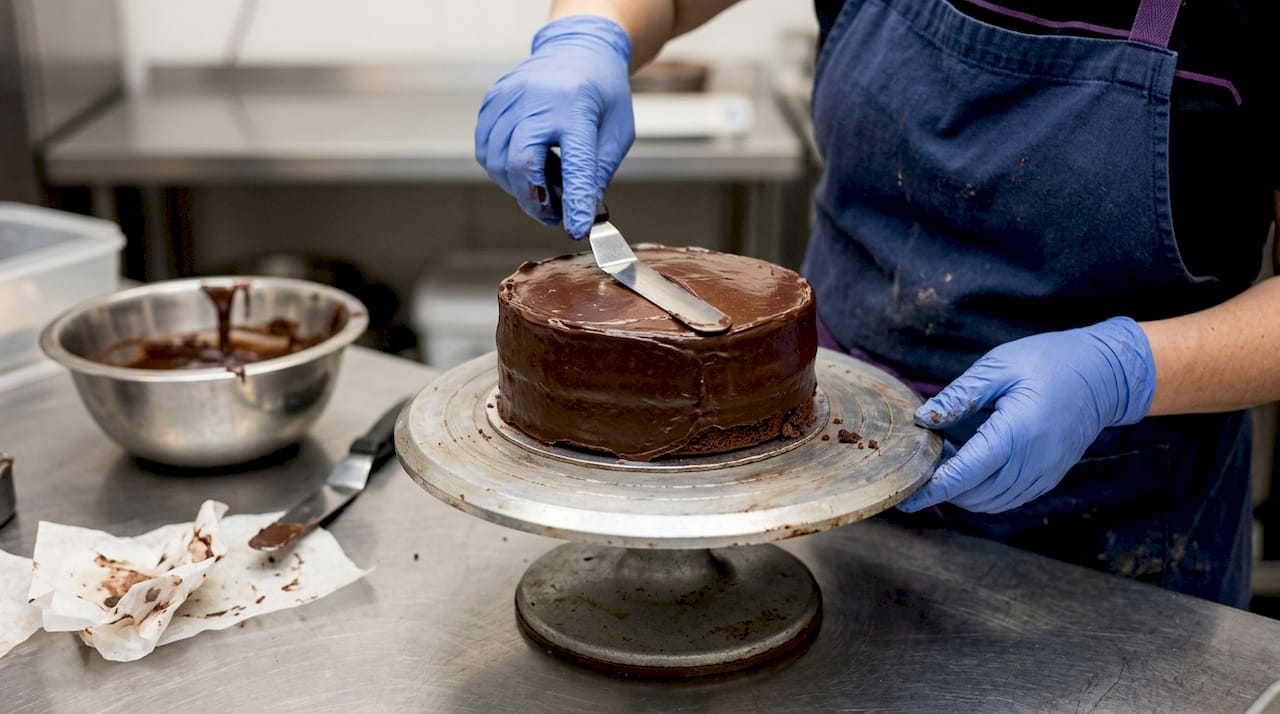
Ganache creates an incredibly firm, smooth surface once set. It’s the go-to choice for cakes that need to support heavy fondant decorations or that will be on display for extended periods. The trade-off is that it requires more precision. Too warm and it stays liquid; too cool and it sets before you can spread it.
Pro Tip: If you’re new to ganache, our guide on perfect ganache tips walks you through the ratios and temperatures that make all the difference.
Some key points to help you decide:
- Choose buttercream for sponge cakes, birthday cakes, and everyday bakes
- Choose ganache for tiered cakes, fondant-covered cakes, or when a razor-sharp edge is the goal
- Consider your environment: warm kitchens favour buttercream
- For more detail on this choice, our article on ganache vs buttercream covers it thoroughly
You can even use ganache in creative ways beyond the crumb coat. Our piece on creative ganache uses is full of inspiration.
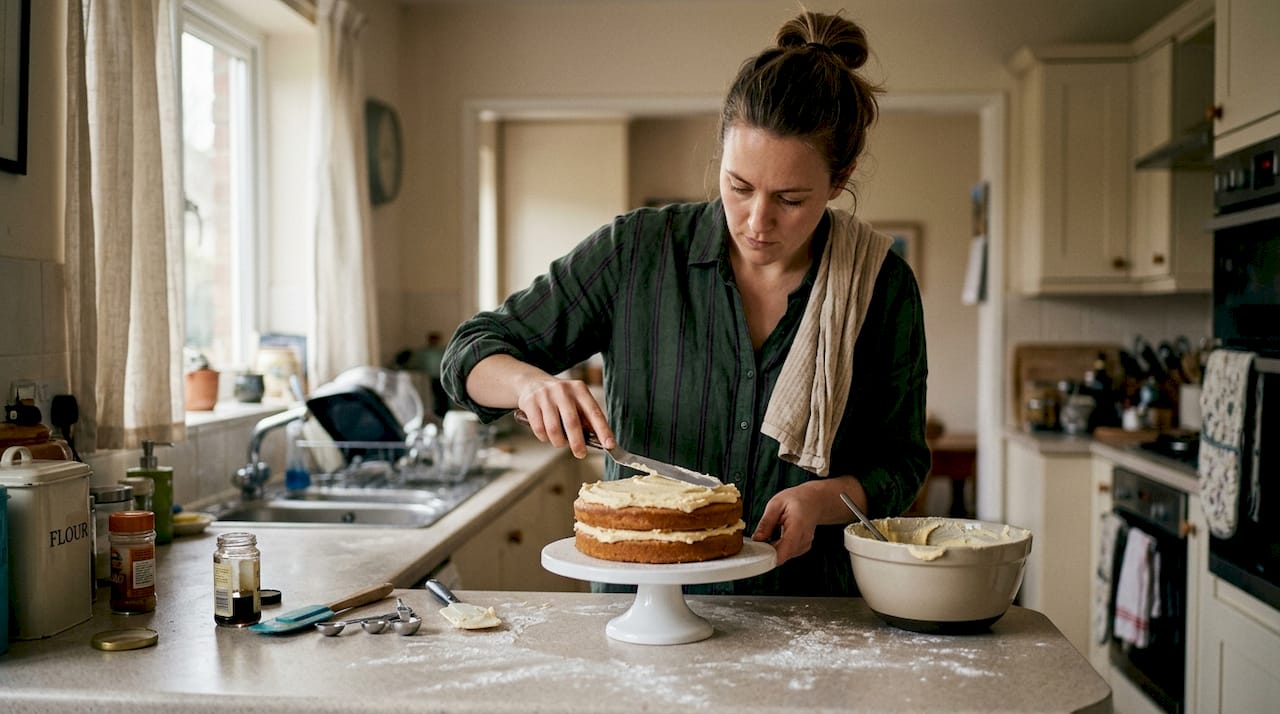
Step-by-step: Preparing and applying the crumb coat
Right, let’s get practical. Knowing why and what matters, but the real skill is in the doing. Here’s how to apply a crumb coat properly, from start to finish.
Apply your crumb coat after fully cooling, levelling, and brushing off crumbs. Stack your layers with filling and a frosting border to prevent bulging. That border is important: a small piped ring of frosting around the edge of each layer acts as a dam, keeping your filling in place and your sides straight.
- Cool completely. Never rush this. A warm sponge will cause your frosting to slide and melt. Allow at least two hours at room temperature, or cool overnight.
- Level your layers. Use a serrated knife or cake leveller to create flat, even surfaces. This is what gives you straight sides and a level top.
- Brush off crumbs. A pastry brush works brilliantly here. Remove any loose crumbs from the surface before you start frosting.
- Stack with filling. Add your filling between layers, piping a border of frosting around the edge to contain it.
- Apply the crumb coat. Use a palette knife or bench scraper to spread a thin, even layer of frosting over the entire cake. Don’t worry about perfection at this stage. You’re sealing, not decorating.
- Smooth it out. Use your bench scraper to remove excess frosting and create a relatively even surface. It won’t be perfect, and that’s fine.
- Chill. This is non-negotiable.
Chill your crumb-coated cake for 20 to 60 minutes; professionals use frozen sponges for faster setting and less crumbling. If you’re not in a hurry, chilling overnight gives you the firmest possible base for your final coat.
Pro Tip: Working with a frozen sponge dramatically reduces crumbing during the crumb coat stage. Bake your layers a day ahead, wrap them well, and freeze overnight. Frost them straight from the freezer for a much cleaner result.
For more detail on nailing this process, our guide to perfect crumb coating is essential reading. And if you want to avoid the most common baking disasters, our cake fail prevention article covers the pitfalls to watch out for.
Troubleshooting and mastering advanced crumb coating
Even with the basics down, things don’t always go smoothly. Here’s how to handle the trickier situations and push your results to a genuinely professional level.
Multiple coats work well for crumb-heavy cakes. You can also crumb coat frozen cakes, but ensure proper thawing. Always seal the bottom edge well for stability. That bottom edge is where most structural issues begin, so give it extra attention.
| Cake type | Recommended coats | Notes |
|---|---|---|
| Standard sponge | 1 coat | Chill 20-60 mins between coats |
| Crumb-heavy or fragile | 2-3 coats | Allow each coat to set fully |
| Frozen sponge | 1 coat | Thaw fully before final decoration |
| Tiered or display cake | 2 coats | Ganache recommended for stability |
For frosting quantities, use 180-240g of frosting for the crumb coat on an 8 to 9 inch, 2 to 3 layer cake. That’s roughly three quarters to one cup. Having the right amount ready before you start means you won’t be scraping the bowl mid-application.
Common challenges and how to fix them:
- Crumbs appearing in your final coat: Your crumb coat wasn’t chilled long enough. Always wait until the surface is firm to the touch.
- Frosting tearing the sponge: Your cake wasn’t cool enough, or your frosting is too stiff. Soften it slightly and work gently.
- Uneven sides: Use a turntable and a long bench scraper. Spin slowly and hold the scraper steady.
- Gaps between layers: Fill these with extra frosting before applying the crumb coat, not after.
- Bulging filling: Your frosting border wasn’t high enough. Pipe it taller next time.
For more advanced techniques, the advanced crumb coating guide is genuinely worth bookmarking. And if you’re decorating without fondant, our fondant-free cake decorating article shows you what’s possible with a great crumb coat as your base.
The flawless crumb coating guide on our blog pulls together everything you need for consistent results, whatever the occasion.
The uncomfortable truth most bakers miss about crumb coating
Here’s something we’ve noticed over years of talking to bakers: the ones who stress most about their crumb coat are often the ones who get the best results eventually, but not for the reason they think. It’s not because they achieve perfection at this stage. It’s because the process teaches them to read their cake.
A crumb coat isn’t meant to look beautiful. It’s meant to be functional. When you apply it, you’re learning where your cake is uneven, where the filling has shifted, and where the structure needs support. That information is gold.
Obsessing over tiny imperfections in your crumb coat is a bit like worrying about the undercoat on a wall before the top coat goes on. Nobody sees it. What matters is that it’s there, it’s even enough, and it’s chilled solid before you move on.
Our honest advice? Trust the process. Apply your real-world crumb coating with confidence, chill it properly, and focus your energy on the final coat. That’s where the magic happens.
Polish your cake decorating: Get supplies and expert help
Ready to put all of this into practice? Having the right tools genuinely makes a difference. A good palette knife, a reliable bench scraper, and quality frosting are the foundations of a great crumb coat.

At The Vanilla Valley, we stock everything you need to get a brilliant finish, from professional-grade tools to a wide range of cake decorating supplies. Whether you’re just starting out or refining your technique, our shop has you covered. And if you want to keep building your skills, our further crumb coat tips article is packed with practical advice to help you get consistently great results. Pop over to The Vanilla Valley and see what’s waiting for you.
Frequently asked questions
How much frosting do I need for a crumb coat?
For an 8 to 9 inch, 2 to 3 layer cake, use 180-240g of frosting for the crumb coat, which is roughly three quarters to one cup.
Can I crumb coat a cake straight from the freezer?
Yes, crumb coating a frozen cake reduces crumbing significantly, but make sure the cake is fully thawed before applying your final decoration for the best stability.
How long should I chill the crumb-coated cake before final decoration?
Chill for 20 to 60 minutes in the fridge, or leave it overnight if you want the firmest possible base before your final coat goes on.
Do I need to apply multiple crumb coats?
Most cakes only need one coat, but crumb-heavy or fragile cakes benefit from two to three coats. Always seal the bottom edge well for structural stability.
Is buttercream or ganache better for crumb coating?
Buttercream suits beginners and everyday cakes, while ganache gives a firmer, ultra-smooth finish that professionals prefer for display cakes and fondant work.
Recommended
- How to get a perfect crumb coat every time: flawless cakes - The Vanilla Valley
- Make your cakes look more professional: step-by-step guide - The Vanilla Valley
- Beginner Cake Decorating Tips for Stunning Results - The Vanilla Valley
- Mirror Glaze Cakes: Tips for a Flawless Finish Every Time - The Vanilla Valley