
Stop cakes sticking to the tin: expert tips for bakers
TL;DR:
- Proper preparation and understanding of tin types can nearly eliminate cake sticking.
- Different tins require specific greasing and lining techniques for optimal release.
- Even if a cake sticks, safe methods and creative salvage can still produce beautiful results.
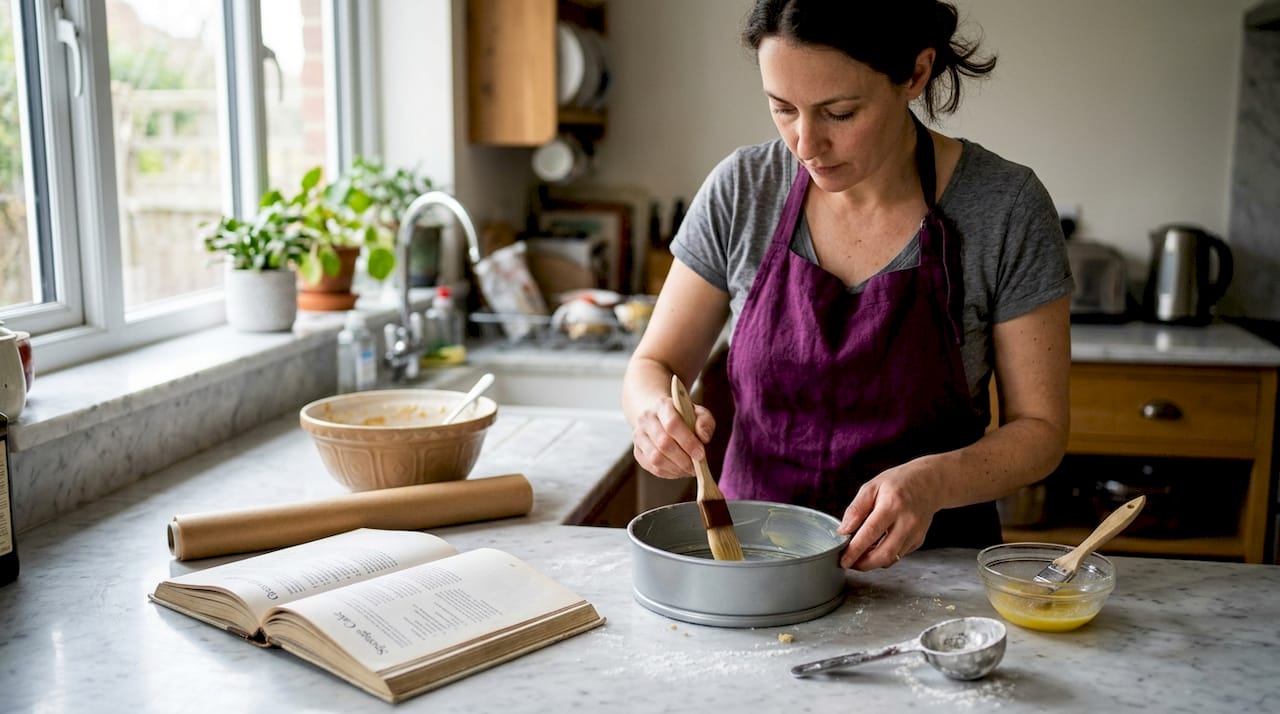
Greasing your tin and hoping for the best is a plan most of us have tried at least once. You slide the cake out, hold your breath, and then half of it stays stubbornly behind. It is one of the most demoralising moments in baking, and it happens to everyone from first-timers to seasoned professionals. The good news? Sticking is almost always preventable once you understand why it happens. In this guide, we will cover the key causes, the best preparation methods for every tin type, what to do when things still go wrong, and pan-specific tips that will change the way you bake.
Table of Contents
- Understanding why cakes stick: common causes explained
- Essential tin preparation methods for cake release
- Pan-specific strategies: Bundt, springform, and more
- Rescuing a stuck cake: safe release and salvage tips
- A baker’s perspective: sticking isn’t failure, it’s feedback
- Take your baking to the next level
- Frequently asked questions
Key Takeaways
| Point | Details |
|---|---|
| Tailor tin prep to cake | Different cake types and pans require specific preparation for best release results. |
| Oil/shortening outperforms butter | Switch from butter to oil or shortening for more reliable cake release, especially for intricate tins. |
| Cool before unmoulding | Let cakes rest in the tin for 10–20 minutes before removal to avoid sticking and breaking. |
| Rescue stuck cakes safely | Careful use of spatulas, steam, or freezing can help release stuck cakes with minimal damage. |
| Learn from mistakes | Cake sticking is an opportunity to refine technique rather than a baking failure. |
Understanding why cakes stick: common causes explained
Now that we have acknowledged the problem, let us understand the causes behind cakes sticking. It is rarely just one thing. Most of the time, sticking is the result of a small combination of factors working against you.
Here are the most common culprits:
- Moisture imbalance in the batter, which causes the cake to bond to the tin as it cools
- High sugar content, which intensifies the problem because high sugar recipes are more prone to sticking due to caramelisation
- Tin finish and condition, including scratched non-stick surfaces that no longer perform reliably
- Poor or rushed preparation, such as uneven greasing, grease pooling at the bottom, or skipping a paper lining altogether
- Using butter instead of oil or shortening, especially in intricate pans, since butter’s milk solids can fuse with the batter during baking
One of the most misunderstood factors is the importance of tin lining and how it works alongside greasing rather than replacing it. Many bakers treat lining as optional, but for layered cakes and anything with a long bake time, it is genuinely essential.
“The most common mistake is assuming that non-stick coating means no preparation needed. All tins benefit from at least a light greasing, and intricate shapes need much more attention.”
It is also worth knowing that not every cake tin should be greased. Sponge and angel food cakes rely on their batter clinging to the sides of the tin to rise properly. Greasing those tins is one of those baking basics often misunderstood that ends in flat, dense results. So before you reach for the butter, think about what you are baking.
Dark-coloured tins absorb more heat and can cause the edges of the cake to set faster, sometimes leading to a tighter bond with the surface. Older tins with scratches or flaking coatings are particularly unreliable. Recognising these factors puts you firmly in control.
Essential tin preparation methods for cake release
With the main causes clear, it is time to address the best practical solutions for preparing your tin. The method you choose should match both the recipe and the tin shape.
Step-by-step tin preparation:
- Choose your fat. Oil or shortening offers more reliable release; butter adds flavour but is less forgiving in complex shapes.
- Apply the fat to every surface of the tin immediately before adding batter. Doing it too early can cause grease to pool.
- Add flour by spooning a tablespoon into the greased tin, then tilting and tapping to coat every surface evenly. Tap out any excess.
- For most standard cakes, add a layer of lining your cake tin with baking paper on the base for extra insurance.
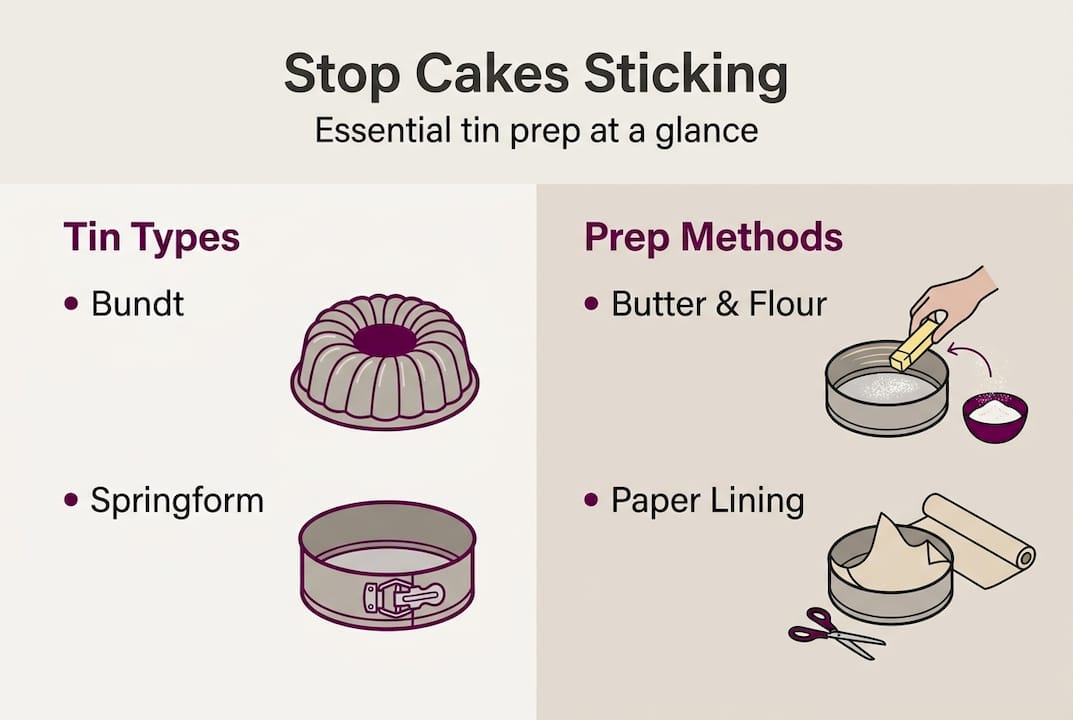
- For Bundt pans, use a paste of melted butter or shortening mixed with flour, then brush it into every crevice with a pastry brush. A paste of melted butter and flour applied to all crevices is the most reliable method for complex shapes.
Pro Tip: Grease your tin right before you pour in the batter. If you grease it at the start of your prep and leave it sitting while you make the batter, the fat slides down and collects at the bottom, leaving the sides exposed.
Here is a quick comparison to help you choose the right release method:
| Method | Best for | Release reliability | Flavour impact |
|---|---|---|---|
| Butter | Standard tins, simple shapes | Moderate | Adds richness |
| Oil or shortening | Intricate tins, Bundt pans | High | Neutral |
| Baking spray with flour | All tin types | High | Minimal |
| Baking paper lining | Flat-bottomed tins, loaf tins | Very high | None |
| Butter and flour paste | Bundt pans, detailed moulds | Very high | Slight |
Angel food and sponge cake tins are the one exception: leave them completely ungreased. The batter must grip the sides to achieve its characteristic lift. Using any fat in these tins results in a collapsed, dense bake.
Pan-specific strategies: Bundt, springform, and more
Having reviewed the methods, let us match the preparation technique to each pan type for the best results.
Bundt pans are beautiful but unforgiving. Their intricate ridges and curves trap batter if any area is undercoated. The most reliable approach is a thick paste of melted butter or shortening combined with plain flour, worked into every groove using a pastry brush. Butter adds flavour but shortening is more reliable for release, particularly in these detailed shapes. Baking sprays that contain flour are also excellent here.

Springform pans benefit from a paper-lined base combined with a light oil coating on the sides. Because the base is removable, there is always a slight risk of batter leaking. Keeping the sides lightly oiled rather than heavily greased reduces that risk while still aiding release.
Pro Tip: For springform pans, wrap the outside base in a layer of foil before baking. It catches any minor leaks and keeps your oven clean.
Standard round and square tins are the most straightforward. Grease the sides and base, add a circle of baking paper to the bottom, and you are covered for almost every cake type. For deeper bakes, line the sides too using a strip of baking paper that extends just above the rim.
For lining options for different pans, the method changes depending on the shape, but the principle stays the same: every surface the batter touches should be prepared.
| Pan type | Greasing method | Lining needed? | Notes |
|---|---|---|---|
| Bundt | Butter/shortening paste | No | Brush every crevice |
| Springform | Light oil on sides | Base only | Wrap base in foil |
| Round/square | Butter or oil | Yes, base and sides | Line sides for deep tins |
| Loaf | Oil or butter | Yes, full lining | Overhang paper for easy lift |
| Angel food/sponge | None | No | Do not grease; batter must cling to sides to rise |
The reason angel food and sponge tins must stay ungreased comes down to structure. The batter is very light and airy. Without something to grip, it simply cannot climb the sides of the tin and collapses under its own weight.
Rescuing a stuck cake: safe release and salvage tips
Even with perfect preparation, cakes occasionally stick. Here is what to do if your cake refuses to budge.
Step-by-step release guide:
- Be patient. Allow the cake to cool 10 to 20 minutes in the pan before inverting. This sets the structure and often makes release much easier.
- Run a flexible plastic spatula around the edges of the cake, working gently and keeping it flush against the tin wall. Never use a metal knife; it scratches the tin and can tear the cake edge badly.
- Place a hot, damp towel over the outside of the tin for a few minutes. The steam softens the bond between the cake and the surface.
- If the cake is still holding on, pop the whole thing (tin and all) in the freezer for up to six hours. Once firm, loosen edges, steam, or freeze as needed, then try turning it out again.
- Work methodically and keep pressure even. Rushing at this stage causes more damage than the sticking itself.
Once the cake is out, even if it comes out in a slightly imperfect state, there is almost always a way to salvage it:
- Crumble coating: Press the loose crumbs back onto the frosted surface for a rustic finish
- Thick buttercream: A generous crumb coat fills in gaps and uneven edges beautifully
- Drip glaze: Poured over the top, it naturally covers cracks and joins
- Cut and layer: Slice through any damage horizontally and turn it into a layered cake
“Every professional baker has a stuck cake story. The difference is knowing that the presentation can almost always be rescued with the right approach.”
For more ideas on avoiding cake fails before they happen, and tips on common cake transport mistakes once your cake is ready to travel, we have guides covering both. And if you need to get your finished cake safely from A to B, the safe cake transport guide is worth a read too.
A baker’s perspective: sticking isn’t failure, it’s feedback
Here at The Vanilla Valley, we have seen hundreds of bakers apologise for a stuck cake as if it were a personal failing. It is not. Sticking is one of the most informative things a cake can do. It tells you something about your tin, your fat choice, your timing, or your batter. That is genuinely useful information.
The contrarian truth is this: some of the most creative cake decorating moments we have ever seen came from a cake that came out wrong. A broken sponge becomes a trifle. A crumbled Bundt becomes a stunning layered dessert with frosted edges. The “failure” forced a creative solution that ended up being more impressive than the original plan.
If you want to fix baking mistakes sustainably, stop trying to replicate the exact same method every time and start experimenting deliberately. Try oil instead of butter. Use a paste in your Bundt pan. Time your greasing better. Each bake teaches you something new, and that accumulated knowledge is what makes a genuinely confident baker.
Sticking is not the end of the cake. It is the beginning of understanding it.
Take your baking to the next level
Now that you are armed with all the knowledge you need to prevent and rescue stuck cakes, why not make sure your kit is just as ready as your technique?

At The Vanilla Valley, we stock everything you need for reliable tin preparation and beautiful cake finishing, from quality baking tools to a full range of baking supplies and tools that take the guesswork out of every bake. Whether you are looking for the right tin liners, decorating essentials, or cake boards for your finished creation, we have got you covered. Pop over to our blog for more cake preparation guides covering everything from lining to troubleshooting, so your next bake comes out perfectly every time.
Frequently asked questions
How do I stop my cake from sticking without baking paper?
Greasing with oil or shortening and dusting with flour is the most reliable option, particularly for shaped or intricate tins where paper cannot be fitted easily.
Why do you cool cakes in the tin before removing?
Allowing the cake to cool 10 to 20 minutes in the pan lets the structure firm up, making it far less likely to tear or break when you turn it out.
What if my cake is still stuck after cooling?
Loosen the edges with a plastic spatula, hold a hot damp towel against the outside of the tin, or freeze for several hours before attempting to release it again.
Should I grease every type of cake tin?
No. Tins for angel food or sponge cakes must stay ungreased so the batter can cling to the sides and rise to its full height properly.
Recommended
- Why lining your tin matters: baking secrets for perfect cakes - The Vanilla Valley
- How to line a cake tin for perfect baking results - The Vanilla Valley
- Stop fondant from cracking: Essential steps for perfect cakes - The Vanilla Valley
- How to Avoid Making a Fail Cake: Essential Steps - The Vanilla Valley