
How to make an Easter drip cake: step-by-step guide 2026
Many amateur bakers struggle with uneven drips or frosting that melts during ganache application, turning an ambitious Easter cake into a disappointing mess. This comprehensive guide walks you through every essential step, from preparing ingredients and chilling correctly to mastering ganache consistency and adding festive decorations. You will gain the confidence and practical skills needed to create a professional-looking Easter drip cake that truly impresses your guests.
Table of Contents
- Prerequisites: What You Need Before You Start
- Preparing And Assembling The Sponge Layers
- Frosting And Smoothing The Cake
- Ganache Drip Technique And Application
- Easter-Themed Decoration Techniques
- Common Mistakes And Troubleshooting
- Expected Outcomes And Timeline
- Shop Cake Decorating Supplies At The Vanilla Valley
- FAQ
Key takeaways
| Point | Details |
|---|---|
| Preparation and chilling | Thorough chilling prevents melting and ensures controlled drips and smooth frosting application. |
| Ganache consistency | Correct chocolate-to-cream ratios and temperature control deliver neat, professional drips every time. |
| Easter decorations | Themed sprinkles, pastel sugar pearls, and fondant shapes add festive flair and personalisation. |
| Step-by-step confidence | Following detailed instructions reduces frustration and builds baking success for amateur decorators. |
Prerequisites: what you need before you start
Before you begin, gather all necessary ingredients and tools to streamline your baking process and avoid last-minute searches.
For the sponge, you need 225g self-raising flour, 225g caster sugar, 225g softened butter, four large eggs, and one teaspoon vanilla extract. Buttercream requires 300g softened butter and 600g icing sugar. For ganache, prepare 300g chocolate and 100ml double cream for white chocolate (3:1 ratio) or 200g chocolate and 200ml cream for dark chocolate (1:1 ratio). These ganache chocolate-to-cream ratios determine drip consistency.
Essential tools include two 20cm round cake tins, a rotating turntable, palette knives (straight and offset), disposable piping bags, a serrated knife or cake leveller, and ample fridge or freezer space. Having these items ready prevents interruptions during assembly.
| Item | Quantity/Details | Purpose |
|---|---|---|
| Self-raising flour | 225g | Sponge base structure |
| Caster sugar | 225g | Sweetness and texture |
| Butter (sponge) | 225g softened | Moisture and richness |
| Butter (buttercream) | 300g softened | Smooth frosting |
| Icing sugar | 600g | Buttercream sweetness |
| Chocolate (white) | 300g | Ganache drip (3:1 ratio) |
| Double cream (white) | 100ml | Ganache consistency |
| Chocolate (dark) | 200g | Alternative ganache (1:1 ratio) |
| Double cream (dark) | 200ml | Alternative consistency |
Pre-bake your sponge layers at least a day ahead to allow complete cooling. Warm cake crumbles easily and melts buttercream during assembly. Chilling the cake thoroughly before applying ganache prevents melting and ensures the drip sets correctly. Plan for multiple chilling stages throughout the process.
Pro Tip: Wrap cooled sponge layers in cling film and refrigerate overnight to firm up the crumb structure, making levelling and stacking significantly easier.
Understanding how to make perfect ganache every time and selecting the best ganache chocolate like Goldings ensures professional results with smooth texture and rich flavour.
Preparing and assembling the sponge layers
Baking stable, level sponge layers forms the foundation for a successful drip cake.
- Preheat your oven to 180°C (160°C fan) and grease two 20cm round cake tins with butter, then line the bases with baking parchment.
- Cream together 225g softened butter and 225g caster sugar until pale and fluffy, approximately three minutes with an electric mixer.
- Beat in four large eggs one at a time, adding a tablespoon of flour with each egg to prevent curdling.
- Fold in the remaining self-raising flour and one teaspoon vanilla extract gently using a spatula until just combined.
- Divide the batter evenly between the prepared tins and smooth the tops with a palette knife.
- Bake for 25 to 30 minutes until golden and a skewer inserted into the centre comes out clean.
- Allow cakes to cool in tins for 10 minutes, then turn out onto a wire rack to cool completely for at least two hours.
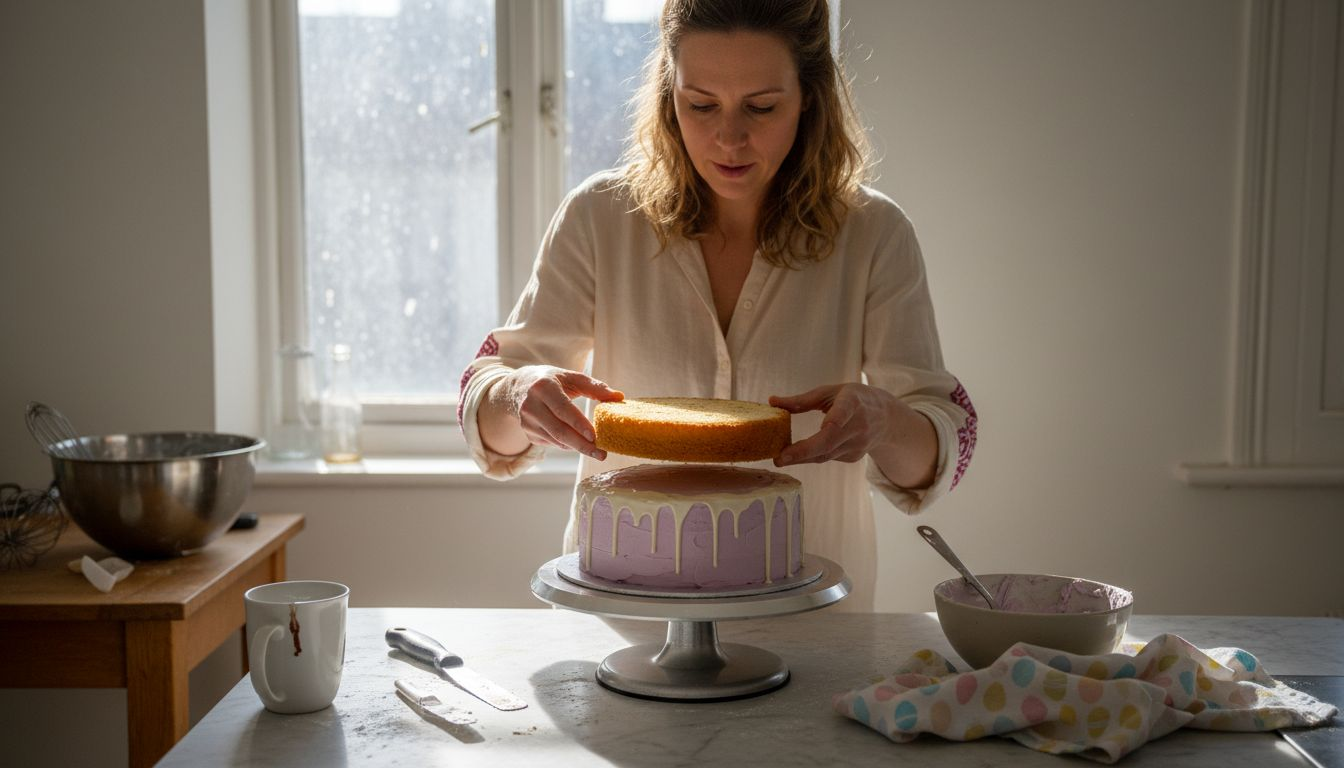
Once fully cooled, use a serrated knife or cake leveller to trim any domed tops, creating flat, even surfaces. Hold the knife parallel to your work surface and rotate the cake slowly for a clean cut. Removing domes ensures stable stacking and prevents the cake from leaning.
Place the first layer on a cake board or serving plate. Spread a generous layer of buttercream evenly across the top, leaving a small border around the edge. Position the second layer on top, trimmed side down, and press gently to adhere.
Pro Tip: Chill each sponge layer for 30 minutes before stacking to reduce crumbs and make handling much easier, especially for beginners.
Following these essential steps to avoid cake fails prevents common structural issues that undermine drip application later.
Frosting and smoothing the cake
Achieving a smooth, even frosting layer creates the ideal canvas for your ganache drips.
Prepare buttercream by beating 300g softened butter until pale and creamy, then gradually add 600g sifted icing sugar, beating continuously until light and fluffy. Add one tablespoon of milk if the mixture feels too thick to spread easily.
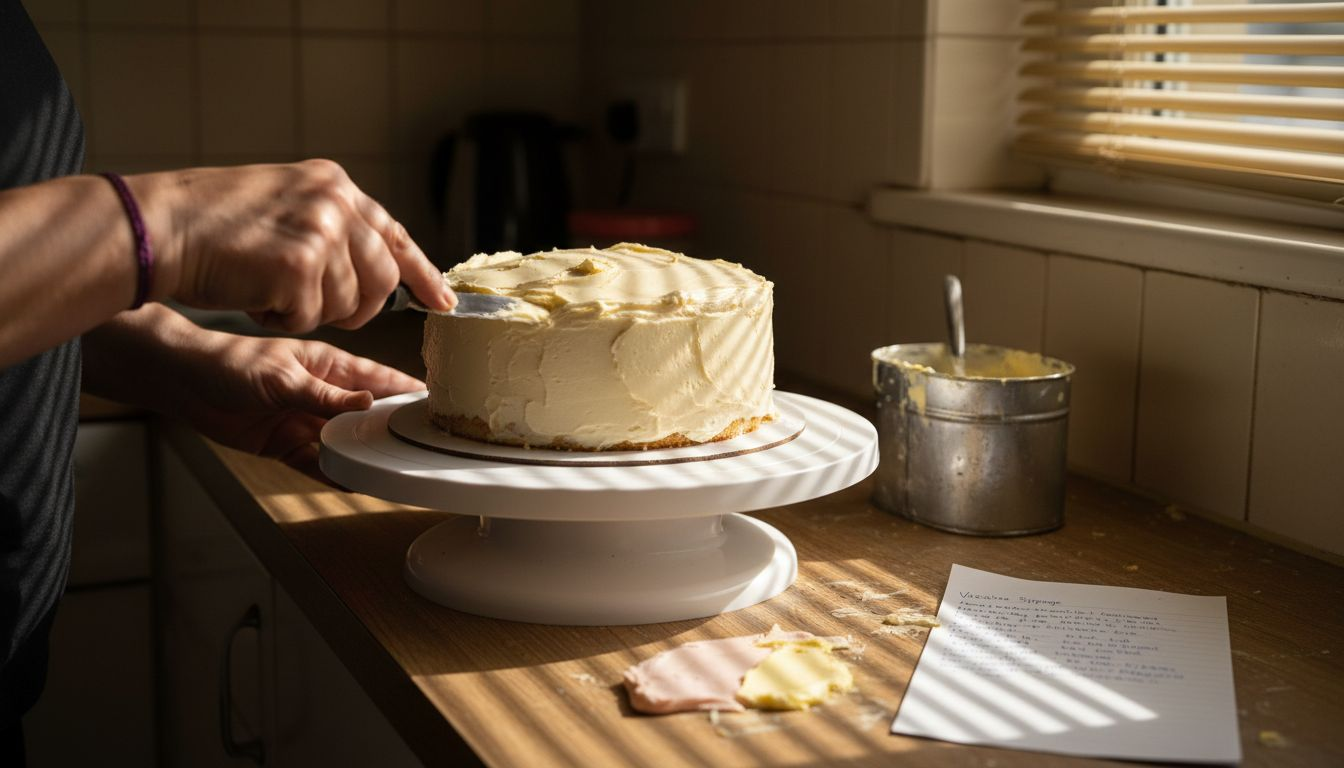
Apply a thin crumb coat by spreading a small amount of buttercream over the entire cake, sealing in loose crumbs. Use a palette knife to smooth the frosting as evenly as possible across the top and sides. Chill the cake for 20 minutes to set this initial layer.
Once the crumb coat is firm, apply a thicker final layer of buttercream generously across the top and sides. Use a straight palette knife held at a 45-degree angle against the side, rotating the turntable smoothly to create an even finish. For the top, hold the knife flat and sweep from the edge towards the centre in one continuous motion.
- Smooth sides first by rotating the turntable while holding the palette knife steady against the cake.
- Finish the top by sweeping excess buttercream from the edge inward, creating a clean, flat surface.
- Remove any ridges or bumps by warming your palette knife briefly in hot water, wiping it dry, then gliding it over the frosting.
Once satisfied with the smoothness, chill the cake thoroughly for at least one to two hours in the fridge or 30 minutes in the freezer. A fully chilled surface prevents the buttercream from melting when warm ganache touches it.
Pro Tip: Warm your palette knife briefly between smoothing strokes by dipping it in hot water and wiping dry to achieve a professional, glossy finish.
Understanding the differences between ganache, buttercream, and fondant helps you choose the best frosting for your decorating style and taste preferences.
Ganache drip technique and application
Mastering ganache consistency and temperature ensures controlled, elegant drips that elevate your Easter cake.
For white chocolate ganache, combine 300g white chocolate and 100ml double cream (3:1 ratio). For dark chocolate ganache, use 200g dark chocolate and 200ml double cream (1:1 ratio). These specific chocolate-to-cream ratios achieve ideal drip consistency.
Heat the cream in a small saucepan until it just begins to simmer, then pour it over chopped chocolate in a heatproof bowl. Let it sit for one minute, then stir gently until smooth and fully combined. Allow the ganache to cool to approximately 30 to 35°C for white chocolate or 35 to 40°C for dark chocolate. Test consistency by drizzling a small amount on a cold bowl; it should flow slowly but not run uncontrollably.
| Ganache Type | Chocolate | Cream | Ratio | Ideal Temp | Drip Effect |
|---|---|---|---|---|---|
| White chocolate | 300g | 100ml | 3:1 | 30-35°C | Thick, short drips |
| Dark chocolate | 200g | 200ml | 1:1 | 35-40°C | Medium, elegant drips |
| Milk chocolate | 250g | 125ml | 2:1 | 32-37°C | Moderate drips |
Transfer cooled ganache to a disposable piping bag, snip a small opening at the tip, and work quickly. Start by piping small amounts of ganache around the top edge of your chilled cake, allowing each drip to flow naturally down the side. Space drips evenly, approximately two to three centimetres apart, for a balanced look.
Once the edge drips are complete, fill the top centre with remaining ganache and spread evenly with a palette knife. Work swiftly because the ganache begins to set within minutes on a cold cake.
- If drips run too far, your ganache is too warm or thin; allow it to cool further or add more chopped chocolate.
- If drips are too thick or barely move, gently reheat the ganache or stir in a teaspoon of cream to loosen.
- For precise control, practise piping a test drip on a cold bowl before committing to the cake.
Pro Tip: Chill your cake for one to two hours before applying ganache to prevent the frosting from melting and to help drips set cleanly and quickly.
Add decorations immediately while the ganache remains slightly wet to ensure they adhere securely. Sprinkles, sugar pearls, and fondant shapes stick best when pressed gently into soft ganache.
Exploring what ganache is and how it works deepens your understanding of this versatile coating, while learning to make perfect ganache every time builds consistent, professional results.
Easter-themed decoration techniques
Adding festive Easter decorations transforms your drip cake into a seasonal centrepiece that delights guests.
Popular Easter decorations include themed sprinkles in pastel shades, sugar pearls, edible glitter, chocolate eggs, and fondant bunnies. Choose colours that complement your ganache and buttercream palette, such as soft pinks, yellows, blues, and greens.
Apply sprinkles strategically by sprinkling them along the top edge where ganache drips begin, creating a decorative border. You can also scatter them across the top surface or press them gently into the wet ganache for secure adhesion. Sugar pearls add elegant texture when arranged in clusters or lines.
For homemade chocolate shapes, melt leftover ganache chocolate and pour it into bunny or egg moulds. Chill until set, then carefully remove and position them on the cake. Alternatively, roll out fondant, cut shapes with Easter-themed cutters, and paint details with edible food colouring.
- Coordinate decoration colours with pastel buttercream or create marbled effects by swirling two buttercream shades together before frosting.
- Position larger decorations like chocolate bunnies or eggs on top as focal points, surrounding them with smaller sprinkles and pearls.
- Use edible glitter sparingly for subtle shimmer that catches the light without overwhelming the design.
Encourage your own creativity by mixing and matching available supplies. Easter cakes offer endless personalisation opportunities, from minimalist elegance to playful, colourful designs.
Discovering creative ganache uses beyond drips inspires versatile decorating techniques that enhance your baking repertoire.
Common mistakes and troubleshooting
Recognising and fixing frequent errors saves frustration and ensures your Easter drip cake looks flawless.
- Ganache drip running too far: This happens when ganache is too warm or thin. Allow it to cool longer or stir in additional chopped chocolate to thicken. Always test drip consistency on a cold bowl first.
- Drip too thick or no drips: Ganache that is too cool or thick will not flow. Gently reheat it in short microwave bursts (10 seconds) or add a teaspoon of warm cream, stirring until it reaches the correct consistency.
- Uneven frosting surface: Bumps and ridges interfere with smooth drips. Smooth the buttercream again using a heated palette knife, then chill the cake thoroughly before attempting ganache application.
- Melting or sliding decorations: Warm room temperature or insufficiently chilled ganache causes decorations to slip. Work in a cool environment and add decorations quickly while ganache is still tacky but not fully set.
- Crumbly sponge during assembly: Warm or under-baked sponge crumbles easily. Always bake fully, cool completely, and chill layers before levelling and stacking.
Pro Tip: Always test your ganache drip consistency on a cold bowl or plate before applying it to the cake to avoid irreversible mistakes.
Learning from common baking mistakes and fixes and following essential steps to avoid cake fails builds your troubleshooting skills and confidence.
Expected outcomes and timeline
Understanding the time investment and visual benchmarks helps you plan effectively and achieve consistent success.
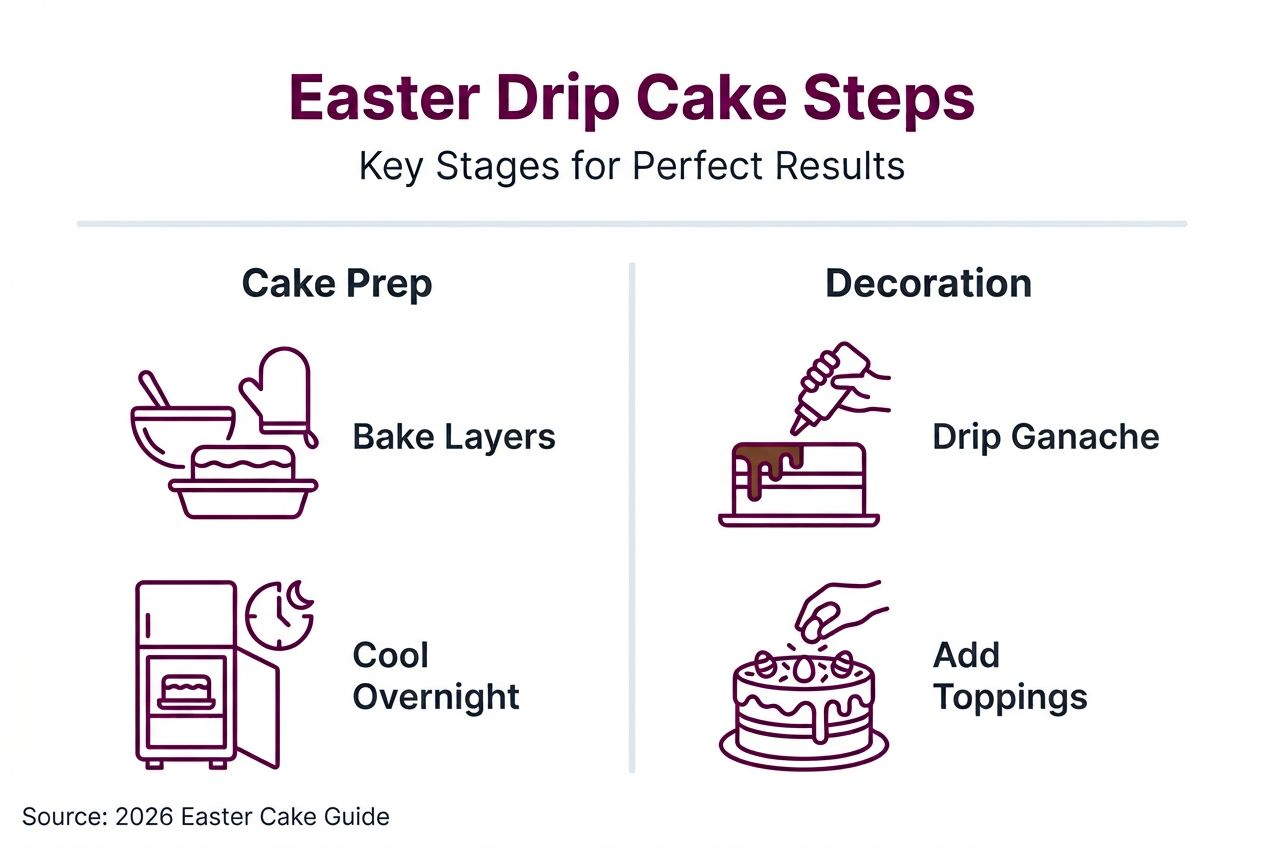
The entire process typically takes 3-4 hours including baking, cooling, frosting, chilling, and decorating. However, spreading the work over two days reduces stress and allows proper chilling between stages.
Day one involves baking the sponge layers, cooling them completely, and wrapping them in cling film to refrigerate overnight. Day two covers levelling, stacking, frosting, chilling, applying ganache drips, and adding decorations.
- Visual cues for smooth frosting: The buttercream should appear even and free of visible ridges or crumbs, with a slight sheen when a warm palette knife is used.
- Visual cues for controlled drips: Ganache drips should flow down the sides evenly, stopping naturally without pooling at the base or running excessively.
- Visual cues for secure decorations: Sprinkles and fondant shapes should adhere firmly without sliding or falling off when the cake is moved gently.
Check texture by touching the ganache lightly; it should feel firm and dry to the touch before serving. If the ganache remains sticky after 30 minutes at room temperature, return the cake to the fridge briefly.
Plan each step in advance by listing ingredients, setting aside dedicated time blocks, and preparing your workspace. This reduces last-minute panic and ensures you have everything needed at each stage.
Shop cake decorating supplies at The Vanilla Valley
Now that you have mastered the techniques, sourcing quality tools and ingredients makes your baking projects easier and more enjoyable.

The Vanilla Valley has been a trusted, independently owned supplier of cake decorating supplies since 2009, serving amateur and professional bakers across the UK from our North Cardiff storefront and online shop. We stock everything you need for Easter drip cakes, including cake tins, palette knives, disposable piping bags, themed sprinkles, sugar pearls, edible glitter, and premium chocolate.
Browse our extensive range of cake decorating supplies and sugarcraft tools to find high-quality items that enhance your baking results. We offer special deals, free delivery options, and next day delivery to help you get started quickly and confidently.
FAQ
What is the best chocolate to use for ganache drip?
Use high-quality couverture chocolate like Goldings for smooth texture and rich flavour that sets beautifully. White chocolate requires less cream (3:1 ratio) for thicker drips, while dark chocolate uses equal parts chocolate and cream (1:1 ratio) for medium, elegant drips.
How long should I chill the cake before adding the ganache drip?
Chill the cake for one to two hours in the fridge or 30 minutes in the freezer for best results. Proper chilling prevents melting of the buttercream and allows the ganache to set smoothly without sliding or pooling.
Can I use a spoon instead of a piping bag for the drip?
Using a piping bag offers better precision and speed for controlled drip lengths, especially for beginners. A spoon can work but may be slower and less consistent, making it harder to achieve evenly spaced, professional-looking drips.
What are some simple Easter decorations I can make at home?
Make small chocolate bunnies and eggs using moulds or shape fondant by hand and paint details with edible food colouring. Use pastel-coloured sprinkles, sugar pearls, and edible glitter for festive accents, or create marbled buttercream by swirling two colours together before frosting.