
How to instantly make your cakes look more professional
TL;DR:
- Essential tools like turntables, spatulas, and scrapers significantly improve cake finishing results.
- Proper prep including leveling, crumb coating, chilling, and smoothing creates professional-looking cakes.
- Easy decoration methods such as fresh flowers, fruit, and drips can instantly elevate cake appearance.
You’ve spent hours baking, your cake smells incredible, but the moment you start frosting it, something goes wrong. The sides look uneven, crumbs are showing through, and it just doesn’t have that polished, bakery-fresh finish you were hoping for. Sound familiar? You’re not alone, and the good news is that a few simple tools and techniques can transform your results almost immediately. This guide walks you through exactly what you need, how to use it, and how to fix the most common problems, so your next cake looks as good as it tastes.
Table of Contents
- Essential tools for a flawless cake finish
- The basic mechanics for pro-looking cakes
- Quick decoration tricks for instant wow factor
- Troubleshooting common issues and expert fixes
- A fresh take: why instant improvements matter more than perfection
- Ready to transform your cakes? Get started with essential supplies
- Frequently asked questions
Key Takeaways
| Point | Details |
|---|---|
| Use essential tools | A turntable and scraper will instantly improve smoothness and finish. |
| Preparation is key | Levelling, crumb coating, and chilling create the base for effortless decorating. |
| Easy enhancements work | Fresh fruit, flowers, and drips make cakes look professional in moments. |
| Fix issues quickly | Temperature control and proper chilling solve most beginner cake problems. |
| Progress over perfection | A clean, confident finish impresses more than minor details. |
Essential tools for a flawless cake finish
The right tools make an enormous difference, and you don’t need to spend a fortune to get them. In fact, a small investment in a few key pieces of kit will instantly lift the quality of every cake you make. Our professional cake guide covers this in depth, but here’s a quick breakdown to get you started.
The single most impactful purchase you can make is a turntable. It lets you rotate your cake smoothly while you frost, which is how professionals achieve those perfectly even sides without awkward hand movements. Without one, you’re fighting your own wrists the whole time.
Beyond the turntable, the best baking tools for a professional finish include:
- Offset spatula (large and small): For spreading frosting evenly across the top and sides.
- Bench scraper or icing smoother: The key to silky smooth sides in one clean pass.
- Cake leveller: Removes the dome from your sponge so layers sit flat and even.
- Piping bags and tips: Even basic round and star tips open up a world of finishing options.
| Tool | Approx. cost | Can you improvise? |
|---|---|---|
| Turntable | £10 to £25 | Difficult, not recommended |
| Offset spatula | £5 to £10 | A regular palette knife works |
| Bench scraper | £3 to £8 | A flat ruler in a pinch |
| Cake leveller | £5 to £12 | A serrated knife works fine |
| Piping bags and tips | £5 to £15 | Zip-lock bag with corner snipped |
If budget is tight, prioritise the turntable and bench scraper above everything else. Those two alone will give you the biggest visible improvement. You can also explore using colour dusts to add finishing touches without any extra specialist equipment.
Pro Tip: A clean, flat-bottomed mug placed upside down can substitute for a turntable in a real emergency. It won’t spin, but it raises your cake to a comfortable working height, which already helps your technique.
For a full list of beginner-friendly kit, our beginner decorating tips article is a brilliant starting point.
The basic mechanics for pro-looking cakes
With the right tools gathered, the magic is in the method. Prepping your cake correctly is everything. Even the most expensive frosting won’t look good on an uneven, crumbly base.
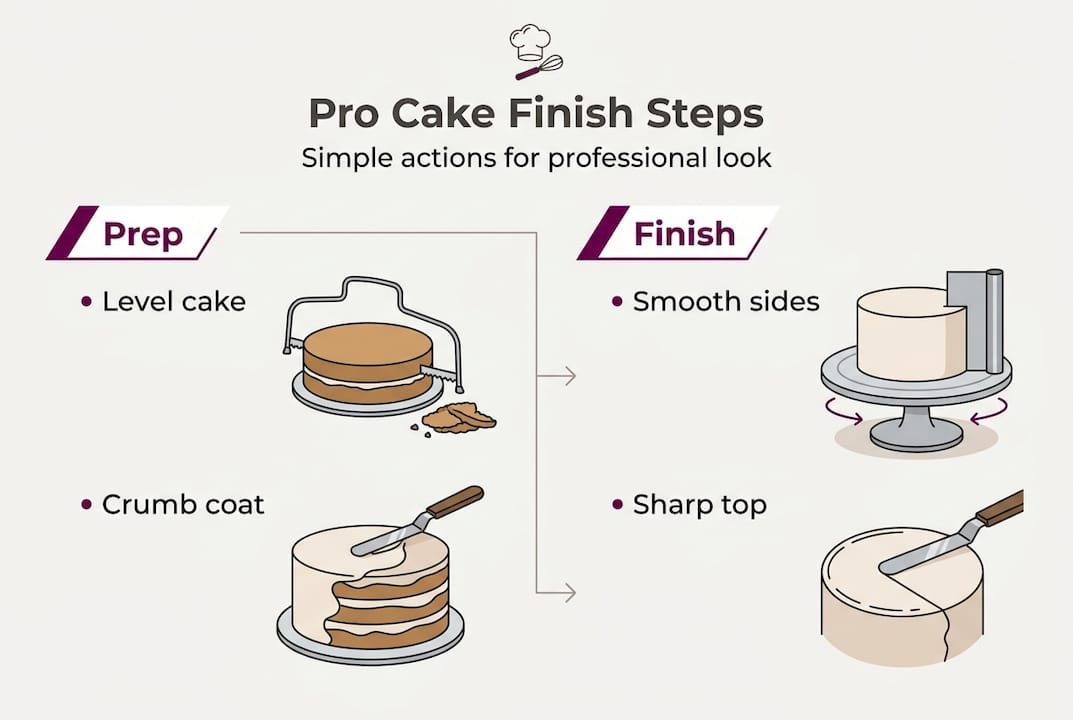
Here’s the core sequence that professionals use, and that you can apply today:
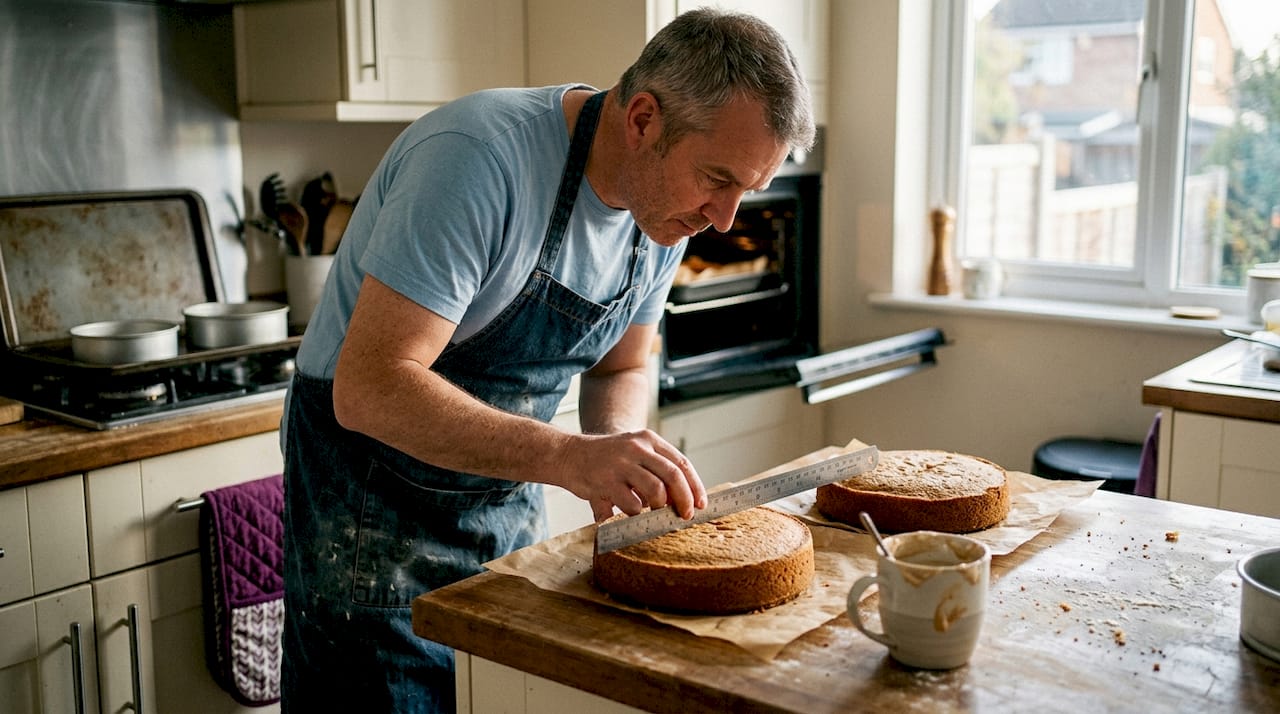
- Level your layers. Use a cake leveller or serrated knife to remove the dome from each sponge. Flat layers stack evenly and prevent wobbling.
- Apply your crumb coat. This is a thin layer of frosting that seals in any loose crumbs. It doesn’t need to look perfect. Our crumb coat guide walks through this step in detail.
- Chill the cake. Pop it in the fridge for at least 20 to 30 minutes. This firms everything up and gives you a solid base to work on.
- Apply your final coat generously. Don’t be stingy. It’s much easier to scrape away excess than to add more later.
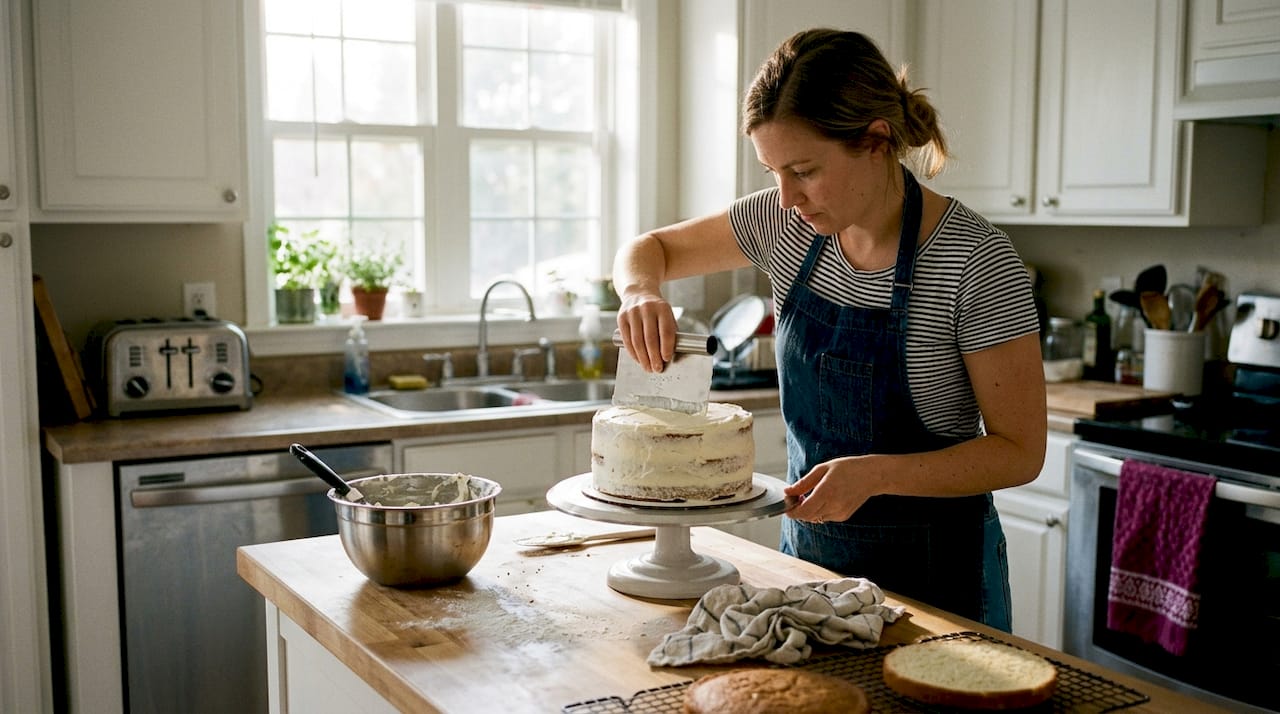
- Smooth the top with your offset spatula. Work from the centre outward in long, confident strokes.
- Smooth the sides with your bench scraper. Hold it steady and rotate the turntable slowly. The step-by-step approach professionals follow finishes the top edge by swiping inward with the spatula.
| Finish style | Best for | Tools needed | Look |
|---|---|---|---|
| Sharp edges | Fondant, firm buttercream | Bench scraper, smoother | Clean, geometric, modern |
| Rounded edges | Soft buttercream | Offset spatula | Soft, rustic, classic |
For even cake baking tips before you even get to the decorating stage, it’s worth reading up on how to bake level layers from the start. And if you want to master the crumb coat specifically, our guide on perfect crumb coating has you covered.
Pro Tip: If your cake looks wobbly or is bulging at the sides, it’s almost always because the frosting was applied before the crumb coat had properly chilled. Always give it enough time in the fridge. Patience here pays off visually.
Quick decoration tricks for instant wow factor
Now, with your foundation set, focus on easy details that instantly transform a plain cake into a professional showpiece. You really don’t need piping skills to achieve a stunning result.
Some of the most effective no-piping enhancements include:
- Fresh flowers or greenery: Tuck them in just before serving for an effortlessly elegant look. Always use food-safe varieties or wrap stems in floral tape.
- Fruit clusters: Berries, figs, or citrus slices look incredible piled on top. Make sure they’re washed and thoroughly dried before placing them on frosting.
- A ganache or caramel drip: Pour it over a well-chilled cake and let gravity do the work. The no-piping methods that professionals rely on include drips as one of the most reliable instant upgrades.
- Edible glitter or metallic lustre dust: A light dusting adds shimmer and makes any cake look special.
- Texture swoops: Use the back of a spoon or a small palette knife to create swirls and peaks in buttercream. No skill required.
- Monochromatic scheme: Choose one colour family for your frosting, decorations, and drip. It looks intentional and very current.
A quick note on food safety: always check that fresh botanicals are non-toxic and haven’t been treated with pesticides. When in doubt, use edible flowers bought specifically for baking.
Did you know? No-piping decoration methods cover around 90% of common cake requests, from birthdays to celebrations. You genuinely don’t need to master piping to deliver impressive results.
Pro Tip: For an instant glaze finish, brush warm apricot jam over a naked sponge before adding decorations. It adds shine, seals the crumb, and gives fruit something to grip onto.
For more ideas, our guide on decorating without fondant is packed with creative options. And if you need something quick, our last-minute cake decoration ideas are perfect for time-pressed bakers. When you’re ready to try some simple piping, our piping basics guide is a great next step.
Troubleshooting common issues and expert fixes
Even with the best tools and techniques, a few common mistakes can undo your hard work. Here’s how to keep your cakes looking perfect every time.
The most frequent problems bakers run into are:
- Uneven frosting: Usually caused by applying too little buttercream or not chilling between coats. Add more frosting and start again.
- Lumpy buttercream: Almost always down to unsifted icing sugar. Always sift your sugar before mixing, and beat the buttercream for longer than you think you need to.
- Unstable or leaning cakes: Layers that aren’t level, or fillings that are too soft. Chill between layers and use a firmer filling if needed.
- Elephant skin on fondant: This happens when fondant is over-smoothed or the surface underneath is too moist. Work quickly and use a light dusting of icing sugar.
- Shaky hands causing uneven scraping: Chill the cake for longer before your final pass with the bench scraper. A firmer surface is far more forgiving.
For common decorating mistakes and how to avoid them, it’s worth bookmarking that resource before your next bake.
Important: A warm kitchen is one of the biggest enemies of a polished cake. Buttercream softens quickly,
runny frosting in warm rooms is one of the most cited causes of decorating disasters. If your kitchen is warm, work in shorter bursts and return the cake to the fridge frequently.
Pro Tip: Spotted a crack or dent just before serving? A small rosette of buttercream piped over the spot, or a strategically placed flower or berry, can hide almost any last-minute flaw. Nobody needs to know.
A fresh take: why instant improvements matter more than perfection
Here’s something we genuinely believe at The Vanilla Valley: the pursuit of perfection can actually hold you back. We see it all the time. Bakers who are so worried about getting sharp edges or flawless fondant that they stop enjoying the process entirely.
The truth is, most cakes are eaten at birthday parties, family gatherings, and casual celebrations where people are delighted by even the simplest upgrade. A smooth coat of buttercream and a handful of fresh berries will get more compliments than you expect. Every time.
Learning tips for quick cake upgrades builds real confidence, because you see results quickly. That confidence is what keeps you baking, experimenting, and improving over time. Chasing perfection from the start often does the opposite.
Professional-looking cakes are genuinely accessible to everyone. You don’t need expensive tools, years of training, or a spotless technique. You need a few good habits, the right supplies, and the willingness to give it a go. A clean, joyful finish beats a stressed, over-worked cake every single time.
Ready to transform your cakes? Get started with essential supplies
If reading this has given you the buzz to get baking, the next step is making sure you’ve got the right supplies to hand. There’s nothing more frustrating than being inspired and then realising you’re missing a key tool.

At The Vanilla Valley, we’ve been helping bakers of all levels find exactly what they need since 2009. From turntables and bench scrapers to edible glitter and cake decorating supplies of every kind, everything is in one place. We also offer free delivery options and next day delivery when you need supplies in a hurry. Browse our curated range of best baking tool kits and find the perfect starting point for your next cake project. Your most impressive bake is closer than you think.
Frequently asked questions
What’s the fastest way to make my cake look professional if I have no piping skills?
Add fresh flowers, fruit, or a simple ganache drip to instantly elevate your cake with no piping required. These methods are quick, accessible, and genuinely impressive.
What are the best affordable tools for an instant cake upgrade?
A turntable, bench scraper, and offset spatula are the essential affordable tools that deliver pro results for under £40 combined. Start with those three and build from there.
How do I get perfectly smooth sides and sharp top edges?
Apply a crumb coat, chill the cake, then smooth generous frosting with a bench scraper on a turntable. The sharp edge technique involves swiping inward along the top with an offset spatula.
Why does my frosting go runny or won’t hold its shape?
Frosting softens quickly in a warm room. Keep your kitchen cool, and follow the advice on chilling between steps to maintain structure throughout the decorating process.
Recommended
- Make your cakes look more professional: step-by-step guide - The Vanilla Valley
- How to Use Colour Dusts for Professional Cake Details - The Vanilla Valley
- Colour Palettes That Make Cakes Look Pricier - The Vanilla Valley
- Beginner Cake Decorating Tips for Stunning Results - The Vanilla Valley
- Choosing the Perfect Wedding Cake - Winelands Function – For Every Occasion, Your Celebration