
How to pipe simple cupcake swirls like a pro
TL;DR:
- Mastering cupcake swirls is achievable with proper tools, buttercream consistency, and technique practice.
- Consistent pressure, correct positioning, and practice are key to creating beautiful, professional-looking swirls.
- Simple piped swirls add charm and confidence to baking, serving as a foundation for creative decorating.
There is nothing quite as frustrating as spending time on a batch of cupcakes, only to find your swirls look flat, lopsided, or nothing like the beautiful bakes you see online. You squeeze the bag, something wobbles, and suddenly the whole thing collapses into a sad blob of buttercream. Sound familiar? You are absolutely not alone. The good news is that piping a gorgeous swirl is genuinely achievable for anyone, whether you are a complete beginner or a small-scale baker looking to tighten up your technique. This guide walks you through the tools, the buttercream prep, the piping steps, and the finishing touches so you can create swirls you are genuinely proud of.
Table of Contents
- Tools and ingredients you need
- How to prepare your buttercream for piping
- Piping the perfect cupcake swirl: step-by-step
- Troubleshooting swirls: fix, refine, and finish
- Our perspective: why simple swirls elevate every bake
- Shop essential cake decorating tools and supplies
- Frequently asked questions
Key Takeaways
| Point | Details |
|---|---|
| Essential tools matter | Using the right piping tips and bags makes swirls much easier to master. |
| Buttercream consistency is critical | Firm, pipeable buttercream will help swirls hold their shape and look professional. |
| Angle and pressure are key | Hold the piping bag perpendicular and use steady, even pressure for best results. |
| Practice adds charm | Practice builds confidence, and even beginner swirls have an appealing, homemade look. |
Tools and ingredients you need
Now that you know why mastering the swirl matters, let us get you set up with exactly what you need to begin. Having the right kit makes an enormous difference. You can have perfect buttercream, but if your piping bag is flimsy or your tip is the wrong size, the results will disappoint.
Here is your essential toolkit:
- Piping bags (disposable or reusable, 12-inch or larger)
- Piping tips: a 1M open star tip for classic ruffled swirls, a 2D closed star for a denser finish, and a large round tip for smooth domes
- Couplers for swapping tips without changing bags
- A palette knife or spatula for filling the bag cleanly
- Mixing bowls in two sizes
- A stand mixer or hand mixer for beating buttercream properly
- Gel food colours if you want to add a pop of colour
For the buttercream itself, you will need unsalted butter (at room temperature), sifted icing sugar, a splash of whole milk or double cream, and a little vanilla extract. These four ingredients, combined correctly, give you a base that pipes beautifully. Learning how to frost cupcakes well really does start with getting this foundation right.
| Tool | Why it matters |
|---|---|
| 1M open star tip | Creates the classic, ruffled swirl most people recognise |
| 2D closed star tip | Produces a tighter, denser swirl with more defined ridges |
| Large round tip | Ideal for smooth, dome-style finishes |
| Coupler | Lets you swap tips mid-batch without wasting buttercream |
| Disposable piping bags | Hygienic and easy to manage for beginners |
Consistency is everything. Buttercream that is firm enough to hold its shape but still pipeable is the target. Beat it for 3 to 5 minutes, sift your icing sugar, and use room temperature butter. A quick test squeeze onto a plate will tell you immediately whether it is ready.
Pro Tip: Always sift your icing sugar before adding it to the butter. Skipping this step is the number one cause of grainy buttercream, and no amount of extra beating will fully rescue it. If you do hit problems, our guide on fixing buttercream problems has you covered.
Optional but useful: a turntable for rotating cupcakes as you pipe, and a tall glass or mug to hold your piping bag upright while you fill it.
How to prepare your buttercream for piping
With the right tools ready, the next step is to ensure your buttercream base is absolutely flawless. Even the best piping technique cannot save buttercream that is too soft, too stiff, or grainy. Getting this right before you even touch the piping bag is where most successful swirls begin.
Follow these steps for reliable, pipeable buttercream every time:
- Start with room temperature butter. It should be soft enough to press a finger into easily but not greasy or melted. Cold butter will not beat properly and creates a lumpy mix.
- Beat the butter alone for 2 minutes until it is pale and creamy. This step is often skipped and makes a real difference to the final texture.
- Sift your icing sugar in two or three additions, mixing on low between each. Adding it all at once creates a sugar cloud and an uneven mix.
- Add a teaspoon of vanilla extract and one to two tablespoons of milk or double cream. Beat on medium-high for a further 3 minutes.
- Test the consistency. Pipe a small swirl onto a plate or piece of parchment. As the guidance from Buttercream Recipe for Piping puts it: “Buttercream must be firm enough to hold shape but pipeable; test by squeezing a test swirl that holds without drooping.”
If the buttercream is too runny, add icing sugar a tablespoon at a time. If it is too stiff, add a tiny splash of milk and beat again. It is a gentle balancing act, but you will feel the difference quickly. Our article on achieving perfect textured buttercream goes deeper into this if you want to refine your approach further.
If your buttercream looks curdled or grainy, do not panic. Read our guide on why buttercream gets grainy before starting over.
Pro Tip: Only add your gel food colour once the buttercream has reached the perfect consistency. Adding colour too early can thin the mixture and throw off the balance you have worked hard to achieve.
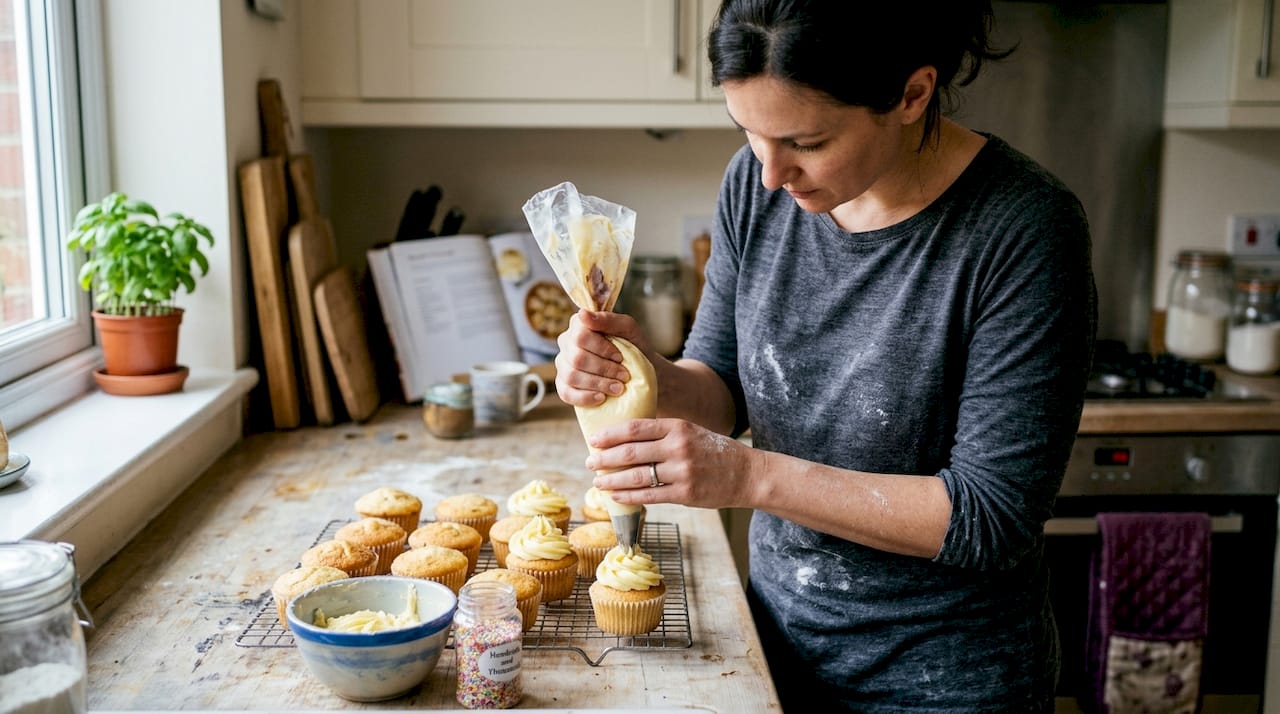
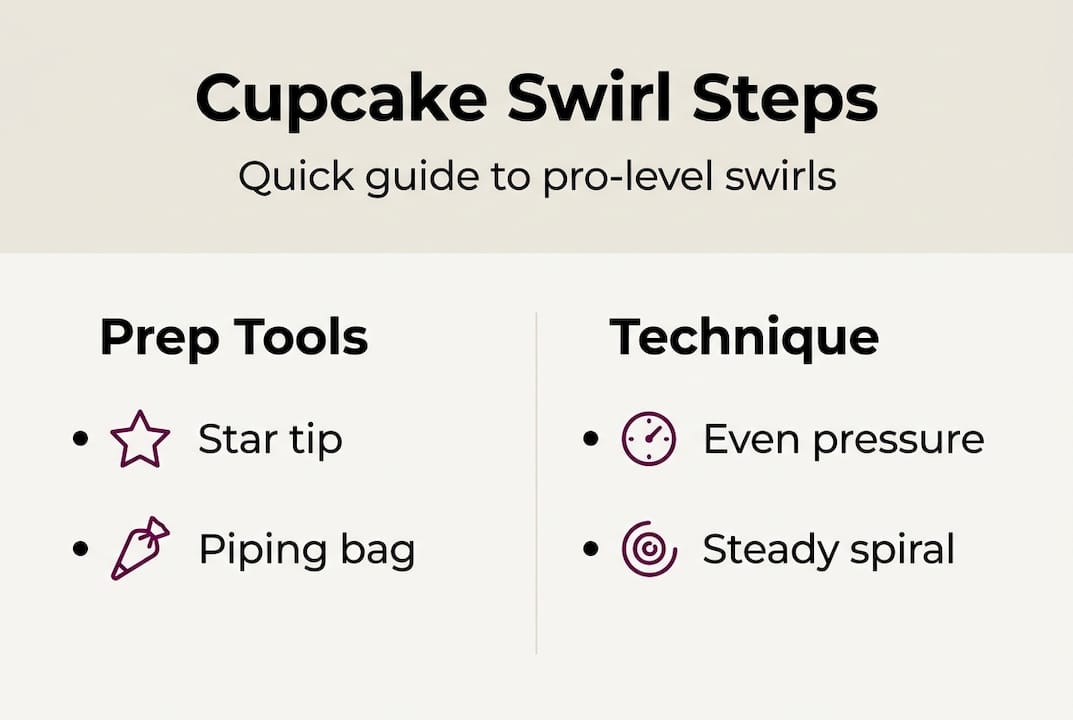
Piping the perfect cupcake swirl: step-by-step
With smooth, stable buttercream on hand, it is time to create beautifully swirled cupcakes using a tried-and-true technique. This is the part that feels daunting at first, but once you have done it a few times, it genuinely becomes second nature.
Fill your piping bag no more than two-thirds full. Overfilling makes the bag hard to control and puts pressure on the seam. Twist the top closed firmly and squeeze out any air pockets before you begin.
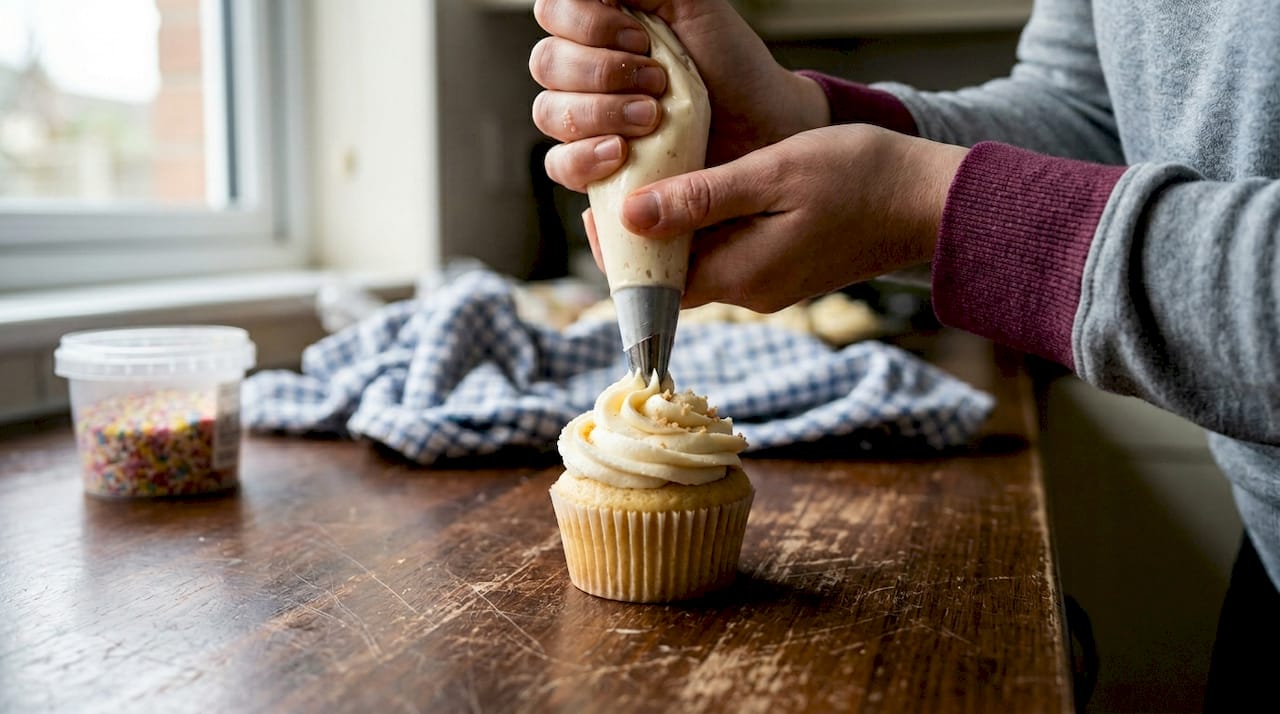
Now, follow these steps for the classic swirl:
- Hold the bag vertically, at a 90-degree angle directly above the cupcake. This is the single most important positioning tip.
- Start at the outer edge of the cupcake, not the centre. This gives the swirl its layered, stacked look.
- Apply steady, even pressure as you begin to spiral inward. Do not rush. Consistent pressure equals consistent lines.
- Work in 2 to 3 loops, spiralling inward and slightly upward as you go. As the piping technique guidance explains, holding the bag perpendicular and spiralling inward in a clockwise or anti-clockwise motion over 2 to 3 loops is the standard method.
- Finish with a stop-pull motion. Ease off the pressure first, then lift the bag upward and away in one smooth movement. This prevents a messy tail.
Once practised, a single swirl takes under a minute per cupcake. That means a batch of 12 can be piped in around 10 minutes, which is brilliant news if you are baking for events or selling to customers.
| Tip type | Effect | Best for |
|---|---|---|
| 1M open star | Ruffled, airy swirl | Classic cupcakes, celebrations |
| 2D closed star | Dense, defined ridges | Formal bakes, elegant displays |
Common mistakes to watch for:
- Releasing pressure too early, which creates a flat, unfinished top
- Moving the bag sideways instead of spiralling upward
- Starting in the centre, which gives a flat rather than a layered swirl
For more inspiration on what you can do once the basics click, explore creative piping techniques and discover how varied your decorating can become. Our guide on using piping bags also covers bag handling in more detail, and our beginner cake decorating tips are worth bookmarking for your next project.
Troubleshooting swirls: fix, refine, and finish
Even with clear instructions, the best results require a little patience and a toolbox of simple tricks for common hiccups. Not every swirl will be perfect straight away, and that is completely fine.
Here are the most common problems and their quick fixes:
- Swirl collapses or droops: Buttercream is too soft. Chill the bowl for 10 minutes and beat again briefly before continuing.
- Jagged or uneven lines: Pressure is inconsistent. Practise squeezing at a steady pace on parchment before moving to the cupcakes.
- Buttercream crusting in the bag: The bag has been sitting too long. Re-knead the bag gently to soften the buttercream inside.
- Swirls look different on each cupcake: You are changing your starting position or angle. Pick one spot on the cupcake edge and always start there.
- Peaks or tails at the top: You are lifting the bag before releasing pressure. Ease off first, then lift.
As the advice from How to Frost Cupcakes puts it so well: “Practice builds muscle memory quickly; imperfections add charm.” That really is the spirit to hold onto.
Pro Tip: Pipe 6 to 8 practice swirls on a sheet of parchment paper before touching your cupcakes. Scrape the buttercream back into the bowl and reuse it. This builds control without wasting your bake.
Once you are happy with the swirl shape, finishing touches make a real difference. Sprinkles, edible glitter, or a dusting of lustre spray can elevate even a simple swirl into something that looks genuinely professional. When adding colour, always use gel colours and follow our guide on colouring buttercream safely to keep the texture intact. For seasonal ideas, our decorating ideas for cupcake swirls article is packed with creative inspiration.
Our perspective: why simple swirls elevate every bake
Once you have ironed out common piped swirl mistakes, it is worth considering the broader value of this foundational technique. There is a tendency in the baking world to celebrate complexity. Intricate sugar flowers, multi-tier showpieces, and elaborate painted cakes get all the attention. But we genuinely believe the simple swirl is one of the most underrated skills in decorating.
Here is the thing: a well-piped swirl communicates care. It tells the person receiving that cupcake that someone took time and thought about presentation. It does not need to be flawless to do that job. In fact, slight variations from one cupcake to the next give a batch its handmade charm. Perfectly identical swirls can actually feel a little cold and machine-made.
What we have seen over the years, working with bakers at every level, is that once someone masters the basic swirl, their confidence in decorating grows enormously. Suddenly beginner cake decorating feels exciting rather than intimidating. They start experimenting with colour, different tips, and layering techniques. The swirl is the gateway. Perfection is not the goal. Consistency, personality, and a little joy in the process are what make baking worth sharing.
Shop essential cake decorating tools and supplies
Inspired to give simple cupcake swirls a go? Get everything you need for your next bake here.
We have been helping bakers find the right tools since 2009, and we know how much of a difference quality supplies make. Whether you are picking up your first piping bag or restocking on tips and gel colours, we have got you covered.

At The Vanilla Valley, you will find all the piping tips, bags, couplers, and buttercream essentials mentioned in this guide, alongside a huge range of cake decorating supplies to fuel your creativity. From sprinkles to food colours, boards to boxes, everything is in one place. We also offer free delivery options and next day delivery when you need supplies in a hurry. Pop over to the shop and see what catches your eye. Your next batch of beautiful swirled cupcakes is closer than you think.
Frequently asked questions
Which piping tip is best for simple cupcake swirls?
An open star tip such as the Wilton 1M is the most popular choice for smooth, ruffled swirls, while a closed star tip like the 2D produces a denser, more defined effect.
How do I stop my buttercream from drooping when piping?
Ensure your buttercream is firm enough to hold shape by beating it for 3 to 5 minutes using room temperature butter, then test it by piping a small swirl that holds without drooping before moving to your cupcakes.
Can I colour buttercream without changing its texture?
Yes, always use gel food colouring and add it only after the buttercream has reached the correct consistency, as our guide on colouring without texture issues explains in full.
How can I achieve consistent swirls on every cupcake?
Hold the piping bag at a 90-degree angle directly above the cupcake, apply steady even pressure, and practise the same spiral motion starting from the outer edge each time.
Is it normal for beginner swirls to look messy?
Absolutely. As practice builds muscle memory quickly, even a few practice runs on parchment will show a marked improvement, and any imperfections simply add to the handmade charm of your bake.
Recommended
- 7 Essential Creative Buttercream Techniques for Beginners - The Vanilla Valley
- Beginner Cake Decorating Tips for Stunning Results - The Vanilla Valley
- Creative cupcake decorating ideas for spring parties - The Vanilla Valley
- How to get a perfect crumb coat every time: flawless cakes - The Vanilla Valley