
Colour your buttercream without overmixing for silky results
TL;DR:
- Proper technique involves minimal overmixing and folding to preserve buttercream’s structure.
- Gel and powder colors are preferred as they do not compromise texture unlike liquid dyes.
- Resting coloured buttercream deepens shades naturally, reducing the need for excess dye or mixing.
Getting vibrant buttercream colours is one of those goals that trips up even enthusiastic bakers. You start with a perfectly fluffy, glossy batch, add a drop of colour, mix a little more, then suddenly the texture is grainy, flat, or worse, split. It feels like a cruel trade-off. But here’s the truth: you do not have to sacrifice your buttercream’s structure to achieve rich, show-stopping shades. With the right techniques and a little patience, stunning colour and silky texture can absolutely coexist. This article walks you through exactly how to make that happen, from choosing the right colouring products to resting methods that do the hard work for you.
Table of Contents
- Why overmixing ruins buttercream
- Essential tools and food colours: What the experts recommend
- Step-by-step: Colouring buttercream without overmixing
- Deep and bold colours: Special techniques to avoid overmixing
- Getting true whites and pastels: Counteracting yellow butter
- Expert perspective: Why less is more with buttercream colouring
- Upgrade your buttercream skills with the right supplies
- Frequently asked questions
Key Takeaways
| Point | Details |
|---|---|
| Choose gel colours | Gel and powder colours give vibrant results without thinning your buttercream. |
| Mix as little as possible | Minimal mixing preserves buttercream texture, preventing grainy or split icing. |
| Let colours develop naturally | Resting your buttercream deepens the shade without extra dye or effort. |
| Use special techniques for deep shades | Try chocolate bases, microwave or immersion blending for reds and blacks. |
| Counter yellow for true whites | A hint of purple gel helps neutralise yellow butter for perfect white icing. |
Why overmixing ruins buttercream
Let’s start with the science behind the problem, because once you understand it, the solutions make complete sense. Buttercream gets its light, creamy texture from air bubbles beaten into the fat during mixing. It sounds simple, but that airy structure is actually quite fragile.
When you overmix, you collapse those air bubbles. The result is deflated buttercream structure that goes from fluffy and voluminous to dense, greasy, or grainy. And the consequences are not just aesthetic. Overmixed buttercream is harder to spread, difficult to pipe neatly, and far less pleasant to eat.
Where colour comes into this is sneaky. Most bakers add their gel or dye, then return the bowl to the mixer and beat it in. Each extra minute on the machine is working against you. Even a low-speed blitz to incorporate colour can push the buttercream past its ideal consistency.
Here are the most common signs that your buttercream has been overmixed:
- It looks shiny or greasy rather than matte and fluffy
- The texture feels dense and heavy when you lift the spatula
- It has separated slightly, with a liquid pooling at the bottom
- It has lost volume and looks noticeably smaller in the bowl
- It tastes more fatty than creamy
Learning to make perfect textured buttercream is really about learning when to stop. The mixing stage for incorporating colour should be as short as possible, relying on folding with a spatula rather than the machine.
“Overmixing is one of the most common mistakes we see. Once the air is gone, you cannot simply whip it back in. Prevention is everything.” This is the advice shared consistently by professional decorators who know how quickly a great buttercream can go wrong.
If you find yourself regularly dealing with these issues, our guide on how to fix common buttercream problems covers practical rescue methods worth keeping bookmarked.
Essential tools and food colours: What the experts recommend
Understanding the problem means you can now select the right tools for the job. Not all food colours behave equally inside buttercream, and choosing the wrong type is one of the fastest ways to ruin texture before you have even started mixing.

The gel and powder colour advice from professional decorators is clear: avoid liquid food colouring wherever possible. Liquids introduce water into a fat-based mixture. Water and fat do not mix happily, and the result is often a buttercream that thins out, splits, or becomes slightly curdled.
Here is a quick comparison of your main options:
| Colour type | Effect on texture | Vibrancy | Best for |
|---|---|---|---|
| Gel | Minimal impact | High | Most buttercream projects |
| Powder | None when used correctly | High | Deep colours and pastels |
| Oil-based | Compatible with fat base | High | Rich, saturated shades |
| Liquid | Can thin and split | Low to medium | Avoid for buttercream |
For home bakers, gel colours are the go-to choice. They are concentrated, meaning you use less to achieve intensity, and they blend into buttercream without disturbing the fat structure. Powders are brilliant for very deep shades like black or navy, where you need a lot of pigment without adding any liquid at all.
Essential tools to have alongside your colours:
- A flat-edged silicone spatula for folding
- Toothpicks for adding tiny gel increments
- A small palette knife for blending on the surface
- An immersion blender for stubborn, deep-colour batches
Pro Tip: Always check the ingredient label on your food colour before buying. If water appears in the first three ingredients, it may thin your buttercream, especially for delicate formulations like Swiss or Italian meringue-based recipes.
Our full guide on how to colour buttercream without changing texture goes even deeper into product selection if you want to explore further.
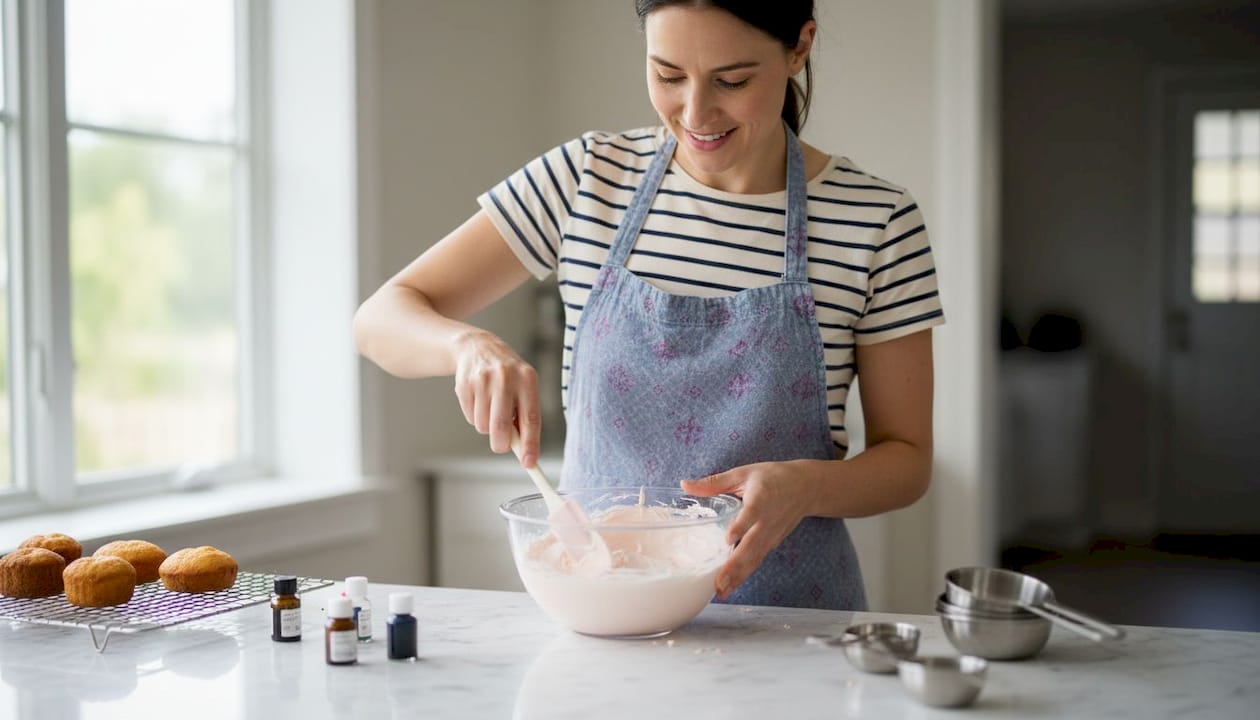
Step-by-step: Colouring buttercream without overmixing
Now that you have your colours and tools, it is time to put them into action. The key principle here is gradual addition and minimal agitation. Think of it like seasoning food: add a little, assess, add a little more.
- Start with room-temperature buttercream. Cold buttercream is stiffer and requires more mixing to incorporate colour evenly, which increases the risk of overworking it.
- Dip a toothpick into your gel colour and wipe a small amount directly onto the surface of the buttercream. Less than you think you need is always the right starting point.
- Fold the colour in using a spatula. Use broad, sweeping strokes and turn the bowl as you go. Avoid circular stirring motions, which trap less air than folding.
- Check the shade before adding more. The colour you see immediately is not the final colour. It will deepen as it rests.
- Repeat in tiny increments until you are close to your desired shade, always folding rather than mixing with a machine.
- Cover the bowl and let it rest. This is where the magic happens.
The colour resting technique is genuinely one of the most underused tricks in cake decorating. Leaving coloured buttercream to rest for 1 to 24 hours allows the pigment to fully absorb and colours deepen naturally without any additional mixing required. Many bakers find their overnight buttercream is two or three shades deeper than what they saw the night before.
Pro Tip: If you are making buttercream for a morning event, colour it the evening before. You will almost always need less dye than you expected, and the texture stays perfect.
For more ideas on mastering this process, our buttercream texture tips and creative buttercream techniques guides are both brilliant next reads.
Deep and bold colours: Special techniques to avoid overmixing
If you want to achieve show-stopping bold colours, there are a few expert techniques worth considering. Achieving true reds, blacks, or navy shades is notoriously tricky because these colours require so much pigment that you risk both bitterness and textural damage from overworking.
Here is a summary of the three most effective professional methods:
| Method | Pros | Cons |
|---|---|---|
| Chocolate buttercream base | Reduces dye needed, no bitterness | Changes flavour profile slightly |
| Microwave method | Deepens colour fast, minimal mixing | Must cool before folding back in |
| Immersion blender | Even blending, great for large batches | Can overheat if overused |
For the chocolate base technique, simply make your buttercream with melted dark chocolate already incorporated before you begin adding colour. The deep brown starting point means you reach deep red or black with far less dye, which keeps both bitterness and texture damage in check.
The microwave method works beautifully for bold shades. Take roughly a quarter of your coloured batch, heat it for 10 to 15 seconds until just softened, then fold it back into the main bowl. The warmth helps the pigment distribute without extra dye or mixing.
For large batches, using an
“Deep colours like red and black are where patience really earns its keep. The bakers who rush will always use too much dye and end up with a bitter, grainy mess. The professionals wait, rest, and layer.”
You can read more about choosing the right buttercream style as a foundation before you tackle bold colour work. The right base recipe makes everything easier.
Getting true whites and pastels: Counteracting yellow butter
For cakes needing white or pastel shades, there is a safe way forward. Butter is naturally yellow, and that warm tone will show through any delicate pastel shade you try to achieve. The good news is that there is a simple, low-risk fix.

The key advice from decorators is to neutralise yellow with purple: add the tiniest amount of purple gel colour to your buttercream before you begin. Purple sits opposite yellow on the colour wheel, so it cancels out the warm tones and leaves you with a much cleaner, cooler base for white or pastel work.
Here is how to handle whites and pastels well:
- Whip your butter alone for several minutes before adding icing sugar. The longer whipping time lightens the colour of the fat before you even begin.
- Use unsalted butter where possible, as it is often paler than salted varieties.
- Add purple gel on a clean toothpick in the smallest possible quantity. A smear, not a drop.
- Fold gently and assess the shade before adding anything else.
- For pastels, add your chosen colour after the neutralising step, not before.
Pro Tip: Purple gel is extraordinarily concentrated. Start with less than you think is reasonable. A fraction too much and your white buttercream will tip into lilac.
You can also find an external demonstration of this neutralising yellow technique which shows the process visually in real time. For a deeper read, our guide on proven white buttercream techniques has everything you need.
Avoiding over-whipping at this stage is just as important as avoiding overmixing during the colouring stage. The principles are the same: less is genuinely more.
Expert perspective: Why less is more with buttercream colouring
All these methods share a philosophy grounded in experience. The most common mistake we see from bakers, whether they are brand new or have been decorating for years, is trying to force the result. More dye. More mixing. More intervention. And almost every time, more damage.
The reality is that the bakers who achieve the most vibrant, professional-looking buttercream are the ones who do the least. They use gel colours, gradual addition, and resting as their primary method. They fold rather than beat. They wait overnight rather than adding another squeeze of dye.
Patience is not a passive skill here. It is an active, deliberate choice that protects your work. If your buttercream is not quite the shade you wanted, the instinct is to add more. But the right answer is almost always to cover the bowl, walk away, and come back in an hour.
We have seen this shift something for bakers who previously struggled. Once they stop fighting grainy buttercream with more effort, the results improve dramatically. Restraint, it turns out, is one of the most powerful tools you have.
Upgrade your buttercream skills with the right supplies
Getting started with these methods is easier with the right supplies to hand. At The Vanilla Valley, we have been supporting bakers across the UK since 2009, and we stock everything you need to put these techniques into practice straight away.

From premium gel food colours to professional-grade spatulas and decorating tools, our cake decorating supplies are chosen with real bakers in mind. Whether you are decorating your first celebration cake or running a small baking business, we have got you covered. And if you want to build your skills further, our perfect textured buttercream guide is a brilliant companion to everything you have just read. Come and explore, we would love to be part of your baking journey.
Frequently asked questions
Why use gel or powder instead of liquid food colour for buttercream?
Gel and powder colours avoid introducing water into your buttercream, which keeps the texture smooth and stable. Liquid colours can thin the mixture or cause it to split, especially in meringue-based recipes.
How long should you let coloured buttercream rest?
Let your coloured buttercream rest for 1 to 24 hours so the pigment absorbs fully and the shade deepens on its own. This means you need less dye overall and avoid extra mixing.
What’s the best way to achieve deep colours like red or black?
Start with a chocolate buttercream base to reduce the amount of dye needed, and consider the microwave or immersion blending method for even, intense colour with minimal mixing.
How do you make buttercream truly white for cake decorating?
Add the smallest possible amount of purple gel colour to cancel out the yellow tones from butter, and whip your butter well before adding icing sugar to lighten the base.
How can I avoid grainy or split buttercream when colouring?
Add colour gradually using a toothpick, fold it in with a spatula rather than a mixer, and resist the urge to overwork the buttercream once the colour looks close to right.
Recommended
- How to Colour Buttercream Without Ruining the Texture Easily - The Vanilla Valley
- How to colour buttercream without changing texture in 2026 - The Vanilla Valley
- 7 Essential Creative Buttercream Techniques for Beginners - The Vanilla Valley
- 7 Easy Ways to Fix Common Buttercream Problems at Home - The Vanilla Valley