
Drip cake mastery: top tips, pro tricks, and pitfalls
TL;DR:
- Achieving perfect drip cakes relies on proper temperature control, ratios, and ingredient quality.
- Using a squeeze bottle and testing ganache consistency before applying improves results significantly.
- Patience in chilling and setting the cake is key to preventing common drips disasters.
There is something genuinely exciting about a drip cake done well. Those glossy, perfectly spaced rivulets of ganache cascading down a beautifully iced cake look effortless on Instagram. At home, though, the story can be very different. Drips run straight to the board, clump together, or refuse to move at all. Sound familiar? You are not alone. Most bakers who struggle with drips are missing just a handful of key details about temperature, ratios, and technique. Get those right, and the results can genuinely look professional. This guide covers everything you need to know, from ganache ratios to avoiding the most common disasters.
Table of Contents
- Understanding the basics of drip cake success
- Tools and techniques: expert-approved methods
- Avoiding classic mistakes: why drips fail and how to fix them
- Finishing touches and storage for lasting perfection
- Our take: why good drips are more science than art
- Level up your drip cakes with the right supplies
- Frequently asked questions
Key Takeaways
| Point | Details |
|---|---|
| Temperature is critical | A cold cake and warm ganache ensure perfect, controlled drips every time. |
| Test before you drip | Always trial your ganache consistency on a cold surface to avoid disasters. |
| Tools shape your look | Squeeze bottles deliver uniform drips; spoons give a more rustic, artisan finish. |
| Mistakes are fixable | Knowing the cause of common drip fails helps you troubleshoot quickly and effectively. |
| Set and store with care | Let drips set in the fridge and finish with careful storage for lasting results. |
Understanding the basics of drip cake success
Before any drip touches your cake, you need to understand what actually makes a drip cake work. It is not simply a matter of melting some chocolate and pouring it over the top. The magic (and the science) lies in three things: your ingredients, your ratios, and your temperatures.
Start with the right ingredients
Not all chocolate is equal for ganache. Real chocolate, whether dark, milk, or white, contains cocoa butter that melts smoothly and sets beautifully. Candy melts are a popular shortcut, but they simply do not behave the same way. For a ganache that flows, sets with a glossy finish, and tastes amazing, always use real chocolate bars or chips. Pair that with heavy whipping cream, which has a high enough fat content to emulsify properly with the chocolate.
Our full ganache guide is a brilliant place to start if you are new to making it from scratch.
Get your ratios right
This is where most home bakers go wrong. Different chocolates need different ratios of cream to chocolate because of their varying cocoa butter content. Use approximately 1:1.5 cream to chocolate by volume for milk chocolate. White chocolate needs even less cream because it is much softer. Dark chocolate can handle a bit more. For a quick reference, here is a handy guide:
| Chocolate type | Cream | Chocolate |
|---|---|---|
| Dark chocolate | 1 part | 1.25 parts |
| Milk chocolate | 1 part | 1.5 parts |
| White chocolate | 1 part | 2 parts |
For more detail on the differences, our guide to types of ganache breaks it all down beautifully.
Why temperature is everything
Your ganache needs to be warm enough to flow but not so hot that it races down the cake uncontrollably. Your cake, meanwhile, needs to be cold. The contrast between warm ganache and a cold cake is what creates those clean, controlled drips.
Chill your cake in the fridge for 20 to 30 minutes, or the freezer for around 10 minutes, before you begin. This step is non-negotiable.
- Warm ganache on a warm cake = runaway drips
- Cool ganache on a cold cake = stubby, short drips
- Warm ganache on a cold cake = showstopper drips
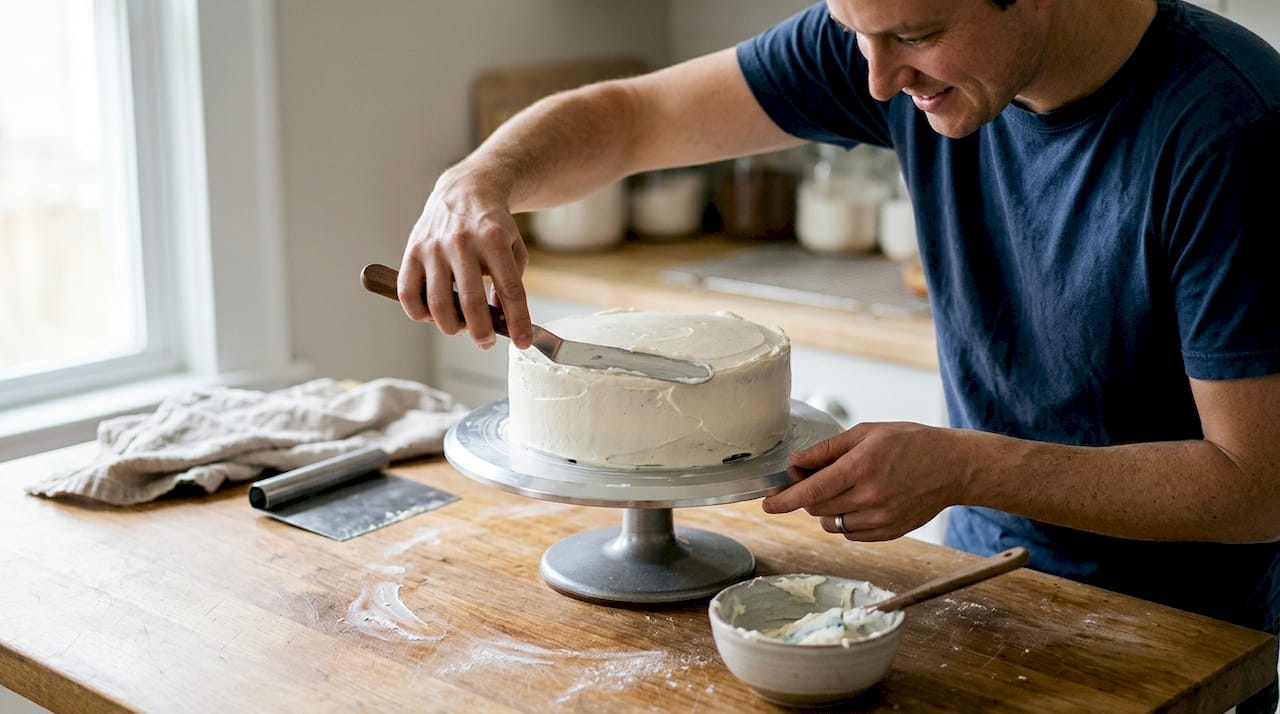
Pro Tip: Always ensure your cake has a completely smooth, crumb-free buttercream layer before chilling. Any bumps or crumbs will interrupt the drip flow and make your finished result look uneven.
Tools and techniques: expert-approved methods
Now that you have the right ingredients and temperatures, the next key success factor is how you actually apply your drips. The tools you choose matter more than most people realise.
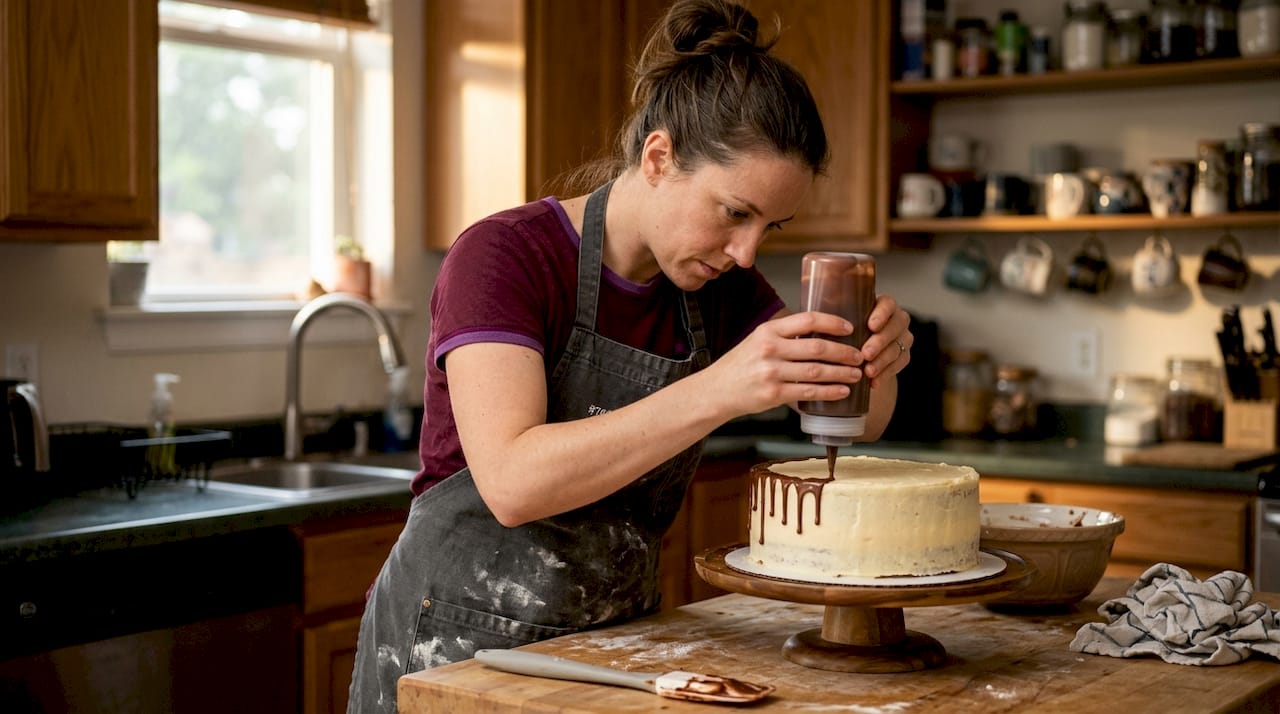
Squeeze bottle versus spoon: which is better?
Both methods work well, but they give different results. Here is a quick comparison:
| Method | Best for | Effect |
|---|---|---|
| Squeeze bottle | Precision and control | Consistent, uniform drips |
| Spoon | Rustic, artisan look | Varied, organic drips |
For beginners, a squeeze bottle is almost always the better choice. It gives you control over how much ganache you release and where it goes. Spoons can create a beautiful alternative drip style but require a steadier hand and a good feel for the ganache consistency.
For more inspiration on getting results you are proud of every time, our guide to perfect ganache every time is packed with useful advice.
Step-by-step drip application
Follow these steps each time and your drips will improve dramatically:
- Make your ganache and allow it to cool to around 32 to 35 degrees Celsius. It should feel just slightly warm to the touch.
- Transfer to a squeeze bottle or prepare your spoon.
- Do a test drip on the side of a chilled glass or the back of a cold spoon. It should flow slowly and stop within 3 to 5 centimetres.
- Starting at the top edge of your chilled cake, apply drips using the squeeze bottle or spoon. Vary your pressure gently to create drips of different lengths for a natural look.
- Work around the entire circumference before filling in the top surface with the remaining ganache.
- Use a palette knife or the back of a spoon to spread the ganache across the top in smooth, even strokes.
Pro Tip: Do a test drip on a cold surface before you commit to the cake. Aim for a drip that stops cleanly about 3 to 5 centimetres from the top edge. Adjust the temperature of your ganache as needed.
If you are planning something special, our Easter drip cake guide shows these techniques applied in a really creative, seasonal way.
Avoiding classic mistakes: why drips fail and how to fix them
Even with perfect technique and tools, the real make-or-break factor is avoiding classic mistakes. Here is what trips up most bakers, and exactly how to fix it.
The most common drip disasters
Temperature mismatch is the number one reason drips go wrong. It is not about skill level. Even experienced bakers get caught out. Understanding the cause of each problem makes troubleshooting much quicker.
“The most common drip mistakes come down to temperature. Ganache too warm and your drips race away. Ganache too cool and they barely move. Getting that sweet spot is where the magic happens.”
Here is your troubleshooting checklist:
- Runaway drips: Your ganache was too warm or your cake was not cold enough. Solution: let the ganache cool a little longer and always chill your cake beforehand.
- Stubby, short drips: Ganache is too cool or too thick. Solution: gently warm the ganache in short bursts (10 seconds at a time in the microwave) and stir well before retesting.
- Grainy or separated ganache: You may have overheated the chocolate or used poor-quality chocolate. Solution: try a gentle rescue by adding a splash of warm cream and stirring slowly.
- Dull, matte finish: This often happens with white chocolate if the cream was too hot. Solution: use lower heat and stir gently rather than vigorously.
- Uneven drip coverage: Ganache applied too thickly in spots. Solution: use a lighter hand with the squeeze bottle and build up gradually.
Getting your ganache right from the beginning is the best prevention. Our guide to making ganache properly is a great resource to bookmark. And if you have ganache left over from a previous bake, knowing how to use it safely is important too. Our article on reheating ganache walks you through that step by step.
A quick note on chocolate quality
This genuinely matters. Cheaper chocolate often contains vegetable fats instead of cocoa butter. The result is a ganache that does not set properly, has a greasy texture, or lacks that beautiful glossy finish. Spending a little more on good chocolate makes a very visible difference to the final cake.

Finishing touches and storage for lasting perfection
Once you master the drip, preserving your creation’s beauty finishes the job. Here is how to keep it brilliant until serving.
Letting your drips set properly
Patience is genuinely a virtue here. Once you have applied all your drips and finished the top of the cake, chill the cake for 10 to 30 minutes before you add any toppings. This gives the ganache time to firm up so that when you place decorations on top, they sit neatly without sinking or disturbing the drip work.
Adding decorative toppings
Here is a simple, effective post-drip routine:
- Chill the finished drip cake for at least 10 minutes.
- Remove from the fridge and work quickly. Cold ganache can make some toppings slide if they are heavy, so plan your layout before you start.
- Add your largest decorations first: macarons, chocolate shards, or cake toppers.
- Fill in with medium decorations such as sweets or fresh fruit.
- Finish with sprinkles and any fine detail work.
- Return the cake to the fridge if not serving immediately.
For topping ideas that go beyond the obvious, our guide to creative ganache ideas is full of inspiration.
Keeping your cake fresh
A drip cake with ganache on the outside will stay fresher than a cake with buttercream alone, because ganache acts as a seal. That said, you still need to store it correctly.
- Refrigerate the finished cake in a box or under a cake dome to protect it from absorbing other fridge smells.
- Avoid leaving it uncovered, as condensation when you bring it back to room temperature can cause the ganache surface to look cloudy.
- Bring the cake out around 30 to 60 minutes before serving for the best flavour and texture.
- For more advice, our guide to storing cakes covers freshness and flavour in much more detail.
Our take: why good drips are more science than art
Here is our honest view: the single biggest myth about drip cakes is that they require some kind of advanced artistic ability. They do not. What they require is precision.
When you follow the ratios, chill your cake properly, and test your ganache before committing to the cake, the results are remarkably consistent. Anyone can do this. The difference between a home bake that looks a bit sad and a bakery-level centrepiece often comes down to two things: temperature discipline and a willingness to test before you act.
The creative part, choosing your colours, your toppings, your drip lengths, comes after the science is sorted. And that is where your personal style develops. We have seen bakers go from total drip disasters to stunning showstoppers simply by understanding their ganache a little better. Our guide to choosing best ganache chocolate is a brilliant next step for anyone who wants to push their results further. Experiment, take notes, and enjoy the process. The science gives you the foundation. The art is all yours.
Level up your drip cakes with the right supplies
Ready to put all these tips into action? Having the right ingredients and tools really does make a difference, and that is something we feel strongly about at The Vanilla Valley. Whether you are just starting out or looking to refine your technique, finding the best quality chocolate, squeeze bottles, and decorating accessories sets you up for success from the very first drip.

We stock everything you need to create show-stopping cakes at home, from premium drip cake decorating supplies to a wide range of decorations and finishing touches. Not sure which ganache approach suits your style? Our guide to choosing the right ganache can help you decide. Come and explore the shop and see what inspires you next.
Frequently asked questions
Why did my drip run all the way to the cake board?
This usually means your ganache was too warm or your cake was not cold enough before you started. Always chill your cake for 20 to 30 minutes in the fridge, or 10 minutes in the freezer, and test the ganache consistency on a cold surface first.
Can I use candy melts instead of real chocolate for drips?
For best results, always use real chocolate rather than candy melts. Candy melts do not flow or set in the same way and often produce a dull, waxy finish rather than a glossy, professional-looking drip.
How do I make my drip ganache the right consistency?
A 1:1.5 ratio of cream to chocolate works well for milk chocolate, and always do a test drip on a chilled glass or surface before applying to your cake. Adjust temperature slightly if the drip moves too fast or too slowly.
When can I add sprinkles or toppings onto a drip cake?
Wait until the drips have set by chilling the cake for at least 10 to 30 minutes after applying the ganache. Adding toppings too early risks disturbing the drips before they have firmed up.
How should I store a finished drip cake?
Refrigerate the cake after decorating to keep the drips firm and maintain freshness. Bring it back to room temperature around 30 to 60 minutes before serving for the best flavour.
Recommended
- Master crumb coating for flawless cake finishes: A step-by-step guide - The Vanilla Valley
- Make your cakes look more professional: step-by-step guide - The Vanilla Valley
- How to instantly make your cakes look more professional - The Vanilla Valley
- How to get a perfect crumb coat every time: flawless cakes - The Vanilla Valley