
How to make buttercream white: proven techniques for flawless cakes
TL;DR:
- Yellow tint in buttercream mainly comes from butter’s beta-carotene and vanilla extract.
- Techniques like whipping butter, using purple gel, and choosing white ingredients achieve a white finish.
- For the best white buttercream, consider shortening or a blend of butter and shortening.
Getting truly white buttercream is one of those goals that trips up bakers at every level. You follow the recipe carefully, whip everything together, and still end up with something that looks more cream or pale yellow than crisp white. It is genuinely frustrating, especially when you are aiming for an elegant wedding cake or a clean canvas for bright decorations. The good news is that the yellow tint is not a flaw in your technique. It is simply chemistry, and once you understand it, you can fix it reliably every single time. This guide walks you through everything, from the science behind the colour to advanced professional tricks.
Table of Contents
- Understanding why buttercream is yellow
- Essential tools and ingredients for white buttercream
- Step-by-step: How to make buttercream white
- Pro secrets for ultra-white buttercream: Advanced techniques and alternatives
- Troubleshooting and avoiding common buttercream whitening mistakes
- Why chasing perfect white buttercream matters (and when to stop fussing)
- Get your white buttercream essentials at The Vanilla Valley
- Frequently asked questions
Key Takeaways
| Point | Details |
|---|---|
| Butter choice matters | Always use pale, high-fat unsalted butter for the whitest results. |
| Whipping method is crucial | Whip your butter thoroughly to aerate and lighten its colour before adding other ingredients. |
| Violet gel trick | A toothpick tip of violet gel neutralises yellow via colour theory but add it carefully. |
| Clear vanilla essential | Avoid brown vanilla extract to keep your buttercream a crisp white. |
| Fixing mistakes | Over-purpling, soft texture, and yellowing can all be remedied with expert tweaks. |
Understanding why buttercream is yellow
Let’s begin by understanding the causes of that yellow tint before tackling how to fix it.
Buttercream gets its yellow colour from the butter itself. Butter contains beta-carotene, a natural pigment that gives it that warm, golden tone. The higher the quality of the butter, often the more vibrant that yellow can be. Grass-fed and European-style butters tend to be the most deeply coloured because the cows eat more carotene-rich grass.
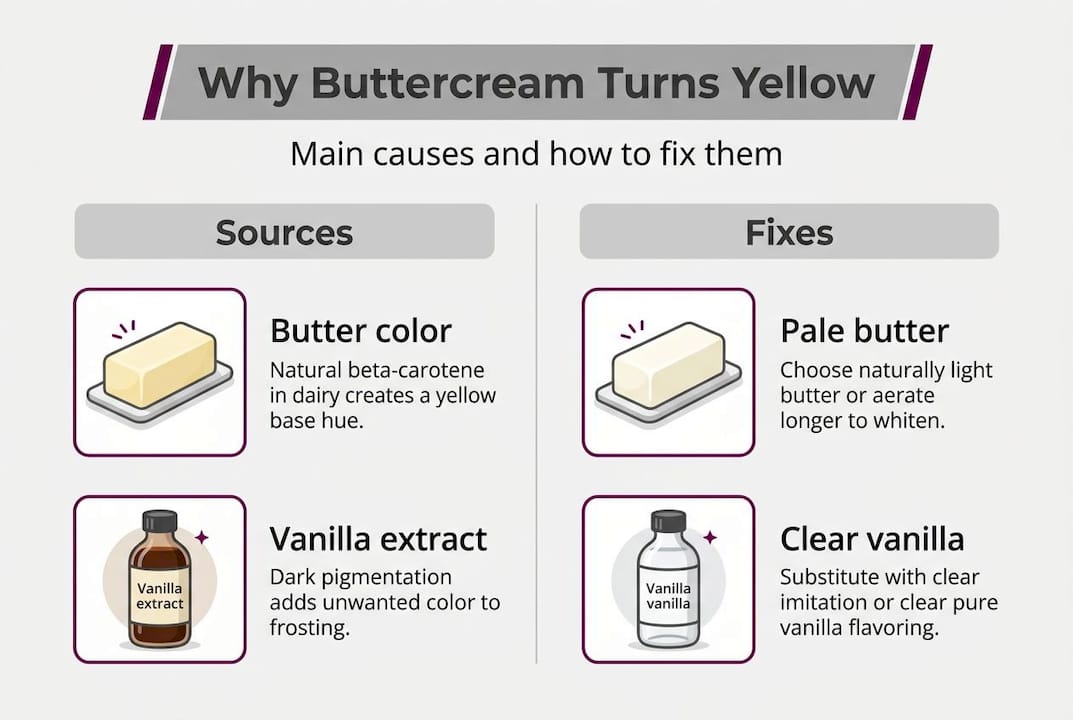
Vanilla extract adds to the problem. Standard brown vanilla extract introduces a creamy or beige tint into your mix, pushing the colour even further from white. Many bakers do not realise how much of an impact this single ingredient has until they swap it out.
Standard mixing alone will not fix this. Whipping does lighten the colour slightly by incorporating air, but it rarely gets you to a clean white without additional steps. Understanding the importance of white buttercream for decorating work helps you appreciate why these extra steps are worth taking.
| Ingredient | Colour impact |
|---|---|
| Unsalted butter (standard) | Yellow to golden tint |
| European or grass-fed butter | Deeper yellow tint |
| Brown vanilla extract | Creamy or beige tint |
| Clear vanilla extract | Minimal colour impact |
| Icing sugar | Neutral to slightly warm white |
| Vegetable shortening | Naturally bright white |
“Buttercream is naturally yellow due to beta-carotene in butter and sometimes vanilla extract; whitening techniques counteract this yellow tone.”
Knowing this gives you a clear map. Every whitening technique you will use targets one or more of these sources directly.
Essential tools and ingredients for white buttercream
With a clear understanding of the yellow tint, let’s move on to assembling what you’ll need.
The single biggest ingredient decision is your butter. Pale, high-fat unsalted butter is your best starting point. Look for butters that appear lighter in colour in the packet. Some bakers swear by specific supermarket own-brand butters that happen to be paler than premium alternatives. Counterintuitively, a cheaper, paler butter can actually give you a better white result than an expensive golden one.
Vanilla is your next key choice. Clear vanilla extract avoids the ivory tint that brown vanilla introduces. It does taste slightly different, with a cleaner, more synthetic vanilla note, but for purely white buttercream it is the right call. You can find European-style butter tips and ingredient guidance on our blog if you want to go deeper on sourcing.
For whitening additives, you have two main options: white gel food colouring and titanium dioxide powder. White gel is easy to use and widely available. Titanium dioxide is more powerful but has faced some regulatory discussion in certain markets, so check current guidelines before using it.
Key equipment you will need:
- Stand mixer or powerful hand mixer
- Large mixing bowl (light coloured so you can judge the buttercream shade accurately)
- Icing spatula for scraping down sides
- Toothpick for adding tiny amounts of purple gel
- Airtight container for resting the finished buttercream
| Butter type | Colour | Fat content | Best use |
|---|---|---|---|
| Standard unsalted | Yellow | 80% | Everyday baking |
| European-style | Deep yellow | 82-84% | Rich flavour, harder to whiten |
| Pale supermarket brand | Light cream | 80% | Best for white buttercream |
| Vegetable shortening | Bright white | 100% fat | Purest white, less flavour |
Pro Tip: Buy two or three different butter brands and hold them up to natural light before you start. The palest one in the packet will give you the lightest base to work from.
Step-by-step: How to make buttercream white
Now, with all your ingredients and tools at the ready, let’s walk through each step to transform your buttercream.
-
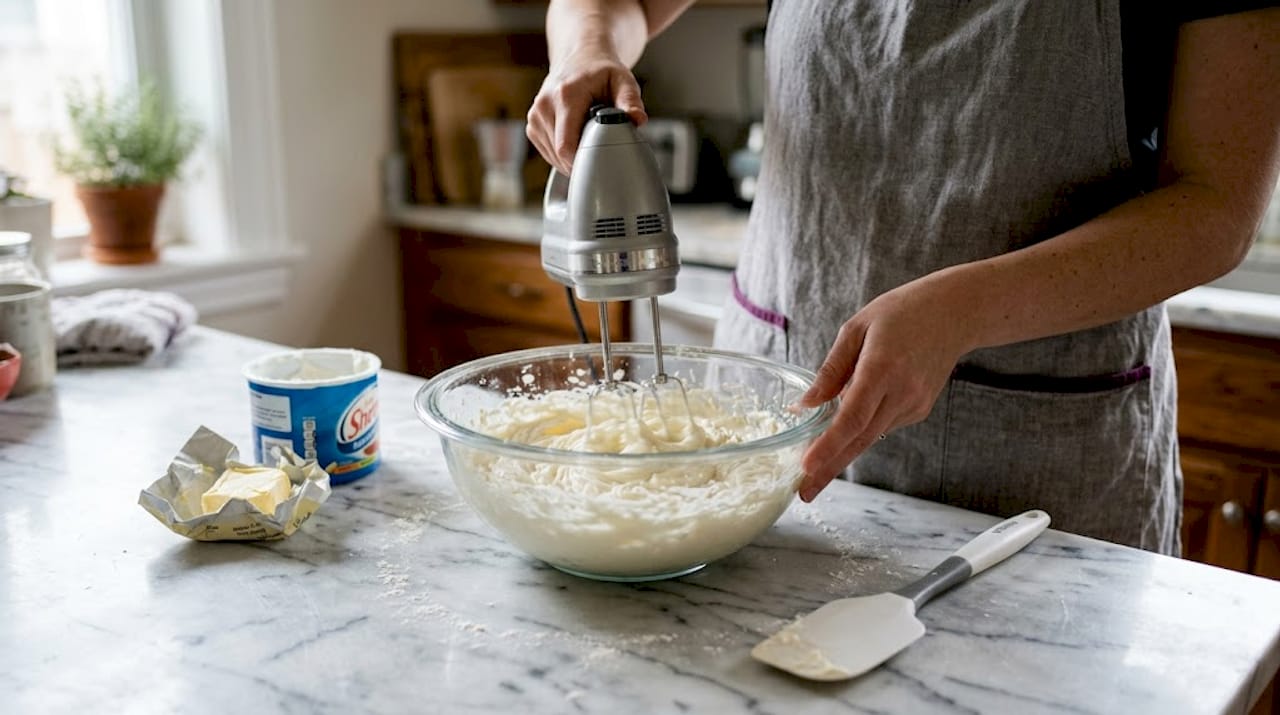
Whip the butter alone first. Before adding anything else, beat your butter on medium-high speed for 2 to 10 minutes. This incorporates air and genuinely lightens the colour. You will see it go from yellow to a much paler, almost ivory shade. Do not skip this step. It is the foundation of everything that follows.
-
Add icing sugar gradually. Sift your icing sugar and add it in stages, mixing on low to avoid clouds of sugar dust. Once all the sugar is in, increase the speed and beat for another two to three minutes.
-
Add clear vanilla extract. Measure carefully. A teaspoon is usually enough for a standard batch. Avoid the temptation to add extra for flavour at this stage.
-
Colour correct with purple gel. This is the clever bit. A tiny amount of violet gel neutralises the yellow using basic colour theory, the same principle used in purple shampoos for blonde hair. Dip a clean toothpick into the gel and swipe a tiny amount into the mix. Beat on high for one minute. Assess the colour. Repeat if needed, but be cautious.
-
Add white gel or titanium dioxide if needed. For extra brightness, a small amount of white gel colouring or titanium dioxide can push the result from off-white to genuinely bright white. Add a little at a time.
-
Rest the buttercream. Cover the bowl and leave it for one to two hours. The colour often develops and brightens further as it rests. For tips on fixing common buttercream issues that can crop up during this process, we have a dedicated guide.
Pro Tip: If you are short on time, spread the buttercream thinly on a plate and leave it for 20 minutes. The increased surface area speeds up the colour development noticeably.
Pro secrets for ultra-white buttercream: Advanced techniques and alternatives
For bakers who want perfect results for special occasions or challenging environments, here’s how the professionals do it.
The most reliable route to truly white buttercream is to replace some or all of the butter with vegetable shortening. Shortening is naturally white and produces a brilliantly pale result. The trade-off is flavour. Pure shortening buttercream tastes noticeably less rich and can leave a slightly waxy mouthfeel.
The professional sweet spot is a 50/50 blend. Half butter, half shortening. You get a much whiter result than all-butter while keeping enough of that buttery flavour to satisfy guests. This blend also performs better in warm conditions, which makes it popular for summer weddings and outdoor events.
Advanced techniques worth knowing:
- Use meringue powder in your buttercream for added stability and a slightly brighter finish
- Chill your mixing bowl before you start to keep the butter firm and prevent premature softening
- For large batches, mix in stages and combine at the end to ensure even colour throughout
- When making buttercream texture techniques a priority, avoid overbeating once the sugar is in
- Store finished buttercream away from direct light, which can cause subtle yellowing over time
Meringue-based buttercreams, such as Swiss or Italian meringue buttercream, present their own challenges. They are naturally paler than American-style buttercream but can still carry a yellow tint from the butter. The same purple gel trick applies. For help choosing your buttercream style before you start, our breakdown guide covers all the main types.
“The debate between pure butter and shortening comes down to priorities. Pure butter wins on taste every time, but shortening wins on colour and stability in the heat.”
For competition cakes or display pieces where taste is secondary to appearance, going full shortening is a legitimate and widely used professional choice.
Troubleshooting and avoiding common buttercream whitening mistakes
Even with the best technique, things can go wrong. Here’s how to get back on track and achieve reliable results.
The most common mistake is adding too much purple gel. It is very easy to overdo it. Too much purple turns the buttercream grey, which is arguably worse than yellow. If this happens, do not panic. Mix in a fresh batch of plain white buttercream and stir thoroughly until the grey tone dilutes back to white.
Yellowing after resting is another frequent frustration. Warm temperatures are usually the culprit. If your kitchen is warm, the butter in the buttercream softens and the yellow pigment becomes more visible again. Keep your finished buttercream in a cool spot or briefly refrigerate it before use.
Common problems and quick fixes:
- Grey tint: Added too much purple. Mix in extra plain buttercream to dilute
- Yellow after resting: Warm environment. Chill briefly and re-whip gently
- Grainy texture: Butter too cold or sugar not sifted. Gently warm the bowl and beat again
- Soft and droopy: Butter too warm. Refrigerate for 15 minutes then re-whip
- Air bubbles: Beat on low speed for 5 to 10 minutes at the end to smooth everything out
Re-whipping buttercream that has been refrigerated can also cause yellowing. The act of warming and re-beating reactivates the fat in the butter and can bring the yellow tone back. For help with fixing grainy or yellow buttercream after storage, or if you are dealing with common buttercream texture problems, we have dedicated guides for both.
Always let your buttercream rest covered for at least one to two hours before you judge the final colour. What looks slightly off-white straight from the mixer often brightens significantly once it has had time to settle.
Why chasing perfect white buttercream matters (and when to stop fussing)
Let’s step back and take a balanced view on what really matters in buttercream and baking.
Here is something we genuinely believe at The Vanilla Valley: the pursuit of perfect white buttercream is worth it, but only up to a point. For wedding cakes, competition entries, or any cake where the visual impact is the whole point, yes, every step in this guide matters. The difference between ivory and bright white is immediately visible in photographs and in person.
But for a birthday cake for a friend, or a batch of cupcakes for the school bake sale? A warm ivory buttercream that tastes incredible will always beat a technically perfect white one that sacrifices flavour. Butter tastes better than shortening. Brown vanilla tastes better than clear. Sometimes the “imperfect” version is actually the more enjoyable one.
The bakers who stress least and enjoy the process most are usually the ones who know the techniques thoroughly but apply them selectively. Master the method, then decide when it is genuinely needed. There are also times when choosing fondant over buttercream is simply the smarter call for achieving a flawless white finish without the fuss.
Perfectionism is a great servant but a terrible master in the kitchen. Know your goal, use the right technique for it, and enjoy the bake.
Get your white buttercream essentials at The Vanilla Valley
If you are ready to try these techniques with the best ingredients and kit, here’s where to get started.
We have been supplying bakers across the UK since 2009, and we know exactly what makes the difference between good buttercream and great buttercream. Whether you need white gel food colouring, clear vanilla extract, or the right tools for the job, you will find everything at The Vanilla Valley.

We also stock a brilliant range of food colours, spatulas, and specialist baking accessories that make achieving a professional finish at home genuinely achievable. If you want to go further with your colouring skills, our guide on colouring buttercream safely is a great next read. Pop in to our North Cardiff shop or order online with free delivery options available. We love helping bakers at every level get the results they are proud of.
Frequently asked questions
Why does my buttercream turn yellow after resting?
Warm temperatures cause yellowing by softening the butter and making the beta-carotene more visible; keep your buttercream cool and avoid re-whipping once it has set to maintain whiteness.
Can I use regular vanilla extract in white buttercream?
Regular vanilla extract introduces a creamy or beige tint to your mix; always use clear vanilla extract when a pure white result is your goal.
What should I do if I add too much purple colouring?
If too much purple turns the mix grey, simply fold in extra plain white buttercream and mix thoroughly until the grey tone dilutes back to a clean white.
Is shortening better than butter for white buttercream?
Shortening is naturally white and excellent for colour, but butter delivers far richer flavour; a 50/50 blend gives you a practical balance of both qualities.
Recommended
- How to colour buttercream without changing texture in 2026 - The Vanilla Valley
- How to Colour Buttercream Without Ruining the Texture Easily - The Vanilla Valley
- Buttercream troubleshooting: Fix split, grainy or runny icing fast - The Vanilla Valley
- 7 Easy Ways to Fix Common Buttercream Problems at Home - The Vanilla Valley