
Master cake stencilling: a step-by-step guide to flawless designs
TL;DR:
- Mastering cake stencilling relies on understanding icing consistency, proper stencil contact, and cake surface firmness. Proper preparation, the right tools, and confident technique ensure crisp, clean patterns, avoiding common issues like bleeding and smudging. Ultimately, developing foundational skills and personal style yields more impressive results than chasing fleeting decorating trends.
There is nothing quite as deflating as lifting a stencil from a beautifully frosted cake and finding a blurry, smeared mess where crisp, delicate pattern should be. It happens to beginners and experienced bakers alike, and the frustration is completely understandable. The good news? Most stencil disasters trace back to a handful of fixable variables, and once you understand them, the results can be genuinely amazing. In this guide, we cover everything you need: the right tools, the correct technique, common pitfalls, and how to finish and care for your stencilled masterpiece.
Table of Contents
- What you need to start stencilling cakes
- Step-by-step: how to use stencils for perfect cake decoration
- Troubleshooting and avoiding common stencil mistakes
- Finishing and caring for your stencilled cake
- Why mastering stencil basics beats chasing trends
- Explore more cake decorating essentials
- Frequently asked questions
Key Takeaways
| Point | Details |
|---|---|
| Preparation is crucial | The right tools and firm cake surface lay the foundation for successful stencilling. |
| Icing consistency matters | Thick, pliable icing is key to clean, sharp stencilled patterns. |
| Technique over trend | Careful application and stencil handling ensure great results more than any trendy gadget. |
| Troubleshoot mistakes quickly | Common stencil issues can often be fixed with simple adjustments and practice. |
What you need to start stencilling cakes
With an understanding of how much icing consistency shapes the final result, it is essential to begin with the right preparation. The first step is gathering everything you will need for successful stencilling before a single scrape of icing touches your cake.
Getting your kit together is not just about convenience. Having the wrong spatula, a too-soft cake, or the wrong type of icing ready to go is a recipe for frustration. Think of it like mise en place in a professional kitchen: everything in its place before you begin.
Here is a summary of your core tools and what each one does:
| Tool or material | Purpose |
|---|---|
| Cake stencil | Creates the decorative pattern on the cake surface |
| Offset palette knife | Spreads icing evenly and thinly across the stencil |
| Royal icing or buttercream | The decorating medium that forms the pattern |
| Cake turntable | Allows smooth rotation for side stencilling |
| Parchment paper | Protects workspace and allows practise runs |
| Practice boards | Let you test icing consistency and technique before working on the actual cake |
| Scraper or bench scraper | Ensures an even, thin layer of icing across the stencil |
Royal icing is frequently the medium of choice, and the reason is straightforward: royal icing consistency should be thick and pliable to avoid seeping under the stencil, yet spreadable enough to fill openings cleanly. That balance is everything.
Your cake surface also matters enormously. Whether you are working on fondant or a chilled, crusted buttercream, the surface must be firm. A soft or tacky surface will stick to the stencil when you lift it, dragging your beautiful pattern with it.
Bonus tools for more advanced stencil work:
- Food-safe spray adhesive or low-tack tape to hold the stencil flush against the cake
- An airbrush kit for gradient or multi-colour stencil effects (more on this below)
- Shimmer dusts and lustre sprays for adding a metallic finish over a stencilled pattern
- Multiple palette knives in different widths for varied application pressure
- Stencil bridge or handle clips to keep your hands steady during application
If you are new to cake decorating tools in general, it is worth exploring what cake decorating tools are available and how each one serves a specific purpose. And if you enjoy adding dimension to your designs, techniques like creating edible toppers can pair beautifully with stencilled patterns.
Preparing your cake surface:
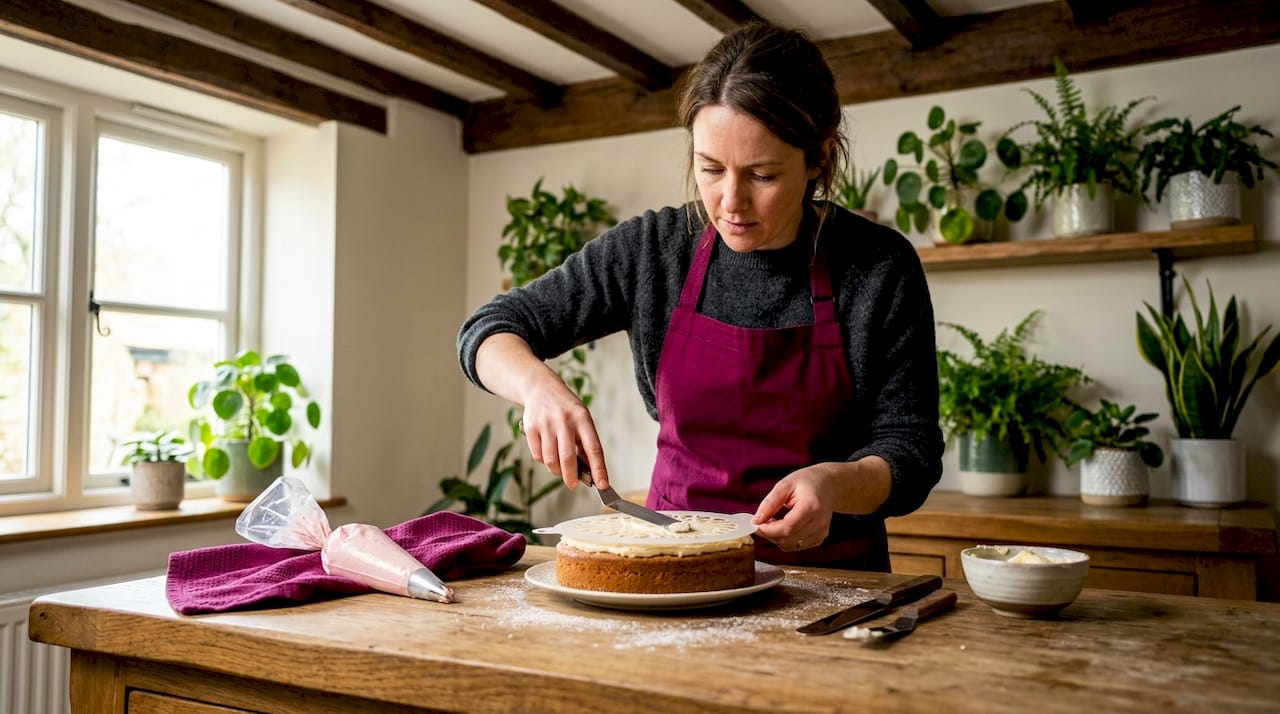
Your cake should be chilled until the surface is firm to the touch. For buttercream, this typically means at least 30 minutes in the fridge after your final coat. For fondant-covered cakes, allow the fondant to dry slightly so it is not sticky. A firm surface is the single most important starting condition for clean stencil work.
Step-by-step: how to use stencils for perfect cake decoration
Now that your essentials are ready and your cake is properly prepped, it is time to bring your stencilled vision to life, step by step. Following a clear process is what separates a polished result from a disappointing one.
Most stencil failures trace back to the same variables: frosting temperature and firmness, stencil contact (flush with no gaps), and icing medium viscosity plus how you scrape or spread it. Keep those three things right and the results will genuinely surprise you.
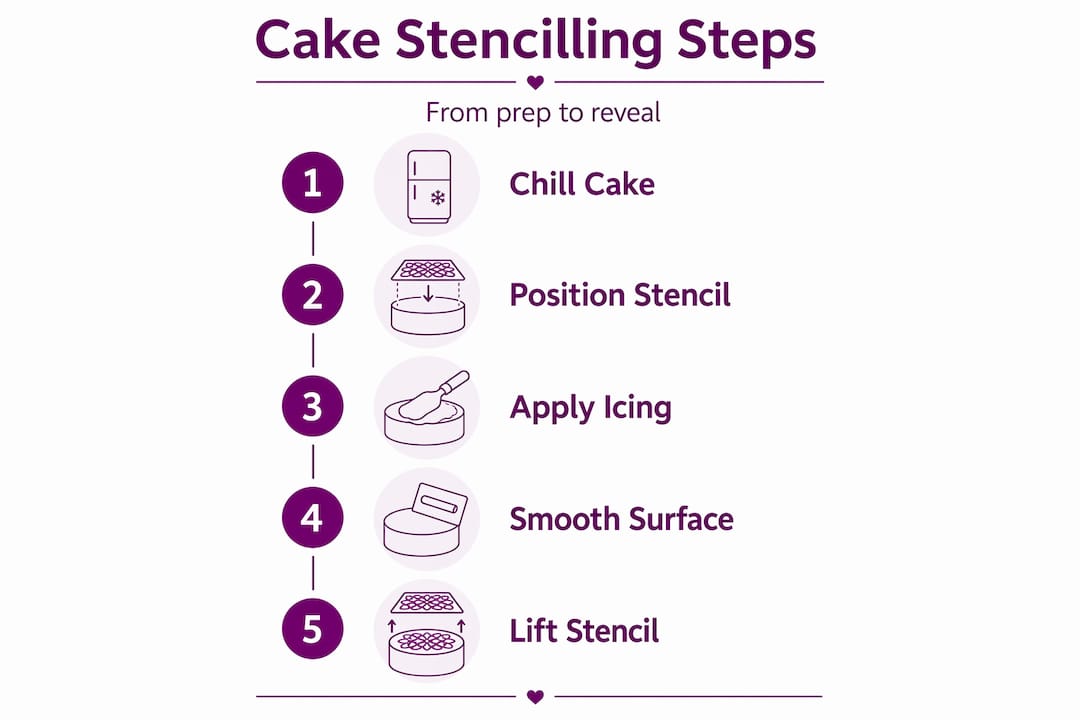
Step-by-step stencilling process:
- Chill your cake. Ensure the frosted surface is cold and firm before you begin. Remove it from the fridge just before you are ready to work.
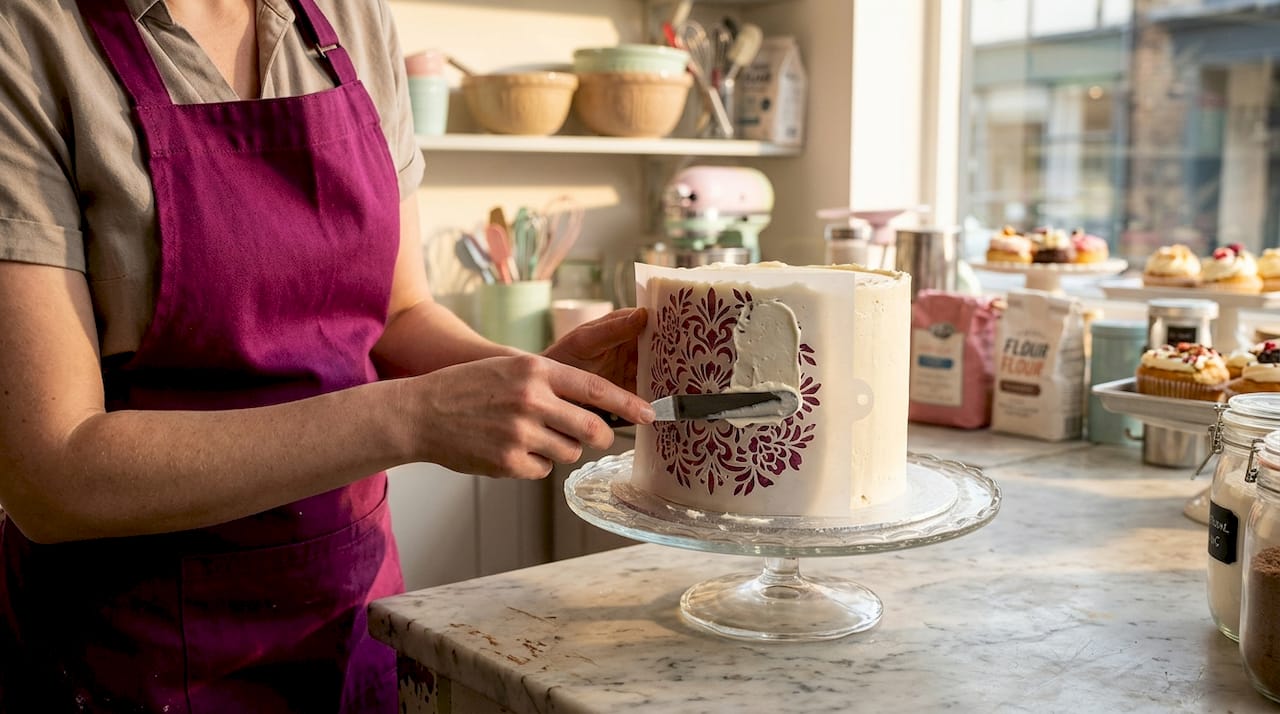
- Position your stencil. Hold the stencil flush against the cake surface, pressing gently to eliminate any gaps. For side stencilling, use a turntable and hold the stencil against the side with one hand.
- Apply the icing. Using an offset palette knife or bench scraper, apply a thin, even amount of icing across the stencil openings. Work in one smooth, confident motion rather than multiple passes, which can lift edges.
- Scrape off excess. Hold the palette knife at a low angle and firmly but gently scrape away the excess icing in a single clean stroke. Avoid pressing too hard, which can push icing under the edges.
- Lift the stencil cleanly. Peel the stencil away from the cake in one smooth, confident pull. Lift straight up rather than dragging sideways.
- Allow to set. Leave the pattern to firm up briefly before attempting to add further layers or moving the cake.
- Clean the stencil promptly. Rinse with warm water immediately after use to prevent icing from hardening in the detail.
Pro Tip: Press the very edges of the stencil firmly against the cake before you apply any icing. Even a tiny gap at the edge is enough to allow icing to creep under and create blurred outlines.
Here is a comparison of the three main stencilling mediums to help you choose the right one for your project:
| Medium | Benefits | Challenges | Best for |
|---|---|---|---|
| Royal icing | Crisp edges, dries firm, holds detail beautifully | Dries quickly, can crack if too thick | Flat top designs, fondant surfaces, intricate patterns |
| Buttercream | Soft, creamy finish; familiar to most bakers | Can smudge; needs to be very cold and firm | Casual designs; rustic or textured looks |
| Airbrush colour | Gradient effects; no spreading pressure | Requires specialist kit; colour can bleed | Bold colour washes; background effects |
If you want to explore how embossed cake techniques can complement stencilling, the two approaches work wonderfully together. You can also dig deeper into buttercream stencil methods or discover how to incorporate cake airbrush stencil use for even more creative possibilities.
Troubleshooting and avoiding common stencil mistakes
Even with careful technique, things may not always go to plan. Here is how to handle and prevent the most frequent stencil decoration troubles, so you can stay calm and carry on.
“Frosting firmness, stencil flush contact, and icing viscosity are the biggest factors in sharp edges.”
That quote captures it perfectly. When something goes wrong, it is almost always traceable to one of those three things. Understanding each problem and its cause is the fastest way to fix it.
Common stencil problems and their solutions:
- Bleeding edges. The icing is seeping under the stencil because either the cake is too warm, the icing is too thin, or the stencil is not held flush. Chill the cake further, thicken your icing, and press the stencil firmly before re-applying.
- Smeared pattern. This usually happens when the stencil shifts during application or when you use too many strokes of the palette knife. Work in a single confident pass and, if needed, use tape or a clip to hold the stencil in place.
- Pattern lifts with the stencil. If your icing pulls off with the stencil, it has likely bonded to a tacky surface. Make sure the cake surface is firm and dry before you apply the stencil.
- Gaps or missed areas. Inconsistent pressure or icing applied too sparingly can leave empty patches. Ensure you are spreading the icing right across all the stencil openings before scraping.
- Stencil tears or creases. Plastic stencils can warp if not stored flat. Warped stencils cannot sit flush against the cake. Store your stencils flat between uses and run a warm damp cloth over them to flatten minor warps.
Pro Tip: If a design goes wrong before the icing has fully set, you can carefully smooth over the area with a palette knife, chill it again, and re-apply the stencil once everything is firm. Do not panic and do not rush.
When buttercream is giving you grief more broadly, it is well worth checking out how to fix buttercream issues that go beyond stencilling. And for those bakers who prefer working without fondant, there are plenty of creative approaches covered in decorating without fondant that can work brilliantly alongside stencil techniques.
Most importantly, do not be disheartened by a blurry first attempt. Every baker who has mastered stencilling has a collection of imperfect cakes in their past. The key is to understand why it went wrong rather than simply trying again and hoping for better luck.
Finishing and caring for your stencilled cake
Once you have achieved a crisp design and overcome any missteps, it is time to finish strong and take care of your decorated masterpiece.
The finishing stage is often underestimated, but how you handle the cake after stencilling can make a real difference to the longevity and impact of the design.
Setting and stabilising your stencilled pattern:
- Allow the stencilled area to air dry for at least 15 to 20 minutes before touching it or adding further decorations around it.
- If you used royal icing, the pattern will harden on its own and become very stable. Avoid covering it with cling film until fully dry.
- If you used buttercream, return the cake to the fridge briefly after stencilling to firm everything back up.
- When adding borders, piping, or additional decorations around the stencilled area, work from the outside inward to avoid brushing against your fresh design.
Storage and serving tips:
- Store your finished cake away from humidity. Moisture is the enemy of crisp stencilled patterns, particularly those done in royal icing.
- Cover the cake loosely with a cake box rather than wrapping it tightly in cling film, which can smudge the pattern.
- Avoid placing a stencilled cake near steam or heat sources in the kitchen. Even a few minutes near a boiling kettle can soften detail.
- When transporting, ensure the cake is on a non-slip mat inside a sturdy box and that nothing presses against the decorated sides.
Creative variations to explore:
Once you have the basics down, the fun really begins. Stencilling opens up a whole world of creative possibilities, and experimenting is genuinely the best way to develop your own signature style.
Try layering two different stencils using contrasting colours for a striking, dimensional look. Paint over a stencilled royal icing pattern with food colouring mixed with clear alcohol for a hand-painted effect on top of the crisp lines. Add shimmer by brushing lustre or colour dusts lightly over a dried stencilled pattern; the raised icing catches the dust differently to the base surface, creating beautiful depth. You can also combine stencilling with modelling paste painting tips for more elaborate, textured cake surfaces.
The cake decorating community is endlessly creative, and places like this baking inspiration resource are great for sparking fresh ideas beyond the expected. Remember that royal icing consistency for decorative overlays follows the same principles as for initial stencilling: firm, smooth, and spreadable without being runny.
Why mastering stencil basics beats chasing trends
Here is something we feel strongly about at The Vanilla Valley. The internet moves fast, and new stencil designs, tools, and gadgets appear constantly. It can feel like you need the latest rotating stencil holder or the trendiest geometric pattern to keep up. We do not think that is true.
The bakers who consistently produce beautiful stencilled cakes are not necessarily the ones with the most expensive or fashionable kits. They are the ones who have taken the time to really understand icing consistency, to practise holding a stencil flush, and to develop confidence in their own application technique. Those fundamentals never go out of style.
Trends in cake decoration come and go quickly. Botanical designs gave way to celestial patterns, which gave way to bold abstract shapes. If you chase each wave, you spend more time buying new stencils than actually getting better at using them. Investing that same energy into mastering cake texture mastery means your skills transfer across every design you try.
There is also something genuinely exciting about developing your own style. When you understand the mechanics well enough to adapt them, you stop replicating trends and start creating something that feels like you. A stencil is just a tool. What you do with it, the colours you choose, the way you layer it, the finishes you add, that is where your individual creative voice lives.
Our honest advice? Pick two or three stencils you love. Practise them on a board until they feel easy. Then expand your collection. The buzz you will feel when a clean, crisp pattern lifts perfectly off a cake the first time you truly nail it is absolutely worth that investment in technique.
Explore more cake decorating essentials
If you are eager to take your stencilling further, there is so much more waiting for you. We have been helping bakers across the UK find the right tools and supplies since 2009, and we love seeing what people create.

Whether you are just starting out or looking to expand your decorating toolkit, our full range of cake decorating supplies has everything you need in one place. From stencils and palette knives to food colours, lustre dusts, and fondant, we stock quality products that make your creative ideas a genuine pleasure to bring to life. Browse our shop, treat yourself to something new, and let us know what you make. We are always here to help and genuinely love hearing from the baking community.
Frequently asked questions
What type of icing works best for stencilling cakes?
Royal icing is ideal because its thick yet pliable consistency remains stable and creates crisp, clean edges that do not bleed under the stencil.
How do you stop icing bleeding under the stencil?
Use a firm, cold cake surface and thick, toothpaste-like icing; always hold the stencil flush against the cake, as stencil failures most often trace back to poor stencil contact and icing that is too thin.
Can you use buttercream for cake stencils?
Yes, but it must be thick, smooth, and very cold; soft or grainy buttercream will smudge and seep under the stencil, producing blurred rather than crisp results.
Should cakes be chilled before applying stencils?
Yes, chilling is essential; frosting temperature and firmness are among the biggest factors in whether a stencilled design turns out sharp or smudged.
Recommended
- Master Textured and Embossed Cake Decorating Techniques - The Vanilla Valley
- Beginner Cake Decorating Tips for Stunning Results - The Vanilla Valley
- Make your cakes look more professional: step-by-step guide - The Vanilla Valley
- Master crumb coating for flawless cake finishes: A step-by-step guide - The Vanilla Valley